Sony BDP BX2 Operating Instructions - Page 40

Network Update, Setting list, Select Network Update using, and press ENTER., Select OK using - software

Page 40 highlights

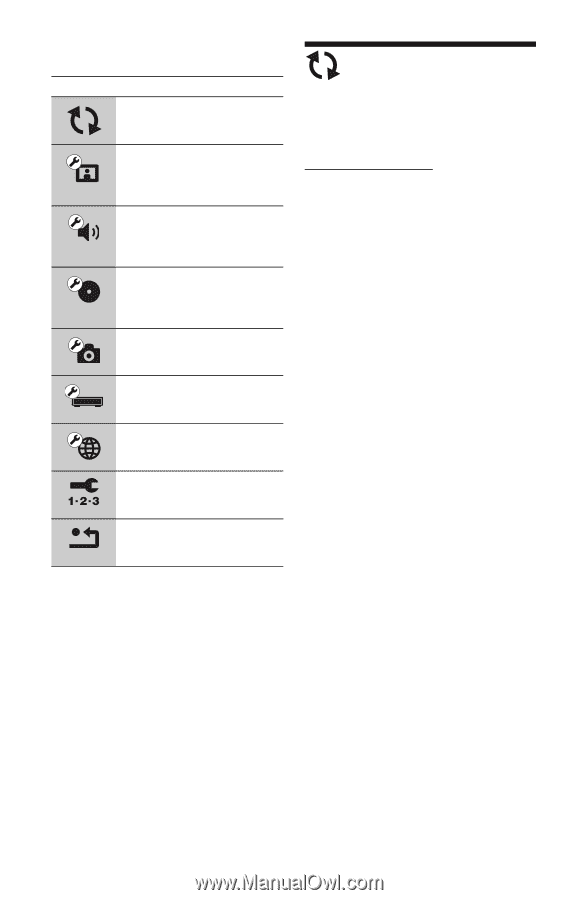
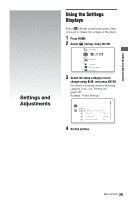
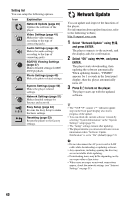
Setting list You can setup the following options. Icon Explanation Network Update (page 40) Updates the software of the player. Video Settings (page 41) Makes the video settings according to the type of connecting jacks. Audio Settings (page 44) Makes the audio settings according to the type of connecting jacks. BD/DVD Viewing Settings (page 47) Makes detailed settings for BD/ DVD playback. Photo Settings (page 49) Makes the photo-related settings. System Settings (page 50) Makes the player-related settings. Network Settings (page 51) Makes detailed settings for Internet and network. Easy Setup (page 53) Re-runs the Easy Setup to make the basic settings. Resetting (page 53) Resets the player to the factory settings. Network Update You can update and improve the functions of the player. For information about update functions, refer to the following website; http://esupport.sony.com 1 Select "Network Update" using M/m, and press ENTER. The player connects to the network, and the display asks for confirmation. 2 Select "OK" using

  • 1
  • 2
  • 3
  • 4
  • 5
  • 6
  • 7
  • 8
  • 9
  • 10
  • 11
  • 12
  • 13
  • 14
  • 15
  • 16
  • 17
  • 18
  • 19
  • 20
  • 21
  • 22
  • 23
  • 24
  • 25
  • 26
  • 27
  • 28
  • 29
  • 30
  • 31
  • 32
  • 33
  • 34
  • 35
  • 36
  • 37
  • 38
  • 39
  • 40
  • 41
  • 42
  • 43
  • 44
  • 45
  • 46
  • 47
  • 48
  • 49
  • 50
  • 51
  • 52
  • 53
  • 54
  • 55
  • 56
  • 57
  • 58
  • 59
  • 60
  • 61
  • 62
  • 63
  • 64
  • 65
  • 66
  • 67
  • 68
  • 69
  • 70
  • 71
  • 72
  • 73
  • 74
  • 75
  • 76
  • 77
  • 78
  • 79

40
Setting list
You can setup the following options.
Network Update
You can update and improve the functions of
the player.
For information about update functions, refer
to the following website;
1
Select “Network Update” using
M
/
m
,
and press ENTER.
The player connects to the network, and
the display asks for confirmation.
2
Select “OK” using
<
/
,
, and press
ENTER.
The player starts downloading, then
updating the software automatically.
When updating finishes, “FINISH”
appears for 5 seconds in the front panel
display, then the player automatically
turns off.
3
Press
[
/
1
to turn on the player.
The player starts up with the updated
software.
z
The “VUP */9” counter (“*” indicates update
step) in the front panel display also shows
progress of the update.
You can check the current software version by
selecting “System Information” in the “System
Settings” setup (page 51).
The “Setup” settings remain after updating.
The player informs you of newer software version
information when “Software Update
Notification” is set to “On” (default) (page 51).
b
Do not disconnect the AC power cord or LAN
cable while downloading or updating software.
Any operations, including opening the disc tray,
are not available while updating.
Downloading times may differ depending on the
server provider or line status.
When error messages on network connections
appear, check the network settings (see “Internet
Settings” on page 51).
Icon
Explanation
Network Update (page 40)
Updates the software of the
player.
Video Settings (page 41)
Makes the video settings
according to the type of
connecting jacks.
Audio Settings (page 44)
Makes the audio settings
according to the type of
connecting jacks.
BD/DVD Viewing Settings
(page 47)
Makes detailed settings for BD/
DVD playback.
Photo Settings (page 49)
Makes the photo-related settings.
System Settings (page 50)
Makes the player-related
settings.
Network Settings (page 51)
Makes detailed settings for
Internet and network.
Easy Setup (page 53)
Re-runs the Easy Setup to make
the basic settings.
Resetting (page 53)
Resets the player to the factory
settings.