Sony CW125 User Manual - Page 47
Disposal of the used lamp, For the customers in the USA
 |
UPC - 027242709096
View all Sony CW125 manuals
Add to My Manuals
Save this manual to your list of manuals |
Page 47 highlights
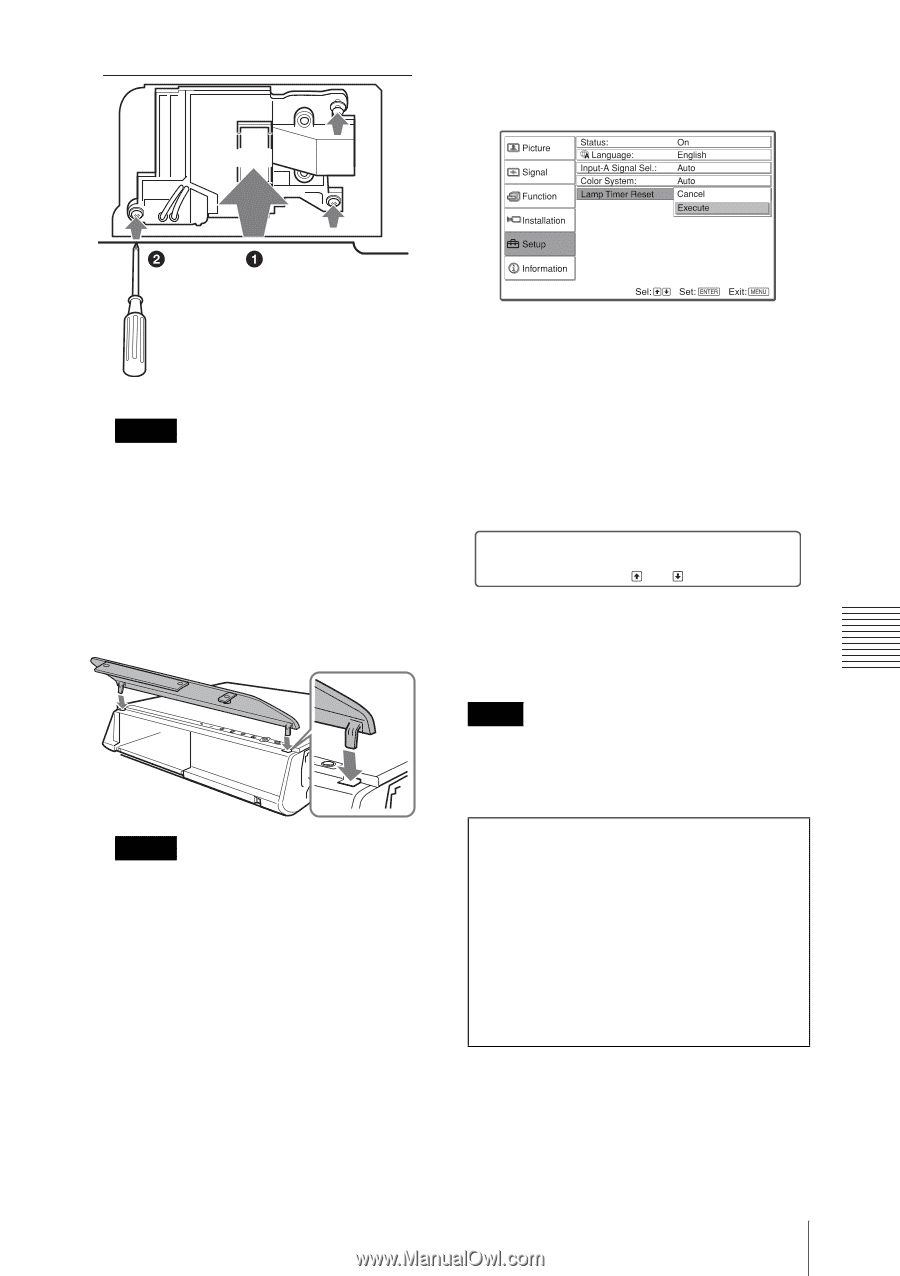
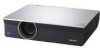
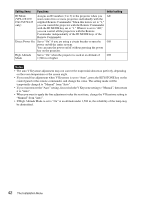
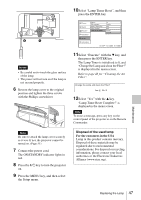
10Select "Lamp Timer Reset", and then press the ENTER key. Maintenance Notes • Be careful not to touch the glass surface of the lamp. • The power will not turn on if the lamp is not secured properly. 6 Restore the lamp cover to the original position and tighten the three screws with the Phillips screwdriver. 11Select "Execute" with the V key, and then press the ENTER key. The Lamp Timer is initialized to 0, and "Change the Lamp and clean the Filter?" is displayed in the menu screen. Refer to page 48 for "Cleaning the Air Filter". Change the Lamp and clean the Filter? Yes: No: 12Select "Yes" with the v key. "Lamp Timer Reset Complete!" is displayed in the menu screen. Note To erase a message, press any key on the control panel of the projector or on the Remote Commander. Note Be sure to attach the lamp cover securely as it was. If not, the projector cannot be turned on. (Page 51) 7 Connect the power cord. The ON/STANDBY indicator lights in red. 8 Press the ?/1 key to turn the projector on. 9 Press the MENU key, and then select the Setup menu. Disposal of the used lamp For the customers in the USA Lamp in this product contains mercury. Disposal of these materials may be regulated due to environmental considerations. For disposal or recycling information, please contact your local authorities or the Electronic Industries Alliance (www.eiae.org). Replacing the Lamp 47
-
 1
1 -
2
-
3
-
4
-
5
-
6
-
7
-
8
-
9
-
10
-
11
-
12
-
13
-
14
-
15
-
16
-
17
-
18
-
19
-
20
-
21
-
22
-
23
-
24
-
25
-
26
-
27
-
28
-
29
-
30
-
31
-
32
-
33
-
34
-
35
-
36
-
37
-
38
-
39
-
40
-
41
-
 42
42 -
 43
43 -
 44
44 -
 45
45 -
 46
46 -
 47
47 -
 48
48 -
 49
49 -
 50
50 -
 51
51 -
 52
52 -
53
-
54
-
55
-
56
-
57
-
58
-
59
-
60
-
61
-
62
-
63
-
64
-
65
-
66
-
67
-
68
-
69
-
70
 |
 |