Sony DAV-DZ290K User Manual - Page 57
Set the [TEST TONE] to [ON]., Repeat Steps 1 to 3.
 |
View all Sony DAV-DZ290K manuals
Add to My Manuals
Save this manual to your list of manuals |
Page 57 highlights
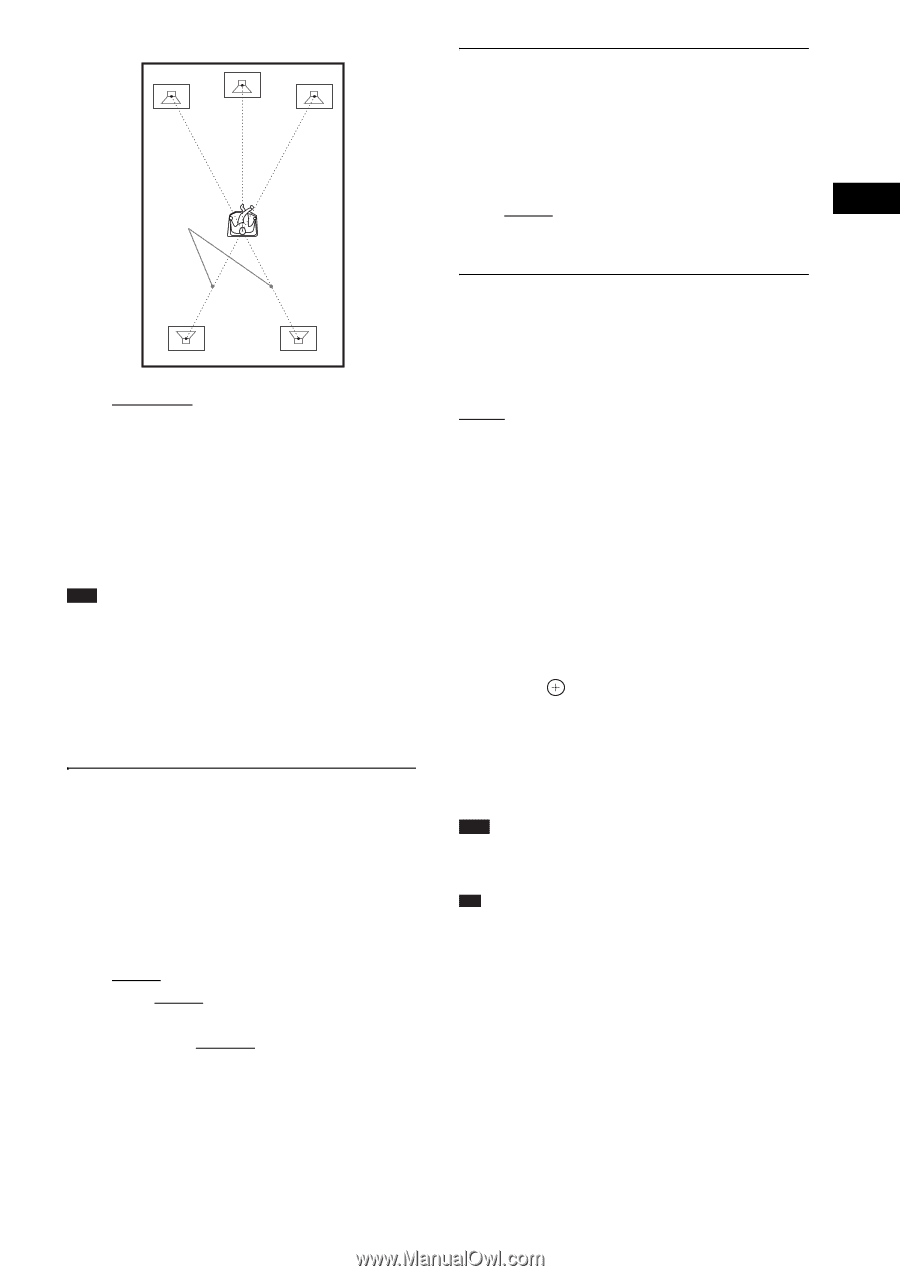
Disc B [L/R] 3.0 m/10 ft2)3): Set the surround speaker distance (up to 5.0 meters (16 ft) closer to the front speakers). 1)0.0 to 6.9 meters for North American models. 2)When you perform the Quick Setup (page 25), the default settings are changed. 3)This item appears when you set [SURROUND] to [YES] in the [CONNECTION] setting. Note • If all front and surround speakers are not placed at an equal distance from your listening position, set the distance according to the closest speaker. • Do not place the surround speakers farther away from your listening position than the front speakers. • Depending on the input stream, the [DISTANCE] setting may not be effective. x [LEVEL (FRONT)] You can adjust the sound level of the front speakers, center speaker, and subwoofer. You can set the parameters from -6.0 dB to 0 dB for [L/R], and from -6.0 dB to +6.0 dB for [CENTER] and [SUBWOOFER]. Be sure to set [TEST TONE] to [ON] for easy adjustment. [L/R] 0.0 dB: Set the front speaker level. [CENTER] 0.0 dB*: Set the center speaker level. [SUBWOOFER] +2.0 dB: Set the subwoofer level. * This item appears when you set [CENTER] to [YES] in the [CONNECTION] setting. x [LEVEL (SURROUND)] You can adjust the sound level of the surround speakers. You can set the parameter from -6.0 dB to +6.0 dB. Be sure to set [TEST TONE] to [ON] for easy adjustment. [L/R] 0.0 dB*: Set the surround speaker level. * This item appears when you set [SURROUND] to [YES] in the [CONNECTION] setting. x [TEST TONE] The speakers will emit a test tone to adjust [LEVEL (FRONT)] and [LEVEL (SURROUND)]. [OFF]: The test tone is not emitted from the speakers. [ON]: The test tone is emitted from each speaker in sequence while adjusting the level. When you select one of the [SPEAKER SETUP] items, the test tone is emitted from each speaker in sequence. Adjust the sound level as follows. 1 Set the [TEST TONE] to [ON]. 2 Press C/X/x/c repeatedly to select the desired speaker and the level. 3 Press . 4 Repeat Steps 1 to 3. 5 Press C/X/x/c repeatedly to set [TEST TONE] to [OFF] after adjusting the speaker level. Note • You cannot perform [TEST TONE] during karaoke mode. Tip • To adjust the volume of all the speakers at one time, turn the VOLUME control on the unit, or press VOLUME +/- on the remote. • To return to the default setting when changing a setting, select the item, then press CLEAR. Note that only the [CONNECTION] setting does not return to the default setting. 57GB
-
 1
1 -
2
-
3
-
4
-
5
-
6
-
7
-
8
-
9
-
10
-
11
-
12
-
13
-
14
-
15
-
16
-
17
-
18
-
19
-
20
-
21
-
22
-
23
-
24
-
25
-
26
-
27
-
28
-
29
-
30
-
31
-
32
-
33
-
34
-
35
-
36
-
37
-
38
-
39
-
40
-
41
-
42
-
43
-
44
-
45
-
46
-
47
-
48
-
49
-
50
-
51
-
 52
52 -
 53
53 -
 54
54 -
 55
55 -
 56
56 -
 57
57 -
 58
58 -
 59
59 -
 60
60 -
 61
61 -
 62
62 -
63
-
64
-
65
-
66
-
67
-
68
-
69
-
70
-
71
-
72
-
73
-
74
-
75
-
76
-
77
-
78
-
79
-
80
-
81
-
82
-
83
-
84
-
85
-
86
-
87
-
88
-
89
-
90
-
91
-
92
-
93
-
94
-
95
-
96
-
97
-
98
-
99
-
100
-
101
-
102
-
103
-
104
-
105
-
106
-
107
-
108
-
109
-
110
-
111
-
112
-
113
-
114
-
115
-
116
-
117
-
118
-
119
-
120
 |
 |