Sony DCR-HC46 Operating Guide - Page 63
INT.REC-STL Interval photo, recording, DEMO MODE, PictBridge PRINT, USB SELECT, Using the Menu - usb streaming
 |
UPC - 027242688742
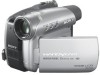
View all Sony DCR-HC46 manuals
Add to My Manuals
Save this manual to your list of manuals |
Page 63 highlights
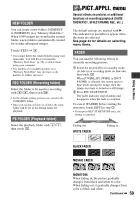
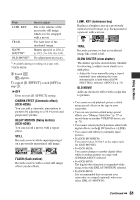
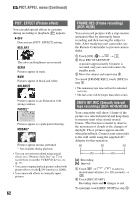
To resume, touch [REC START]. To cancel, touch [REC STOP], then [END] in step 2. • During Smooth interval recording, your camcorder may perform the END SEARCH function to locate the end in current recordings on the tape after several frames have been recorded. • Do not turn off the power or disconnect the power source while a message is displayed on the screen. • The camcorder will shoot several frames for the first and last shots of the Smooth interval recording. • Smooth interval recording is released when approximately 12 hours have elapsed after shooting has begun. • Sounds are not recorded. • The last few frames may not be recorded if the battery or tape has run out. • There may be discrepancies in the interval. • If you adjust the focus manually, you can record clear pictures even if the light changes ([FOCUS], p. 51). • You can silence the recording beep by setting of [BEEP] (p. 68). INT.REC-STL (Interval photo recording) You can record still images on the "Memory Stick Duo" at a selected interval. This function is useful to observe the movement of clouds or the changes in daylight, etc. [a]: Recording [b]: Interval 1 Touch t a desired interval time (1, 5 or 10 minutes) t t [ON] ( ) t t . 2 Press PHOTO fully. stops flashing and the interval still image recording starts. To cancel [INT.REC-STL], select [OFF] in step 1. DEMO MODE The default setting is [ON], allowing you to view the demonstration in about 10 minutes, after you have removed both a cassette and a "Memory Stick Duo" from your camcorder, and slide the POWER switch repeatedly to turn on the CAMERATAPE lamp. • The demonstration will be suspended in situations such as those described below. - When you touch the screen during the demonstration. (The demonstration starts again after about 10 minutes.) - When a cassette or a "Memory Stick Duo" is inserted. - When the POWER switch is set to other than CAMERA-TAPE. PictBridge PRINT See page 82. USB SELECT You can connect the camcorder to a personal computer with a USB cable and view pictures on the computer. You can also connect the camcorder to a PictBridgecompatible printer (p. 82) using this function. Refer to "First Step Guide" on the supplied CD-ROM for details. Memory Stick Select this to view pictures on a "Memory Stick Duo" on the computer or to import them to the computer. PictBridge PRINT Select this when you connect the camcorder to a PictBridge-compatible printer to print out directly (p. 82). STREAM Select this to view movies on a tape on the computer or to import them to the computer. Continued , 63 Using the Menu
-
 1
1 -
2
-
3
-
4
-
5
-
6
-
7
-
8
-
9
-
10
-
11
-
12
-
13
-
14
-
15
-
16
-
17
-
18
-
19
-
20
-
21
-
22
-
23
-
24
-
25
-
26
-
27
-
28
-
29
-
30
-
31
-
32
-
33
-
34
-
35
-
36
-
37
-
38
-
39
-
40
-
41
-
42
-
43
-
44
-
45
-
46
-
47
-
48
-
49
-
50
-
51
-
52
-
53
-
54
-
55
-
56
-
57
-
 58
58 -
 59
59 -
 60
60 -
 61
61 -
 62
62 -
 63
63 -
 64
64 -
 65
65 -
 66
66 -
 67
67 -
 68
68 -
69
-
70
-
71
-
72
-
73
-
74
-
75
-
76
-
77
-
78
-
79
-
80
-
81
-
82
-
83
-
84
-
85
-
86
-
87
-
88
-
89
-
90
-
91
-
92
-
93
-
94
-
95
-
96
-
97
-
98
-
99
-
100
-
101
-
102
-
103
-
104
-
105
-
106
-
107
-
108
-
109
-
110
-
111
-
112
-
113
-
114
-
115
-
116
-
117
-
118
-
119
-
120
-
121
-
122
-
123
-
124
-
125
-
126
-
127
-
128
-
129
-
130
-
131
-
132
-
133
-
134
-
135
-
136
-
137
-
138
-
139
-
140
 |
 |
