Sony DPP-FP55 Operating Instructions - Page 50
Checking the installation, Uninstalling the printer driver - driver windows 7
 |
View all Sony DPP-FP55 manuals
Add to My Manuals
Save this manual to your list of manuals |
Page 50 highlights
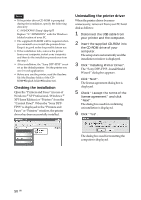
Notes • If the printer driver CD-ROM is prompted during the installation, specify the following directory: C:\WINDOWS\Temp\dpp-fp55 Replace "C:\WINDOWS" with the Windows folder location of your PC. • The supplied CD-ROM will be required when you uninstall or re-install the printer driver. Keep it in good order for possible future use. • If the installation fails, remove the printer from your computer, restart your computer, and then do the installation procedures from the step 3. • After installation, the "Sony DPP-FP55" is not set as the default printer. Set the printer you use for each application. • Before you use the printer, read the Readme file (the Readme folder of the CDROMcEnglish foldercReadme.txt). Checking the installation Open the "Printers and Faxes" (in case of Windows ® XP Professional/Windows ® XP Home Edition) or "Printers" from the "Control Panel". When the "Sony DPPFP55" is displayed in the "Printers and Faxes" or "Printers" window, the printer driver has been successfully installed. Uninstalling the printer driver When the printer driver becomes unnecessary, remove it from your PC hard disk as follows: 1 Disconnect the USB cable from your printer and the computer. 2 Insert the supplied CD-ROM into the CD-ROM drive of your computer. The setup starts automatically and the installation window is displayed. 3 Click "Installing Printer Driver". The "Sony DPP-FP55 - InstallShield Wizard" dialog box appears. 4 Click "Next". The license agreement dialog box is displayed. 5 Check "I accept the terms of the license agreement" and click "Next". The dialog box used for confirming uninstallation is displayed. 6 Click "Yes". The dialog box used for restarting the computer is displayed. 50 GB
-
 1
1 -
2
-
3
-
4
-
5
-
6
-
7
-
8
-
9
-
10
-
11
-
12
-
13
-
14
-
15
-
16
-
17
-
18
-
19
-
20
-
21
-
22
-
23
-
24
-
25
-
26
-
27
-
28
-
29
-
30
-
31
-
32
-
33
-
34
-
35
-
36
-
37
-
38
-
39
-
40
-
41
-
42
-
43
-
44
-
 45
45 -
 46
46 -
 47
47 -
 48
48 -
 49
49 -
 50
50 -
 51
51 -
 52
52 -
 53
53 -
 54
54 -
 55
55 -
56
-
57
-
58
-
59
-
60
-
61
-
62
-
63
-
64
-
65
-
66
-
67
-
68
-
69
-
70
-
71
-
72
-
73
-
74
-
75
-
76
-
77
-
78
-
79
-
80
-
81
-
82
-
83
-
84
-
85
-
86
-
87
-
88
-
89
-
90
-
91
-
92
 |
 |
