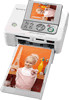
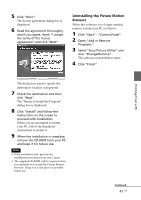
Sony DPP-FP90 Instruction Manual - Page 41
When the software is installed, When Sony DPP-FP60/70/90 - windows 7 driver
 |
View all Sony DPP-FP90 manuals
Add to My Manuals
Save this manual to your list of manuals |
Page 41 highlights
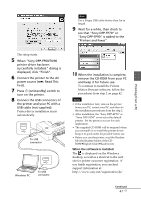
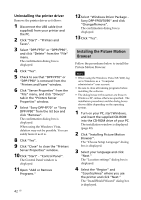
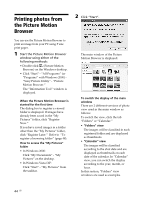
Note Use a B-type USB cable shorter than 3m in length. 9 Wait for a while, then check to see that "Sony DPP-FP70" or "Sony DPP-FP90" is added to the "Printers and Faxes". Printing from a PC The setup starts. 5 When "Sony DPP-FP60/70/90 printer driver has been successfully installed." dialog is displayed, click "Finish". 6 Connect the printer to the AC power source (. Read This First). 7 Press 1 (on/standby) switch to turn on the printer. 8 Connect the USB connectors of the printer and your PC with a USB cable (not supplied). Printer driver installation starts automatically. To USB connector Windows PC To USB connector 10 When the installation is complete, remove the CD-ROM from your PC and keep it for future use. To continue to install the Picture Motion Browser software, follow the procedures from step 2 on page 42. Notes • If the installation fails, remove the printer from your PC, restart your PC, and then do the installation procedures from the step 2. • After installation, the "Sony DPP-FP70" or "Sony DPP-FP90" is not set as the default printer. Set the printer you use for each application. • The supplied CD-ROM will be required when you uninstall or re-install the printer driver. Keep it in good order for possible future use. • Before you use the printer, read the Readme file (the Readme folder of the CDROMcEnglish foldercReadme.txt). When the software is installed The is displayed on the Windows desktop, as well as a shortcut to the web site for printer customer registration. If you finish registration, you can find support information at: http://www.sony.net/registration/di/ Continued 41 GB
-
 1
1 -
2
-
3
-
4
-
5
-
6
-
7
-
8
-
9
-
10
-
11
-
12
-
13
-
14
-
15
-
16
-
17
-
18
-
19
-
20
-
21
-
22
-
23
-
24
-
25
-
26
-
27
-
28
-
29
-
30
-
31
-
32
-
33
-
34
-
35
-
 36
36 -
 37
37 -
 38
38 -
 39
39 -
 40
40 -
 41
41 -
 42
42 -
 43
43 -
 44
44 -
 45
45 -
 46
46 -
47
-
48
-
49
-
50
-
51
-
52
-
53
-
54
-
55
-
56
-
57
-
58
-
59
-
60
-
61
-
62
-
63
-
64
-
65
-
66
-
67
-
68
-
69
-
70
-
71
-
72
-
73
-
74
-
75
-
76
-
77
-
78
-
79
-
80
-
81
-
82
-
83
-
84
 |
 |
