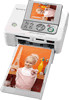
Sony DPP-FP90 Instruction Manual - Page 42
Installing the Picture Motion Browser, Uninstalling the printer driver - driver xp
 |
View all Sony DPP-FP90 manuals
Add to My Manuals
Save this manual to your list of manuals |
Page 42 highlights
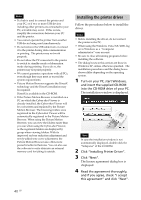
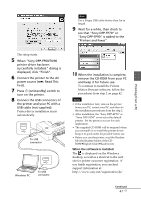
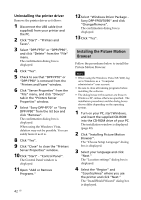
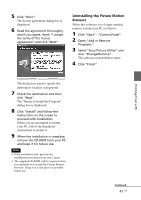
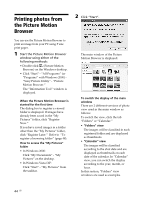
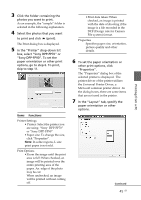
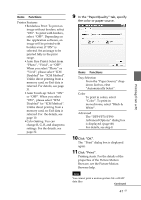
Uninstalling the printer driver Remove the printer driver as follows: 1 Disconnect the USB cable (not supplied) from your printer and the PC. 2 Click "Start" - "Printers and Faxes". 3 Select "DPP-FP70" or "DPP-FP90", and click "Delete" from the "File" menu. The confirmation dialog box is displayed. 4 Click "Yes". 5 Check to see that "DPP-FP70" or "DPP-FP90" is removed from the "Printers and Faxes" window. 6 Click "Server Properties" from the "File" menu, and click "Drivers" tab in the "Printers Server Properties" window. 7 Select "Sony DPP-FP70" or "Sony DPP-FP90" from the list box and click "Remove". The confirmation dialog box is displayed. When using the Windows Vista, deletion may not be possible. You can safely leave it as it is. 8 Click "Yes". 9 Click "Close" to close the "Printers Server Properties" window. 10 Click "Start" - "Control Panel". The Control Panel window is displayed. 11 Open "Add or Remove Programs." 42 GB 12 Select "Windows Driver Package - Sony DPP-FP60/70/90" and click "Change/Remove". The confirmation dialog box is displayed. 13 Click "Yes". Installing the Picture Motion Browser Follow the procedures below to install the Picture Motion Browser. Notes • When using the Windows Vista/XP/2000, log on to Windows as a "Computer administrator" user account. • Be sure to close all running programs before installing the software. • The dialog boxes in this section are those in Windows XP, unless otherwise specified. The installation procedures and the dialog boxes shown differ depending on the operating system. 1 Turn on your PC, start Windows, and insert the supplied CD-ROM into the CD-ROM drive of your PC. The installation window is displayed (page 40). 2 Click "Installing Picture Motion Browser". The "Choose Setup Language" dialog box is displayed. 3 Select your language and click "Next." The "Location settings" dialog box is displayed. 4 Select the "Region" and "Country/Area" where you use the printer and click "Next." The "InstallShield Wizard" dialog box is displayed.
-
 1
1 -
2
-
3
-
4
-
5
-
6
-
7
-
8
-
9
-
10
-
11
-
12
-
13
-
14
-
15
-
16
-
17
-
18
-
19
-
20
-
21
-
22
-
23
-
24
-
25
-
26
-
27
-
28
-
29
-
30
-
31
-
32
-
33
-
34
-
35
-
36
-
 37
37 -
 38
38 -
 39
39 -
 40
40 -
 41
41 -
 42
42 -
 43
43 -
 44
44 -
 45
45 -
 46
46 -
 47
47 -
48
-
49
-
50
-
51
-
52
-
53
-
54
-
55
-
56
-
57
-
58
-
59
-
60
-
61
-
62
-
63
-
64
-
65
-
66
-
67
-
68
-
69
-
70
-
71
-
72
-
73
-
74
-
75
-
76
-
77
-
78
-
79
-
80
-
81
-
82
-
83
-
84
 |
 |
