Sony DSC-G3 Instruction Manual - Page 18
Setting the wireless network
 |
UPC - 027242744363
View all Sony DSC-G3 manuals
Add to My Manuals
Save this manual to your list of manuals |
Page 18 highlights
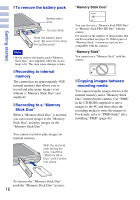
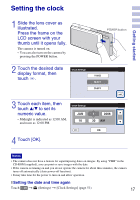
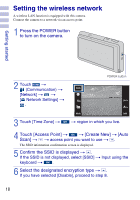
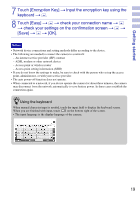
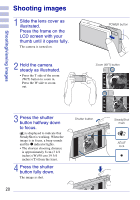
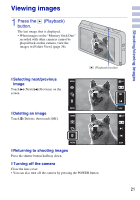
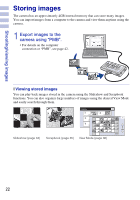
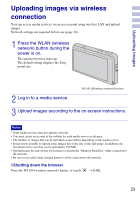
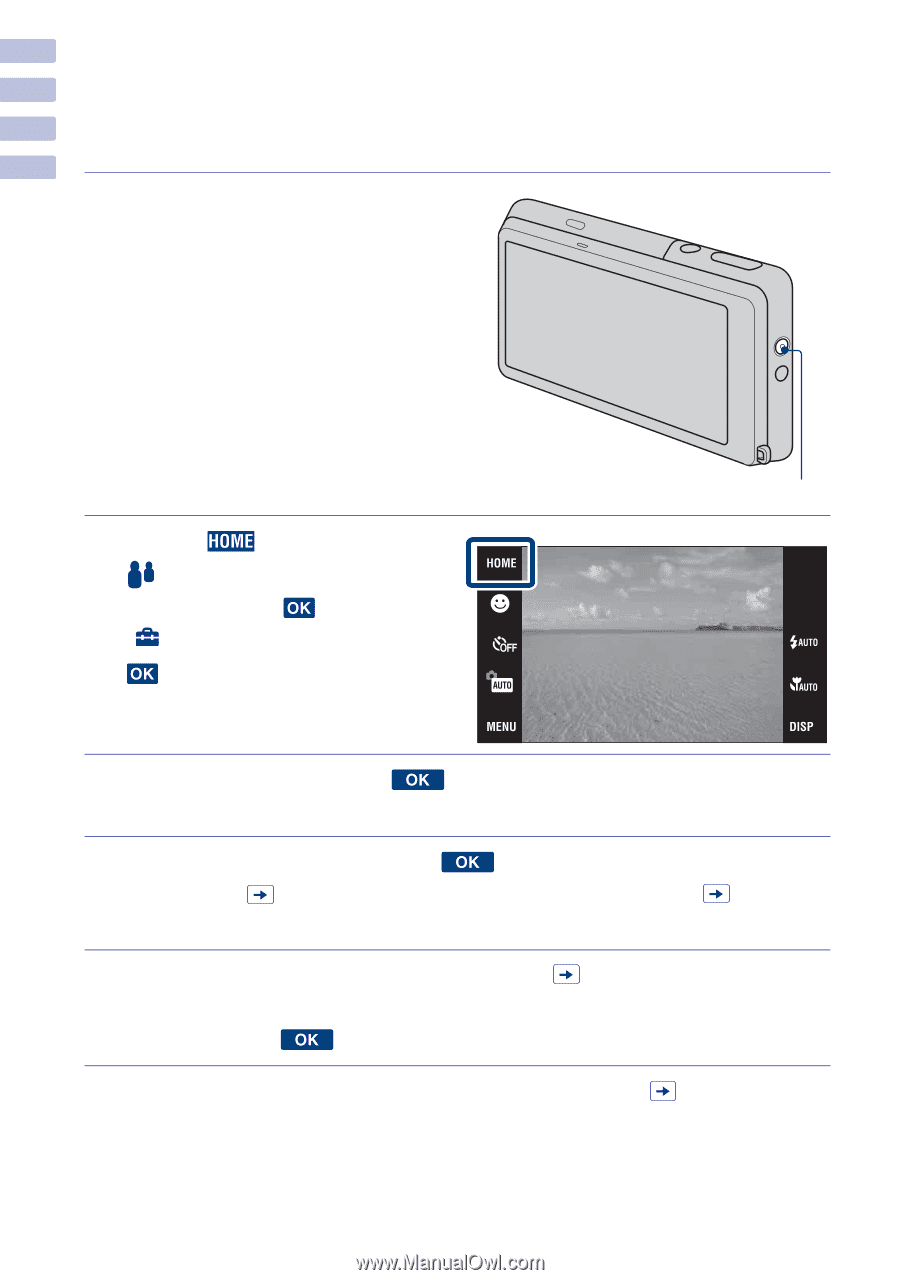
Setting the wireless network A wireless LAN function is equipped with this camera. Connect the camera to a network via an access point. 1 Press the POWER button to turn on the camera. Getting started 2 Touch t (Communication) t [Network] t t [ Network Settings] t . POWER button 3 Touch [Time Zone] t t region in which you live. 4 Touch [Access Point] t t [Create New] t [Auto Scan] t t access point you want to use t . The SSID information confirmation screen is displayed. 5 Confirm the SSID is displayed t . If the SSID is not displayed, select [SSID] t Input using the keyboard t . 6 Select the designated encryption type t . If you have selected [Disable], proceed to step 8. 18
-
 1
1 -
2
-
3
-
4
-
5
-
6
-
7
-
8
-
9
-
10
-
11
-
12
-
 13
13 -
 14
14 -
 15
15 -
 16
16 -
 17
17 -
 18
18 -
 19
19 -
 20
20 -
 21
21 -
 22
22 -
 23
23 -
24
-
25
-
26
-
27
-
28
-
29
-
30
-
31
-
32
-
33
-
34
-
35
-
36
-
37
-
38
-
39
-
40
-
41
-
42
-
43
-
44
-
45
-
46
-
47
-
48
-
49
-
50
-
51
-
52
-
53
-
54
-
55
-
56
-
57
-
58
-
59
-
60
-
61
-
62
-
63
-
64
 |
 |
18
Getting started
Setting the wireless network
A wireless LAN function is equipped with this camera.
Connect the camera to a network via an access point.
1
Press the POWER button
to turn on the camera.
2
Touch
t
(Communication)
t
[Network]
t
t
[
Network Settings]
t
.
3
Touch [Time Zone]
t
t
region in which you live.
4
Touch [Access Point]
t
t
[Create New]
t
[Auto
Scan]
t
t
access point you want to use
t
.
The SSID information confirmation screen is displayed.
5
Confirm the SSID is displayed
t
.
If the SSID is not displayed, select [SSID]
t
Input using the
keyboard
t
.
6
Select the designated encryption type
t
.
If you have selected [Disable], proceed to step 8.
POWER button