Sony DSLR A230L Instruction Manual - Page 101
Protecting images (Protect), the control button.
 |
UPC - 027242748699
View all Sony DSLR A230L manuals
Add to My Manuals
Save this manual to your list of manuals |
Page 101 highlights
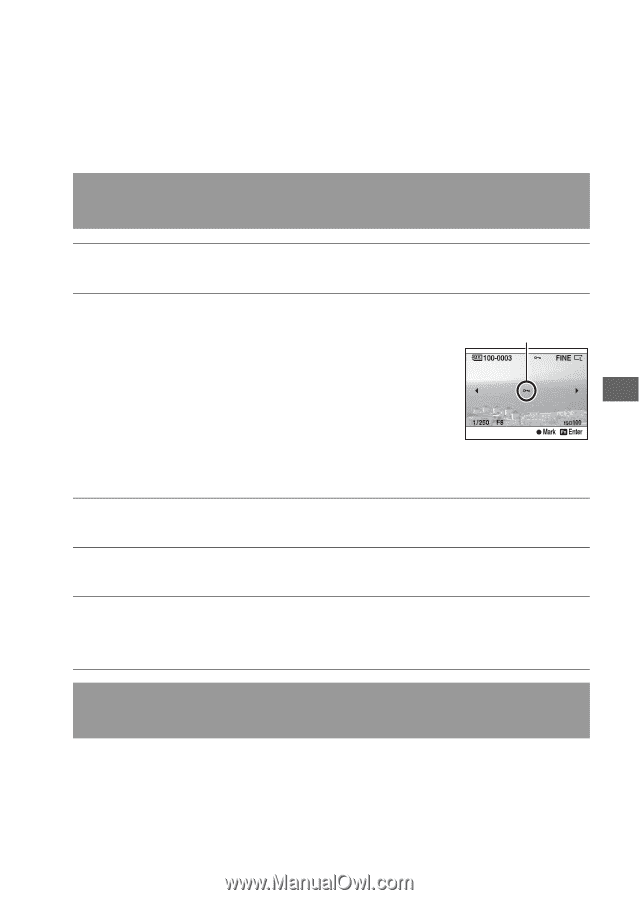
Protecting images (Protect) You can protect images against accidental erasure. The protect function can be operated either using the Fn button or the MENU button. Here operation using the Fn button is described. Protecting selected images/canceling the protection of the selected images 1 Fn button t [Protect] t [Marked images] 2 Select the image you want to protect with b/B on the control - button, then press the center of the control button. A - mark appears on the selected image. • To cancel a selection, press the center again. 3 To protect other images, repeat step 2. 4 Press the Fn button. 5 Select [OK] with v on the control button, then press the center of the control button. Protecting all the images/canceling the protection of all the images Fn button t [Protect] t [All images] or [Cancel all] t [OK] Using the viewing function 101
-
 1
1 -
2
-
3
-
4
-
5
-
6
-
7
-
8
-
9
-
10
-
11
-
12
-
13
-
14
-
15
-
16
-
17
-
18
-
19
-
20
-
21
-
22
-
23
-
24
-
25
-
26
-
27
-
28
-
29
-
30
-
31
-
32
-
33
-
34
-
35
-
36
-
37
-
38
-
39
-
40
-
41
-
42
-
43
-
44
-
45
-
46
-
47
-
48
-
49
-
50
-
51
-
52
-
53
-
54
-
55
-
56
-
57
-
58
-
59
-
60
-
61
-
62
-
63
-
64
-
65
-
66
-
67
-
68
-
69
-
70
-
71
-
72
-
73
-
74
-
75
-
76
-
77
-
78
-
79
-
80
-
81
-
82
-
83
-
84
-
85
-
86
-
87
-
88
-
89
-
90
-
91
-
92
-
93
-
94
-
95
-
 96
96 -
 97
97 -
 98
98 -
 99
99 -
 100
100 -
 101
101 -
 102
102 -
 103
103 -
 104
104 -
 105
105 -
 106
106 -
107
-
108
-
109
-
110
-
111
-
112
-
113
-
114
-
115
-
116
-
117
-
118
-
119
-
120
-
121
-
122
-
123
-
124
-
125
-
126
-
127
-
128
-
129
-
130
-
131
-
132
-
133
-
134
-
135
-
136
-
137
-
138
-
139
-
140
-
141
-
142
-
143
-
144
-
145
-
146
-
147
-
148
-
149
-
150
-
151
-
152
-
153
-
154
-
155
-
156
-
157
-
158
-
159
-
160
-
161
-
162
 |
 |