Sony KDL-46W4100 Operating Instructions - Page 7
Preparation for Wall-Mount Bracket, Wall-Mount Bracket model designed for your - settings
 |
UPC - 027242736597
View all Sony KDL-46W4100 manuals
Add to My Manuals
Save this manual to your list of manuals |
Page 7 highlights
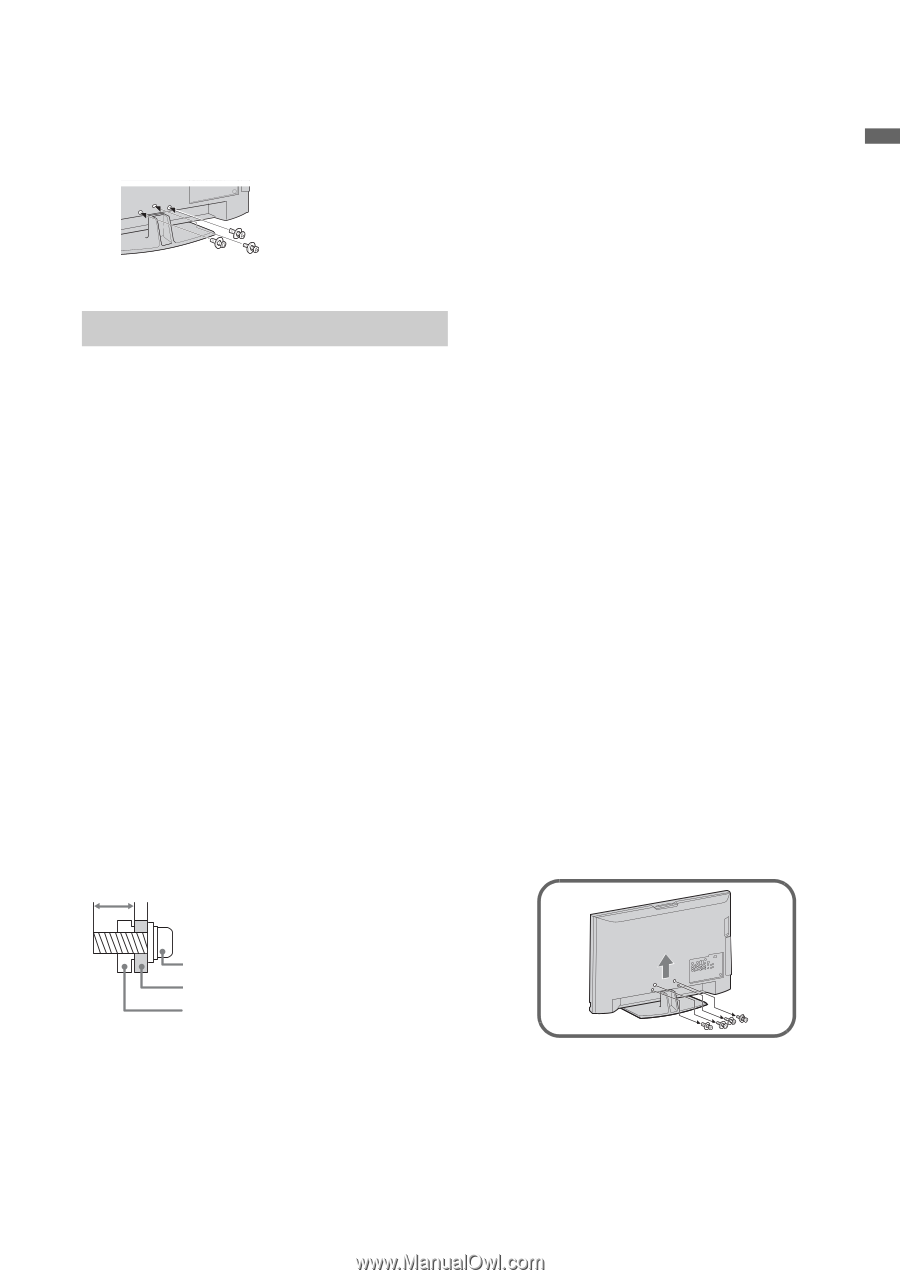
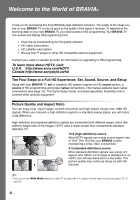
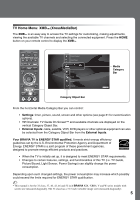
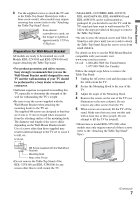
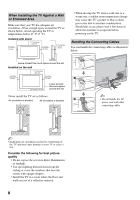
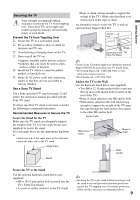
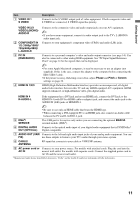
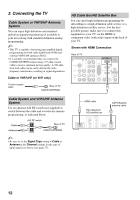
Getting Started 4 Use the supplied screws to attach the TV unit to the Table-Top Stand. Shown here with a three screw model; other models may require screwing four screws (refer to the "Attaching the Table-Top Stand" flyer). If an electric screwdriver is used, set the torque to tighten at approximately 1.5 N·m, 15 Kgf·cm. Preparation for Wall-Mount Bracket All models are ready to be mounted on a wall. Models KDL-52V4100 and KDL-52W4100 will require detaching the Table-Top stand. • For product protection and safety reasons, Sony strongly recommends that you use the Wall-Mount Bracket model designed for your TV and the wall-mounting of your TV should be performed by a Sony dealer or licensed contractor. • Sufficient expertise is required in installing this TV, especially to determine the strength of the wall for withstanding the TV's weight. • Be sure to use the screws supplied with the Wall-Mount Bracket when attaching the mounting hooks to the TV set. The supplied M6 screws are designed so that they are 8 mm to 12 mm in length when measured from the attaching surface of the mounting hook. The diameter and length of the screws differ depending on the Wall-Mount Bracket model. Use of screws other than those supplied may result in internal damage to the TV set or cause it to fall, etc. 8-12 mm • Models KDL-32/37XBR6, KDL-40V4150, KDL-40/42/46V4100, KDL-40/46W4100 and KDL-46W4150 can be wall-mounted as packaged. If you decided to use the TV with the TV stand and later want to wall-mount the TV, follow the steps provided on this page to remove the Table-Top Stand. • Be sure to store the unused screws and Table-Top Stand in a safe place until you are ready to attach the Table-Top Stand. Keep the screws away from small children. For details on how to use the Wall-Mount Bracket compatible with your model, visit www.sony.com/accessories Or call 1-800-488-7669 (for United States) 1-877-899-7669 (for Canada) Follow the simple steps below to remove the Table-Top Stand: 1 Unplug the AC power cord and disconnect all the cables from the TV. 2 Secure the Mounting Hook to the rear of the TV. 3 Adjust the angle of the Mounting Hook. 4 Remove the screws on the rear of the TV (see illustration in the next column). Do not remove any other screws from the TV. 5 When screws are removed, lift the TV off the stand. Make sure that you carry out this task with at least two or three people. Do not attempt to lift the TV by yourself. • Shown here is model KDL-52V4100; other models may only require removal of three screws (refer to the "Attaching the Table-Top Stand" flyer). M6 Screw (supplied with the Wall-Mount Bracket) Mounting Hook Rear of the TV set • Do not remove the Table-Top Stand of the KDL-52V4100 and KDL-52W4100 for any reason other than to wall-mount the TV. (Continued) 7
-
 1
1 -
 2
2 -
 3
3 -
 4
4 -
 5
5 -
 6
6 -
 7
7 -
 8
8 -
 9
9 -
 10
10 -
 11
11 -
 12
12 -
13
-
14
-
15
-
16
-
17
-
18
-
19
-
20
-
21
-
22
-
23
-
24
-
25
-
26
-
27
-
28
-
29
-
30
-
31
-
32
-
33
-
34
-
35
-
36
-
37
-
38
-
39
-
40
-
41
-
42
-
43
-
44
-
45
-
46
-
47
-
48
 |
 |