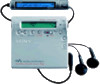
Sony MZ-R900 Operating Instructions - Page 31
Copying CD text information while recording (Joint Text), Jog lever L, LINE OUT, OPT jack, RK-TXT1
 |
View all Sony MZ-R900 manuals
Add to My Manuals
Save this manual to your list of manuals |
Page 31 highlights
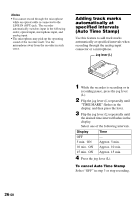
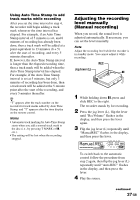
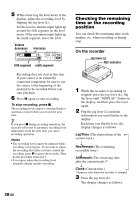
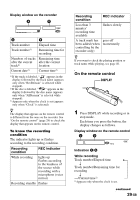
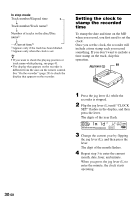
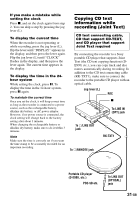
If you make a mistake while setting the clock Press x, and set the clock again from step 2. You can skip a step by pressing the jog lever (L). To display the current time When the recorder is not operating or while recording, press the jog lever (L), flip the lever until " DISPLAY" appears in the display, and then press the lever again. Flip the jog lever (L) until " CLOCK" flashes in the display, and then press the lever again. The current time appears in the display. To display the time in the 24hour system While setting the clock, press X. To display the time in the 12-hour system, press X again. To maintain the correct time Once you set the clock, it will keep correct time as long as the recorder is connected to a power source, such as the rechargeable battery, alkaline dry battery, or AC power adaptor. However, if no power source is connected, the clock setting will change back to the factory setting after about 3 minutes. When changing the rechargeable battery or alkaline dry battery, make sure to do it within 3 minutes. Note Make sure the time is correctly set if you want the time stamp to be accurately recorded for an important recording. Copying CD text information while recording (Joint Text) CD text connecting cable, CD that support CD-TEXT, and CD player that support Joint Text required By connecting the recorder to a Sony portable CD player that supports Joint Text (the CD text copying function) (DE990, etc.), you can copy track and disc names automatically during recording. In addition to the CD text connecting cable (RK-TXT1), make sure to connect the recorder to the portable CD player with an optical cable. Jog lever (L) REC x To LINE IN (OPT) jack To i/LINE OUT jack RK-TXT1 To i/REMOTE jack Portable CD player (D-E990, etc.) POC-5B etc. To LINE OUT (OPTICAL) jack 31-GB
-
 1
1 -
2
-
3
-
4
-
5
-
6
-
7
-
8
-
9
-
10
-
11
-
12
-
13
-
14
-
15
-
16
-
17
-
18
-
19
-
20
-
21
-
22
-
23
-
24
-
25
-
 26
26 -
 27
27 -
 28
28 -
 29
29 -
 30
30 -
 31
31 -
 32
32 -
 33
33 -
 34
34 -
 35
35 -
 36
36 -
37
-
38
-
39
-
40
-
41
-
42
-
43
-
44
-
45
-
46
-
47
-
48
-
49
-
50
-
51
-
52
-
53
-
54
-
55
-
56
-
57
-
58
-
59
-
60
-
61
-
62
-
63
-
64
-
65
-
66
-
67
-
68
-
69
-
70
-
71
-
72
-
73
-
74
-
75
-
76
-
77
-
78
-
79
-
80
-
81
-
82
-
83
-
84
-
85
-
86
-
87
-
88
-
89
-
90
-
91
-
92
-
93
-
94
-
95
-
96
-
97
-
98
-
99
-
100
-
101
-
102
-
103
-
104
-
105
-
106
-
107
-
108
-
109
-
110
-
111
-
112
-
113
-
114
-
115
-
116
-
117
-
118
-
119
-
120
-
121
-
122
-
123
-
124
-
125
-
126
-
127
-
128
-
129
-
130
-
131
-
132
-
133
-
134
-
135
-
136
-
137
-
138
-
139
-
140
-
141
-
142
-
143
-
144
-
145
-
146
-
147
-
148
-
149
-
150
-
151
-
152
-
153
-
154
-
155
-
156
-
157
-
158
-
159
-
160
-
161
-
162
-
163
-
164
-
165
-
166
-
167
-
168
-
169
-
170
-
171
-
172
-
173
-
174
-
175
-
176
-
177
-
178
-
179
-
180
-
181
-
182
-
183
-
184
-
185
-
186
-
187
-
188
-
189
-
190
-
191
-
192
-
193
-
194
-
195
-
196
-
197
-
198
-
199
-
200
-
201
-
202
-
203
-
204
-
205
-
206
-
207
-
208
-
209
-
210
-
211
-
212
 |
 |
