Sony PCV-J100 Reference Manual - Page 49
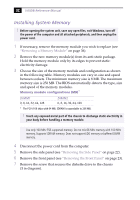
Replacing the Front Panel, Reconnect the power cord and turn on the computer.
 |
View all Sony PCV-J100 manuals
Add to My Manuals
Save this manual to your list of manuals |
Page 49 highlights
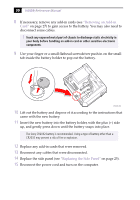
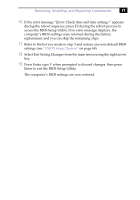
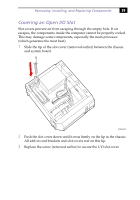
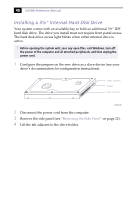
Removing, Installing, and Replacing Components 35 12 Slide the diskette drive back in and replace the screw that secures the diskette drive to the chassis. 13 Replace the front panel (see "Replacing the Front Panel" on page 24). 14 Replace the side panel (see "Replacing the Side Panel" on page 25). 15 Reconnect the power cord and turn on the computer. Your computer automatically recognizes the extra memory and will configure itself accordingly when you turn on the computer. No further action is required.
-
 1
1 -
2
-
3
-
4
-
5
-
6
-
7
-
8
-
9
-
10
-
11
-
12
-
13
-
14
-
15
-
16
-
17
-
18
-
19
-
20
-
21
-
22
-
23
-
24
-
25
-
26
-
27
-
28
-
29
-
30
-
31
-
32
-
33
-
34
-
35
-
36
-
37
-
38
-
39
-
40
-
41
-
42
-
43
-
 44
44 -
 45
45 -
 46
46 -
 47
47 -
 48
48 -
 49
49 -
 50
50 -
 51
51 -
 52
52 -
 53
53 -
 54
54 -
55
-
56
-
57
-
58
-
59
-
60
-
61
-
62
-
63
-
64
-
65
-
66
-
67
-
68
-
69
-
70
-
71
-
72
-
73
-
74
-
75
-
76
-
77
-
78
-
79
-
80
-
81
-
82
-
83
-
84
-
85
-
86
-
87
-
88
-
89
-
90
-
91
-
92
-
93
-
94
-
95
-
96
-
97
-
98
-
99
-
100
-
101
-
102
-
103
-
104
-
105
-
106
-
107
-
108
-
109
-
110
-
111
-
112
-
113
-
114
 |
 |

Removing, Installing, and Replacing Components
35
12
Slide the diskette drive back in and replace the screw that secures the
diskette drive to the chassis.
13
Replace the front panel (see
“
Replacing the Front Panel
”
on page 24).
14
Replace the side panel (see
“
Replacing the Side Panel
”
on page 25).
15
Reconnect the power cord and turn on the computer.
Your computer automatically recognizes the extra memory and will
configure itself accordingly when you turn on the computer. No further
action is required.