Sony PCV-RZ22G System Reference Manual - Page 58
Installing an Additional Hard Disk Drive
 |
View all Sony PCV-RZ22G manuals
Add to My Manuals
Save this manual to your list of manuals |
Page 58 highlights
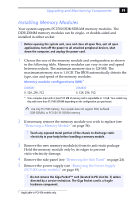
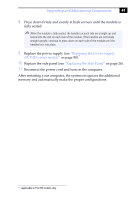
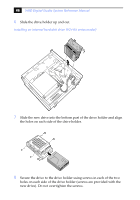
44 VAIO Digital Studio System Reference Manual Installing an Additional Hard Disk Drive Your computer is equipped with an available bay to accommodate an additional 3.5-inch hard disk drive. The hard disk drive access light is lit when either drive is activated, however, the drives are not accessible from the front panel. Sony recommends an ATA-100 hard disk drive to take full advantage of the system's features. ✍ Some models, such as Configure-to-Order (CTO) systems, may already have a second hard disk drive installed. ! Before opening the system unit, save and close all open files, exit all open applications, turn off the power to all attached peripheral devices, shut down the computer, and unplug the power cord. 1 Configure the jumpers on the new drive as a slave device (see your new drive's documentation for configuration instructions). Power connector Jumpers Drive connector 2 Remove the side panel (see "Removing the Side Panel" on page 24).
-
 1
1 -
2
-
3
-
4
-
5
-
6
-
7
-
8
-
9
-
10
-
11
-
12
-
13
-
14
-
15
-
16
-
17
-
18
-
19
-
20
-
21
-
22
-
23
-
24
-
25
-
26
-
27
-
28
-
29
-
30
-
31
-
32
-
33
-
34
-
35
-
36
-
37
-
38
-
39
-
40
-
41
-
42
-
43
-
44
-
45
-
46
-
47
-
48
-
49
-
50
-
51
-
52
-
 53
53 -
 54
54 -
 55
55 -
 56
56 -
 57
57 -
 58
58 -
 59
59 -
 60
60 -
 61
61 -
 62
62 -
 63
63 -
64
-
65
-
66
-
67
-
68
-
69
-
70
-
71
-
72
-
73
-
74
-
75
-
76
-
77
-
78
-
79
-
80
-
81
-
82
-
83
-
84
-
85
-
86
-
87
-
88
-
89
-
90
-
91
-
92
-
93
-
94
-
95
-
96
-
97
-
98
-
99
-
100
 |
 |