Sony PCV-RZ31G VAIO User Guide - Page 178
Identifying the additional hard disk space, Start, My Computer, Manage, Storage, Disk Management
 |
View all Sony PCV-RZ31G manuals
Add to My Manuals
Save this manual to your list of manuals |
Page 178 highlights
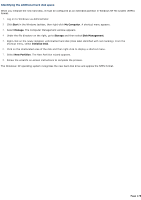
Identifying the additional hard disk space When you initialize the new hard disk, it must be configured as an extended partition in Windows NT file system (NTFS) format. 1. Log on to Windows® as Administrator. 2. Click Start in the Windows taskbar, then right-click My Computer. A shortcut menu appears. 3. Select Manage. The Computer Management window appears. 4. Under the file directory on the right, go to Storage and then select Disk Management. 5. Right-click on the newly installed, unformatted hard disk (Disk label identified with red marking). From the shortcut menu, select Initialize Disk. 6. Click on the Unallocated area of the disk and then right-click to display a shortcut menu. 7. Select New Partition. The New Partition wizard appears. 8. Follow the wizard's on-screen instructions to complete the process. The Windows® XP operating system recognizes the new hard disk drive and applies the NTFS format. Page 178
-
 1
1 -
2
-
3
-
4
-
5
-
6
-
7
-
8
-
9
-
10
-
11
-
12
-
13
-
14
-
15
-
16
-
17
-
18
-
19
-
20
-
21
-
22
-
23
-
24
-
25
-
26
-
27
-
28
-
29
-
30
-
31
-
32
-
33
-
34
-
35
-
36
-
37
-
38
-
39
-
40
-
41
-
42
-
43
-
44
-
45
-
46
-
47
-
48
-
49
-
50
-
51
-
52
-
53
-
54
-
55
-
56
-
57
-
58
-
59
-
60
-
61
-
62
-
63
-
64
-
65
-
66
-
67
-
68
-
69
-
70
-
71
-
72
-
73
-
74
-
75
-
76
-
77
-
78
-
79
-
80
-
81
-
82
-
83
-
84
-
85
-
86
-
87
-
88
-
89
-
90
-
91
-
92
-
93
-
94
-
95
-
96
-
97
-
98
-
99
-
100
-
101
-
102
-
103
-
104
-
105
-
106
-
107
-
108
-
109
-
110
-
111
-
112
-
113
-
114
-
115
-
116
-
117
-
118
-
119
-
120
-
121
-
122
-
123
-
124
-
125
-
126
-
127
-
128
-
129
-
130
-
131
-
132
-
133
-
134
-
135
-
136
-
137
-
138
-
139
-
140
-
141
-
142
-
143
-
144
-
145
-
146
-
147
-
148
-
149
-
150
-
151
-
152
-
153
-
154
-
155
-
156
-
157
-
158
-
159
-
160
-
161
-
162
-
163
-
164
-
165
-
166
-
167
-
168
-
169
-
170
-
171
-
172
-
 173
173 -
 174
174 -
 175
175 -
 176
176 -
 177
177 -
 178
178 -
 179
179 -
 180
180 -
 181
181 -
 182
182 -
 183
183 -
184
-
185
-
186
-
187
-
188
-
189
-
190
-
191
-
192
-
193
-
194
-
195
-
196
-
197
-
198
-
199
-
200
-
201
-
202
-
203
-
204
-
205
-
206
-
207
-
208
-
209
-
210
-
211
-
212
-
213
-
214
-
215
-
216
-
217
-
218
-
219
-
220
-
221
-
222
-
223
 |
 |