Sony RDR-HX730 Operating Instructions - Page 22
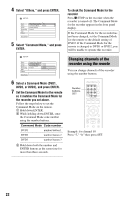
Changing channels of the recorder using the remote, Select Command Mode, and press
 |
View all Sony RDR-HX730 manuals
Add to My Manuals
Save this manual to your list of manuals |
Page 22 highlights
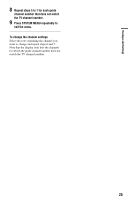
4 Select "Others," and press ENTER. 5 Select "Command Mode," and press ENTER. To check the Command Mode for the recorder Press x STOP on the recorder when the recorder is turned off. The Command Mode for the recorder appears in the front panel display. If the Command Mode for the recorder has not been changed, set the Command Mode for the remote to the default setting of DVD3. If the Command Mode for the remote is changed to DVD1 or DVD2, you will be unable to operate this recorder. Changing channels of the recorder using the remote You can change channels of the recorder using the number buttons. 6 Select a Command Mode (DVD1, DVD2, or DVD3), and press ENTER. 7 Set the Command Mode for the remote so it matches the Command Mode for the recorder you set above. Follow the steps below to set the Command Mode on the remote. 1 Hold down ENTER. 2 While holding down ENTER, enter the Command Mode code number using the number buttons. Command Mode Code number DVD1 number button 1 DVD2 number button 2 DVD3 number button 3 3 Hold down both the number and ENTER buttons at the same time for more than three seconds. Number buttons, SET Example: for channel 50 Press "5," "0," then press SET. 22
-
 1
1 -
2
-
3
-
4
-
5
-
6
-
7
-
8
-
9
-
10
-
11
-
12
-
13
-
14
-
15
-
16
-
 17
17 -
 18
18 -
 19
19 -
 20
20 -
 21
21 -
 22
22 -
 23
23 -
 24
24 -
 25
25 -
 26
26 -
 27
27 -
28
-
29
-
30
-
31
-
32
-
33
-
34
-
35
-
36
-
37
-
38
-
39
-
40
-
41
-
42
-
43
-
44
-
45
-
46
-
47
-
48
-
49
-
50
-
51
-
52
-
53
-
54
-
55
-
56
-
57
-
58
-
59
-
60
-
61
-
62
-
63
-
64
-
65
-
66
-
67
-
68
-
69
-
70
-
71
-
72
-
73
-
74
-
75
-
76
-
77
-
78
-
79
-
80
-
81
-
82
-
83
-
84
-
85
-
86
-
87
-
88
-
89
-
90
-
91
-
92
-
93
-
94
-
95
-
96
-
97
-
98
-
99
-
100
-
101
-
102
-
103
-
104
-
105
-
106
-
107
-
108
 |
 |
