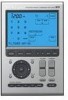
Sony RM-AX4000A Instruction Manual - Page 18
Click [Exit] to close RM-AX4000, Install CD Menu. - rm driver
 |
UPC - 027242701205
View all Sony RM-AX4000A manuals
Add to My Manuals
Save this manual to your list of manuals |
Page 18 highlights
Installing the "AX Remote Editor" (continued) For Windows XP users 1 Close all software running on Windows. 2 Insert the supplied CD-ROM into the CD-ROM drive of the PC. After a moment, "RM-AX4000 Install CD Menu" appears. 3 Click [Exit] to close "RM-AX4000 Install CD Menu." 4 Connect the PC and the Remote Commander using the supplied USB mini cable (page 19). The "Found New Hardware" message appears in the Notification Area in the lower right-hand of the display. After a moment, "Found New Hardware Wizard" appears. Tip If the following confirmation message appears, "Can Windows connect to Windows Update to search for software?", select [No, not this time] then click [Next]. 5 Select "Install the software automatically [Recommended]", then click [Next]. Installing of the USB driver starts. The "Completing the Found New Hardware Wizard" display appears when the installation is complete. 6 Click [Finish]. 18 Installing of the USB driver finishes. For Windows 2000 users 1 Close all software running on Windows. 2 Insert the supplied CD-ROM into the CD-ROM drive of the PC. After a moment, "RM-AX4000 Install CD Menu" appears. 3 Click [Exit] to close "RM-AX4000 Install CD Menu." 4 Connect the PC and the Remote Commander using the supplied USB mini cable (page 19). The "Found New Hardware" message appears. After a moment, "Found New Hardware Wizard" appears. 5 Click [Next]. The "Install Hardware Device Drivers" display appears. 6 Select "Search for a suitable driver for my device [recommended]", then click [Next]. The "Locate Driver Files" display appears. 7 Mark only the check box of "CD- ROM drives", then click [Next]. The "Driver Files Search Results" display appears, and the found driver is displayed.
-
 1
1 -
2
-
3
-
4
-
5
-
6
-
7
-
8
-
9
-
10
-
11
-
12
-
 13
13 -
 14
14 -
 15
15 -
 16
16 -
 17
17 -
 18
18 -
 19
19 -
 20
20 -
 21
21 -
 22
22 -
 23
23 -
24
-
25
-
26
-
27
-
28
-
29
-
30
-
31
-
32
-
33
-
34
-
35
-
36
-
37
-
38
-
39
-
40
-
41
-
42
-
43
-
44
-
45
-
46
-
47
-
48
-
49
-
50
-
51
-
52
-
53
-
54
-
55
-
56
-
57
-
58
-
59
-
60
-
61
-
62
-
63
-
64
-
65
-
66
-
67
-
68
-
69
-
70
-
71
-
72
-
73
-
74
-
75
-
76
-
77
-
78
-
79
-
80
-
81
-
82
-
83
-
84
-
85
-
86
-
87
-
88
-
89
-
90
-
91
-
92
-
93
-
94
-
95
-
96
 |
 |
