Sony RM-AX4000A Instruction Manual - Page 19
Connecting the Remote Commander to your PC, Click [Next]., Click [Finish]. - rm ax4000 driver
 |
UPC - 027242701205
View all Sony RM-AX4000A manuals
Add to My Manuals
Save this manual to your list of manuals |
Page 19 highlights
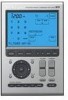
Getting Started 8 Click [Next]. Installing of the USB driver starts. The "Completing the Found New Hardware Wizard" display appears when the installation is complete. 9 Click [Finish]. Installing of the USB driver finishes. Connecting the Remote Commander to your PC You can now connect the Remote Commander (RM-AX4000) to your PC with the supplied USB mini cable. Connect whenever you want to verify correct operation of key and button commands for an XPRESS function, etc., or to exchange setup data between your PC and the Remote Commander. IMPORTANT • Do not keep the Remote Commander connected to the PC when the PC is in standby/ hibernation, otherwise, a malfunction could occur. Be sure to disconnect the Remote Commander from the PC before standby/hibernation begins. • Furthermore, do not connect the Remote Commander to the PC while it is in standby/ hibernation. Wait until the PC comes out of standby/ hibernation before connecting. Notes • The Remote Commander uses the battery when connected to the PC. When you finish the setup, unplug from the USB connector. • Before connecting the Remote Commander to your PC, be sure to install the fresh batteries in the Remote Commander. • Do not disconnect the USB mini cable from your PC while your PC is communicating with the Remote Commander, as a malfunction may occur. • Only connect one Remote Commander to your PC at a time. Otherwise, you will not be able to download the settings correctly. 1 Connect the USB mini cable to the USB connector of the Remote Commander (RM-AX4000). 2 Connect the USB mini cable to the USB connector of your PC. 19
-
 1
1 -
2
-
3
-
4
-
5
-
6
-
7
-
8
-
9
-
10
-
11
-
12
-
13
-
 14
14 -
 15
15 -
 16
16 -
 17
17 -
 18
18 -
 19
19 -
 20
20 -
 21
21 -
 22
22 -
 23
23 -
 24
24 -
25
-
26
-
27
-
28
-
29
-
30
-
31
-
32
-
33
-
34
-
35
-
36
-
37
-
38
-
39
-
40
-
41
-
42
-
43
-
44
-
45
-
46
-
47
-
48
-
49
-
50
-
51
-
52
-
53
-
54
-
55
-
56
-
57
-
58
-
59
-
60
-
61
-
62
-
63
-
64
-
65
-
66
-
67
-
68
-
69
-
70
-
71
-
72
-
73
-
74
-
75
-
76
-
77
-
78
-
79
-
80
-
81
-
82
-
83
-
84
-
85
-
86
-
87
-
88
-
89
-
90
-
91
-
92
-
93
-
94
-
95
-
96
 |
 |
