Sony SA-VA1 Operating Instructions - Page 13
Ebalance
 |
View all Sony SA-VA1 manuals
Add to My Manuals
Save this manual to your list of manuals |
Page 13 highlights
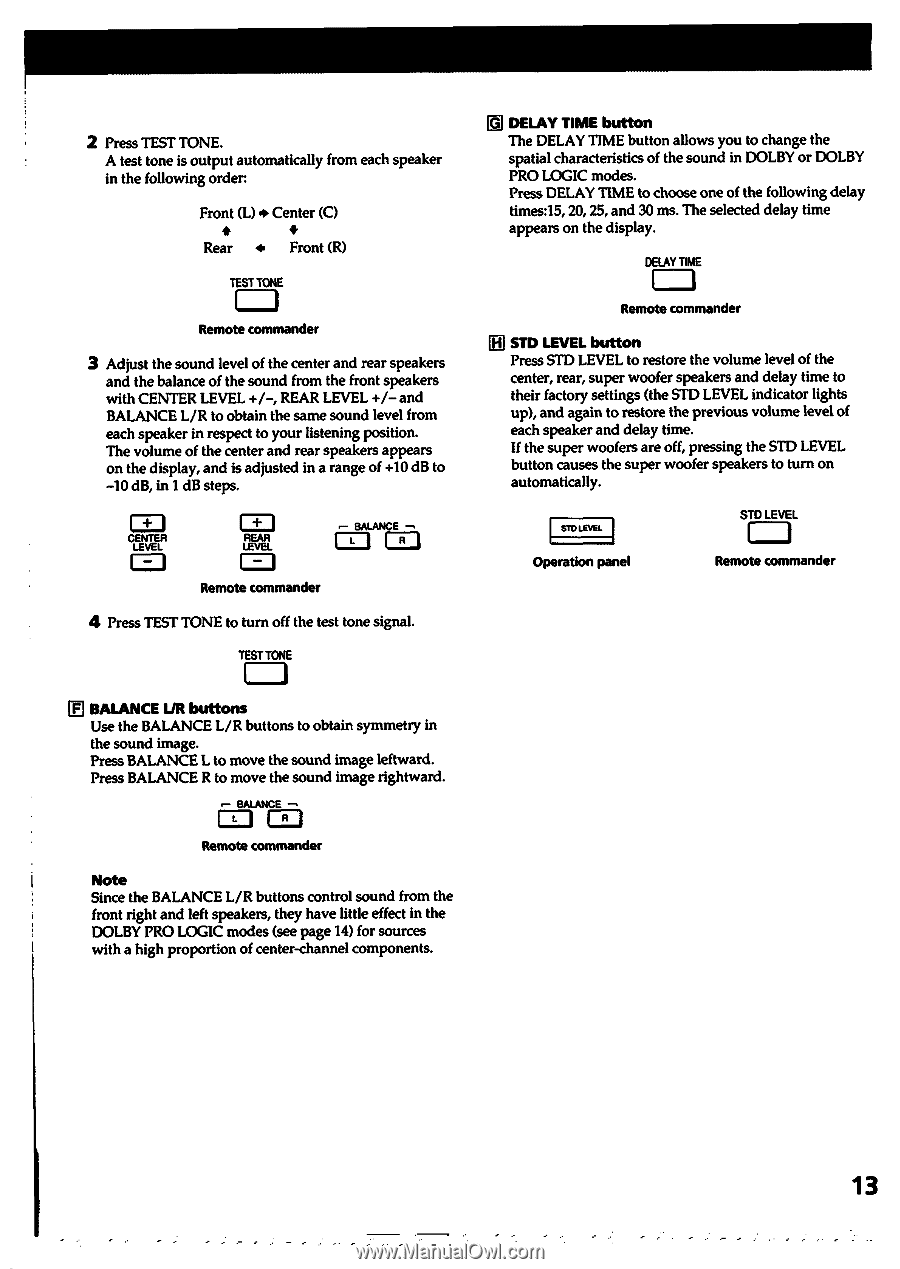
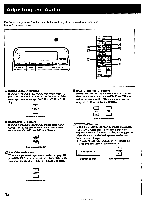
2 Press TEST TONE. A test tone is output automatically from each speaker in the following order. Front (L) • Center (C) • i Rear * Front (R) TIEST TONE commander 3 Adjust the sound level of the center and rear speakers and the balance of the sound from the front speakers with CENTER LEVEL +/-, REAR LEVEL +/- and BALANCE L/R to obtain the same sound level from each speaker in respect to your listening position. The volume of the center and rear speakers appears on the display, and is adjusted in a range of +10 dB to -10 dB, in 1 dB steps. CENTE LEVEL 1=1 REAR LEVEL =1 BALANCE --. =I 1=3 Remote commander 4 Press TEST TONE to turn off the test tone signal. TEST TONE =i E BALANCE LIR buttons Use the BALANCE L/R buttons to obtain symmetry in the sound image. Press BALANCE L to move the sound image leftward. Press BALANCE R to move the sound image rightward. .- BALANCE -. =I =I Remote commander Note Since the BALANCE L/R buttons control sound from the front right and left speakers, they have little effect in the DOLBY PRO LOGIC modes (see page 14) for sources with a high proportion of center-channel components. 0 DELAY TIME button The DELAY TIME button allows you to change the spatial characteristics of the sound in DOLBY or DOLBY PRO LOGIC modes. Press DELAY TIME to choose one of the following delay times:15, 20, 25, and 30 ms. The selected delay time appears on the display. DELAY TIME ED Remote commander El STD LEVEL button Press STD LEVEL to restore the volume level of the center, rear, super woofer speakers and delay time to their factory settings (the STD LEVEL indicator lights up), and again to restore the previous volume level of each speaker and delay time. If the super woofers are off, pressing the STD LEVEL button causes the super woofer speakers to turn on automatically. STD LEVEL Operation panel STD LEVEL =I Remote commander 13
-
 1
1 -
2
-
3
-
4
-
5
-
6
-
7
-
 8
8 -
 9
9 -
 10
10 -
 11
11 -
 12
12 -
 13
13 -
 14
14 -
 15
15 -
 16
16
 |
 |