Sony SDM-HS75 Operating Instructions - Page 13
Adjusting the color temperature (COLOR), Adjust the picture's position manually, H CENTER/V CENTER
 |
View all Sony SDM-HS75 manuals
Add to My Manuals
Save this manual to your list of manuals |
Page 13 highlights
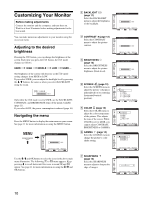
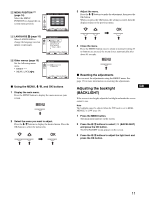
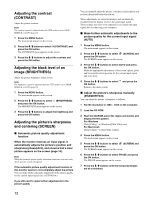
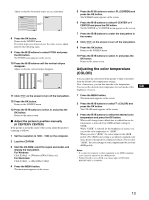
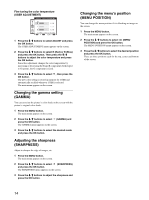
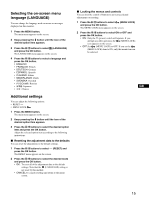
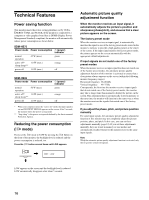
Adjust so that the horizontal stripes are at a minimum. 8 Press the OK button. Return to the SCREEN menu. If vertical stripes are observed over the entire screen, adjust pitch by the following steps. 9 Press the m/M buttons to select PITCH and press the OK button. The PITCH menu appears on the screen. 10 Press the m/M buttons until the vertical stripes disappear. Adjust so that the vertical stripes disappear. 11 Click [END] on the screen to turn off the test pattern. 12 Press the OK button. Return to the SCREEN menu. 13 Press the m/M buttons to select OK button. Return to the menu screen. and press the x Adjust the picture's position manually (H CENTER/V CENTER) If the picture is not in the center of the screen, adjust the picture's centering as follows. 1 Set the resolution to 1280 × 1024 on the computer. 2 Load the CD-ROM. 3 Start the CD-ROM, select the region and model, and display the test pattern. For Windows Click [Utility] t [Windows]/[Win Utility.exe]. For Macintosh Click [Utility] t [Mac]/[Mac Utility]. 4 Press the MENU button. The main menu appears on the screen. 5 Press the m/M buttons to select (SCREEN) and press the OK button. The SCREEN menu appears on the screen. 6 Press the m/M buttons to select H CENTER or V CENTER and press the OK button. The H CENTER or V CENTER menu appears on the screen. 7 Press the m/M buttons to center the test pattern in the screen. 8 Click [END] on the screen to turn off the test pattern. 9 Press the OK button. Return to the SCREEN menu. 10 Press the m/M buttons to select OK button. Return to the menu screen. and press the Adjusting the color temperature (COLOR) You can select the color level of the picture's white color field from the default color temperature settings. Also, if necessary, you can fine tune the color temperature. You can set the desired color temperature for each mode of the brightness of screen. GB 1 Press the MENU button. The main menu appears on the screen. 2 Press the m/M buttons to select (COLOR) and press the OK button. The COLOR menu appears on the screen. 3 Press the m/M buttons to select the desired color temperature and press the OK button. Whites will change from a bluish hue to reddish hue as the temperature is lowered from 9300K (default setting) to 6500K. While "USER" is selected for the brightness of screen, you can set the color temperature to "sRGB." When you select "sRGB," the colors adjust to the sRGB profile. (The sRGB color setting is an industry-standard color space protocol designed for computer products.) If you select "sRGB," the color settings of your computer must be set to the sRGB profile. Notes • If a connected computer or other equipment is not sRGB-compliant, color cannot be adjusted to the sRGB profile. • While COLOR is set to sRGB, you cannot adjust CONTRAST, BRIGHTNESS or GAMMA. 13
-
 1
1 -
2
-
3
-
4
-
5
-
6
-
7
-
 8
8 -
 9
9 -
 10
10 -
 11
11 -
 12
12 -
 13
13 -
 14
14 -
 15
15 -
 16
16 -
 17
17 -
 18
18 -
19
-
20
 |
 |
