Sony SNC-RZ50N User Guide - Page 41
Video codec Tab, OK/Cancel, JPEG setting/MPEG4 setting/H.264, setting
 |
UPC - 027242240377
View all Sony SNC-RZ50N manuals
Add to My Manuals
Save this manual to your list of manuals |
Page 41 highlights
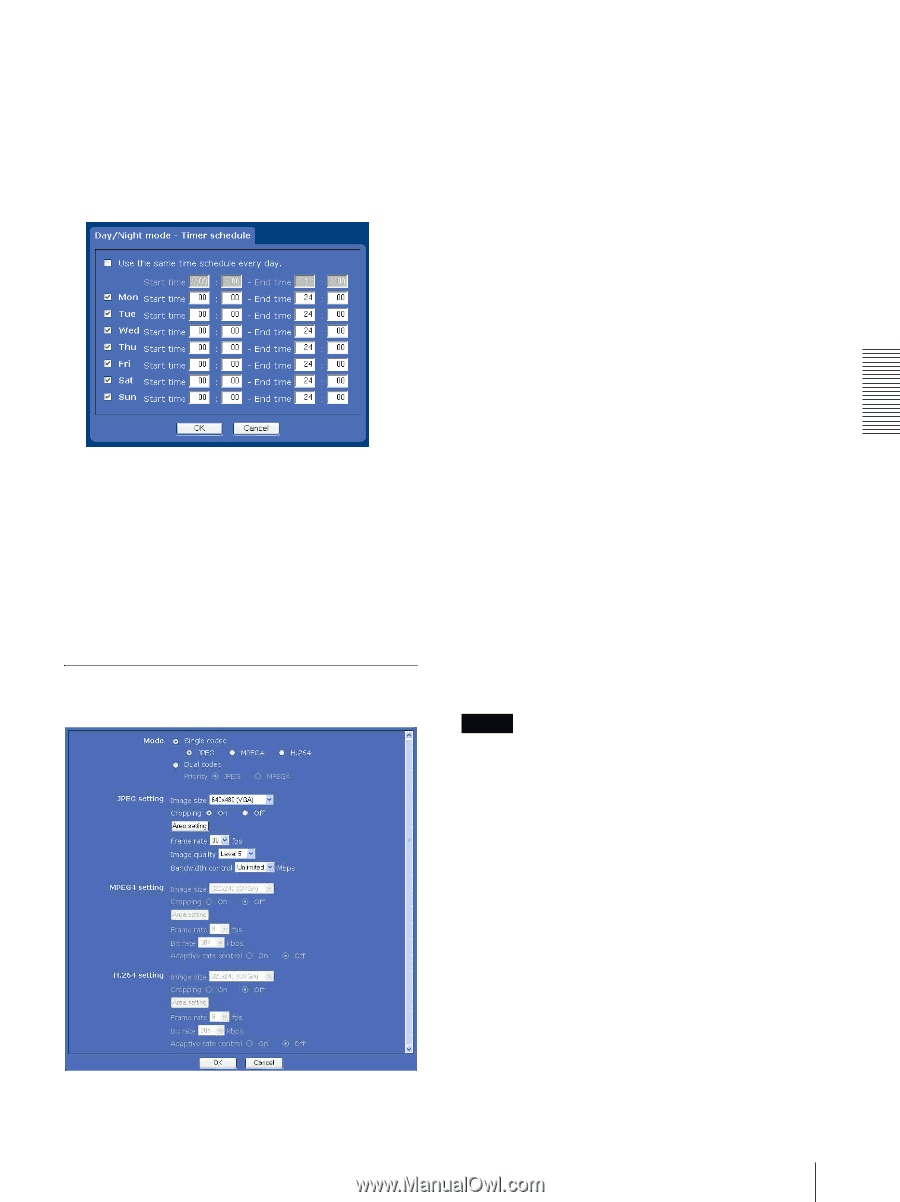
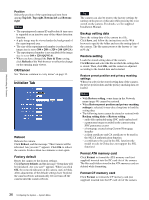
Administrating the Camera When you select On, the camera works in night mode. When you select Off, it works in day mode. Timer: Normally the camera works in day mode. It switches to night mode at the time that you have you set in the Schedule menu. Click Schedule and the setting menu for the effective period is displayed. ("Setting the Schedule - Schedule Menu" on page 80) Sensor input: Controls the day/night mode by synchronizing it with the sensor input. Select the sensor input with which you want to synchronize the mode: Sensor input 1 or Sensor input 2. While a sensor input is detected, the camera works in night mode. OK/Cancel See "Buttons common to every menu" on page 31. Video codec Tab Use this tab to set the items for the video codec. Mode Select the operation mode of the camera. Single codec: Select one video codec from among JPEG, MPEG4 and H.264. The camera supports the selected video codec. Dual codec: The camera supports both JPEG and MPEG4 video codecs simultaneously. When you select this option, select the priority codec from JPEG or MPEG4. JPEG setting/MPEG4 setting/H.264 setting Set the details of the video codecs. Selectable items become active according to the Mode setting. Set the active items in JPEG setting, MPEG4 setting or H.264 setting as required. Image size You can select the image size to be sent from the camera. 640 × 480 (VGA), 384 × 288, 320 × 240 (QVGA) or 160 × 120 (QQVGA) can be selected. When 640 × 480 (VGA) is selected and Cropping is set to On, you can crop a portion of the image and display the cropped image on the computer. Cropping When the image size is set to 640 × 480 (VGA), you can crop a portion of the image and display the cropped image on the computer. Cropping reduces the transmitting data size and thus the network load, and a higher frame rate is achieved. Select On to crop the image, or Off. Note Object detection (page 82) operates for an image in the image size that is not cropped even if Cropping is set to On. To crop an image 1 Set the Image size to 640 × 480 (VGA). Cropping becomes active. 2 Set Cropping to On and click the Area setting button. The area setting window appears. 3 Click on the still image to specify the trimming portion. A red frame that appears when you clicked indicates the trimming portion. 41 Setting the Camera Image and Audio - Camera Menu
-
 1
1 -
2
-
3
-
4
-
5
-
6
-
7
-
8
-
9
-
10
-
11
-
12
-
13
-
14
-
15
-
16
-
17
-
18
-
19
-
20
-
21
-
22
-
23
-
24
-
25
-
26
-
27
-
28
-
29
-
30
-
31
-
32
-
33
-
34
-
35
-
 36
36 -
 37
37 -
 38
38 -
 39
39 -
 40
40 -
 41
41 -
 42
42 -
 43
43 -
 44
44 -
 45
45 -
 46
46 -
47
-
48
-
49
-
50
-
51
-
52
-
53
-
54
-
55
-
56
-
57
-
58
-
59
-
60
-
61
-
62
-
63
-
64
-
65
-
66
-
67
-
68
-
69
-
70
-
71
-
72
-
73
-
74
-
75
-
76
-
77
-
78
-
79
-
80
-
81
-
82
-
83
-
84
-
85
-
86
-
87
-
88
-
89
-
90
-
91
-
92
-
93
-
94
-
95
-
96
-
97
-
98
-
99
-
100
-
101
-
102
-
103
-
104
-
105
-
106
-
107
-
108
-
109
-
110
-
111
-
112
-
113
-
114
-
115
-
116
-
117
-
118
-
119
-
120
 |
 |