Sony STR-GX808ES Operating Instructions - Page 5
Precautions, Unpacking
 |
View all Sony STR-GX808ES manuals
Add to My Manuals
Save this manual to your list of manuals |
Page 5 highlights
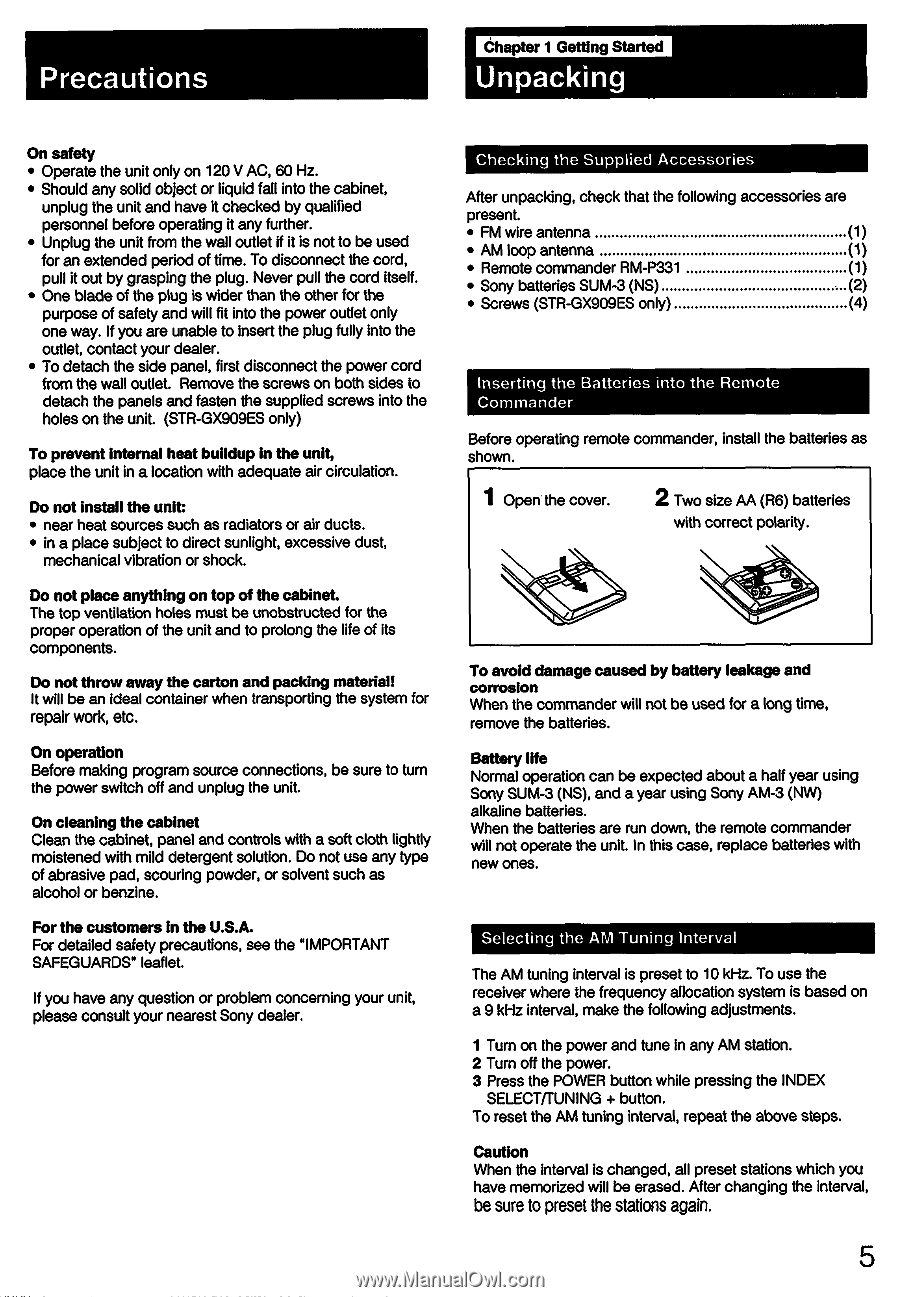
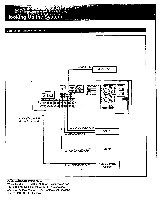
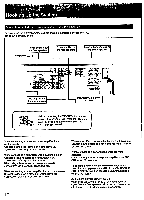
Precautions Chapter 1 Getting Started Unpacking On safety • Operate the unit only on 120 V AC, 60 Hz. • Should any solid object or liquid fall into the cabinet, unplug the unit and have it checked by qualified personnel before operating it any further. • Unplug the unit from the wall outlet if it is not to be used for an extended period of time. To disconnect the cord, pull it out by grasping the plug. Never pull the cord itself. • One blade of the plug is wider than the other for the purpose of safety and will fit into the power outlet only one way. If you are unable to insert the plug fully into the outlet, contact your dealer. • To detach the side panel, first disconnect the power cord from the wall outlet. Remove the screws on both sides to detach the panels and fasten the supplied screws into the holes on the unit (STR-GX909ES only) To prevent internal heat buildup in the unit, place the unit in a location with adequate air circulation. Do not install the unit: • near heat sources such as radiators or air ducts. • in a place subject to direct sunlight, excessive dust, mechanical vibration or shock. Do not place anything on top of the cabinet. The top ventilation holes must be unobstructed for the proper operation of the unit and to prolong the life of its components. Do not throw away the carton and packing material! It will be an ideal container when transporting the system for repair work, etc. On operation Before making program source connections, be sure to turn the power switch off and unplug the unit. On cleaning the cabinet Clean the cabinet, panel and controls with a soft cloth lightly moistened with mild detergent solution. Do not use any type of abrasive pad, scouring powder, or solvent such as alcohol or benzine. For the customers in the U.S.A. For detailed safety precautions, see the IMPORTANT SAFEGUARDS" leaflet. If you have any question or problem concerning your unit, please consult your nearest Sony dealer. Checking the Supplied Accessories After unpacking, check that the following accessories are present. • FM wire antenna (1) • AM loop antenna (1) • Remote commander RM-P331 (1) • Sony batteries SUM-3 (NS) (2) • Screws (STR-GX909ES only) (4) inserting the Batteries into the Remote Commander Before operating remote commander, install the batteries as shown. 1 Open the cover. 2 Two size AA (R6) batteries with correct polarity. To avoid damage caused by battery leakage and corrosion When the commander will not be used for a long time, remove the batteries. Battery life Normal operation can be expected about a half year using Sony SUM-3 (NS), and a year using Sony AM-3 (NW) alkaline batteries. When the batteries are run down, the remote commander will not operate the unit. In this case, replace batteries with new ones. Selecting the AM Tuning Interval The AM tuning interval is preset to 10 kHz. To use the receiver where the frequency allocation system is based on a 9 kHz interval, make the following adjustments. 1 Turn on the power and tune in any AM station. 2 Turn off the power. 3 Press the POWER button while pressing the INDEX SELECT/TUNING + button. To reset the AM tuning interval, repeat the above steps. Caution When the interval is changed, all preset stations which you have memorized will be erased. After changing the interval, be sure to preset the stations again. 5
-
 1
1 -
 2
2 -
 3
3 -
 4
4 -
 5
5 -
 6
6 -
 7
7 -
 8
8 -
 9
9 -
 10
10 -
 11
11 -
12
-
13
-
14
-
15
-
16
-
17
-
18
-
19
-
20
-
21
-
22
-
23
-
24
-
25
-
26
-
27
-
28
-
29
-
30
-
31
-
32
-
33
-
34
-
35
-
36
-
37
-
38
-
39
-
40
-
41
-
42
-
43
-
44
-
45
-
46
-
47
-
48
-
49
-
50
 |
 |