Sony UPDR80 Operating Instructions - Page 5
RIBBON/PAPER indicator - printers
 |
View all Sony UPDR80 manuals
Add to My Manuals
Save this manual to your list of manuals |
Page 5 highlights
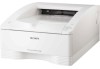
Introduction G Indicators The indicators are as shown below: Rear A CLEANING indicator Lights while cleaning is in progress. B RIBBON/PAPER indicator Lights when an error involving the ink ribbon or paper occurs. C ALARM indicator Lights when an error such as a paper jam occurs. D PRINT indicator Lights while printing is in progress. The location and cause of an error can be determined according to which of the indicators (PRINT, ALARM, RIBBON/PAPAER and CLEANING) are on or flashing. For details, refer to "Explanation of Indicators" on page 22. H STOP button (page 13) Press this button to stop a continuous printing operation. When this button is pressed, the printer returns to ready state after the current page is printed and ejected. A USB connector Connects to a computer equipped with the USB interface (which conforms to USB 2.0), using a USB cable (supplied). B Vent openings C ~AC IN connector (page 7) Use the power cord provided. D Security slot Used to attach a security cable. E USB cable stopper (page 7) Fixes the USB cable to prevent it from being disconnected. 5 Location and Function of Parts and Controls
-
 1
1 -
 2
2 -
 3
3 -
 4
4 -
 5
5 -
 6
6 -
 7
7 -
 8
8 -
 9
9 -
 10
10 -
 11
11 -
12
-
13
-
14
-
15
-
16
-
17
-
18
-
19
-
20
-
21
-
22
-
23
-
24
 |
 |
