Stihl 009 Instruction Manual
Stihl 009 Manual
 |
View all Stihl 009 manuals
Add to My Manuals
Save this manual to your list of manuals |
Stihl 009 manual content summary:
- Stihl 009 | Instruction Manual - Page 1
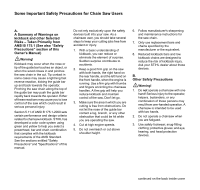
Occasional User Saw STIHL 009 STIH) Instruction Manual Warning! To reduce the risk of kickback injury use STIHL reduced kickback bar and STIHL PM 1 (3/8" Picco), RM 2 (0.325") or PM 2 (3/8") chain depending on sprocket pitch or other available low kickback components. Read and follow all safety - Stihl 009 | Instruction Manual - Page 2
section of this Owner's Manual) !Warning! Kickback may occur when the nose or tip of the guide bar touches an object, 6. Follow manufacturer's sharpening and maintenance instructions for the saw chain. 7. Only use risk of kickback injury. Ask your STIHL dealer about these devices. B. Other Safety - Stihl 009 | Instruction Manual - Page 3
Carburetor Guide Bar, Chain and Sprocket 35 Troubleshooting on Chain Oiling System 37 Air Filter 38 Printed on chlorine-free paper Andreas Stihl AG & Co. KG, 2004 0458 125 3021. M2. F4. PM. Printed in USA 39 This Manual contains operating and 39 safety instructions for all STIHL 009 - Stihl 009 | Instruction Manual - Page 4
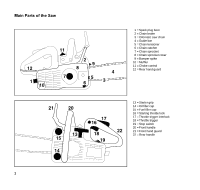
12 1 10 11 2 9 8 4 7 5 6 3 1 = Spark plug boot 2 = Chain brake 3 = Oilomatic saw chain 4 = Guide bar 5 = Chain tensioner 6 = Chain catcher 7 = Chain sprocket 8 = Chain sprocket cover 9 = Bumper spike 10 = Muffler 11 = Choke control 12 = Rear hand guard 21 20 13 15 - Stihl 009 | Instruction Manual - Page 5
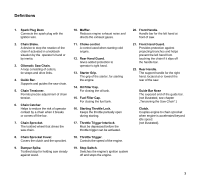
of the chain if activated in a kickback situation by the operator's hand or by inertia. A loop consisting of cutters, tie straps and drive links. Supports and guides the saw chain. Permits precise adjustment of chain tension. Helps to reduce the risk of operator contact by a chain when it breaks or - Stihl 009 | Instruction Manual - Page 6
following safety precautions and warnings. Read the Owner's Manual the safety instructions periodically. Pay special attention to the section on reactive must be observed to reduce the risk of personal injury. Have your STIHL dealer show you how to operate your chainsaw. Observe all applicable - Stihl 009 | Instruction Manual - Page 7
In order to reduce the risk of whitefinger disease and carpal tunnel syndrome, please note the following: The STIHL 009 is not equipped with an antivibration (AV) system. - Many STIHL models are available with an anti-vibration ("AV") system designed to reduce the transmission of vibrations created - Stihl 009 | Instruction Manual - Page 8
STIHL or expressly approved by STIHL for use with the specific STIHL saw models are authorized. Although certain unauthorized attachments are useable with the STIHL guard (scabbard) should be over the chain and the guide bar, which should point backwards. When carrying your saw, Manual. 001BA115 KN - Stihl 009 | Instruction Manual - Page 9
STIHL Oilomatic chain, guide bar and sprocket must match each other in gauge and pitch. Before replacing any bar and chain, see the sections on "Specifications", "Kickback" and the "ANSI B 175.1-2000 chainsaw kickback standard" in this manual. Proper tension of the chain is extremely important. In - Stihl 009 | Instruction Manual - Page 10
hand with as much force as possible. The screwdriver end of the STIHL combination wrench or other similar tool can be used as an aid in tightening your saw without assistance. For specific starting instructions, see the appropriate section of the Owner's Manual. Proper starting methods reduce the risk of - Stihl 009 | Instruction Manual - Page 11
the chain brake before starting. Never attempt to start the chainsaw when the guide bar is in a cut or kerf. When you pull the starter grip, see the appropriate section of your Owner's Manual. If you cannot set the correct idle speed, have your STIHL dealer check your saw and make proper adjustments - Stihl 009 | Instruction Manual - Page 12
or excessive wear. Buffers should always be replaced in sets. If you have any questions as to whether the buffers should be replaced, consult your STIHL servicing dealer. Take extreme care in wet and freezing weather (rain, snow, ice). Put off the work when the weather is windy, stormy or rainfall - Stihl 009 | Instruction Manual - Page 13
on rear handle and throttle trigger. Left-handers should follow these instructions too. Wrap your fingers tightly around the handles, keeping the handles a firm foothold. Never work on a ladder, or on any other insecure support. Never use the saw above shoulder height. Never work in a tree unless - Stihl 009 | Instruction Manual - Page 14
. Under some cutting circumstances the bar moves towards the operator, who may suffer severe or fatal injury. Kickback may occur when the nose of the guide bar is pinched unexpectedly, unintentionally contacts solid material in the wood or is incorrectly used to begin a plunge or boring cut. - Stihl 009 | Instruction Manual - Page 15
and force of the kickback reaction. Some STIHL bar and chain types are designed to reduce kickback forces. STIHL recommends the use of reduced kickback bars and as complying in the "Specifications" section of the Owner's Manual or - other replacement bar and chain combinations marked in accordance - Stihl 009 | Instruction Manual - Page 16
STIHL Service Centre! Do not use the saw until the problem has been rectified (see the section "Chain Brake"). STIHL STIHL chainsaw and is available for installation on most older STIHL saws. Ask your dealer to retrofit your older model saw with a chain brake. When a kickback occurs, the guide Manual - Stihl 009 | Instruction Manual - Page 17
do not prevent kickback, but they are designed to reduce the risk of kickback injury. They are available from your STIHL dealer. STIHL offers a variety of bars and chains. STIHL reduced kickback bars and low kickback chains are designed to Even if your saw is equipped with a Quickstop, a reduced - Stihl 009 | Instruction Manual - Page 18
kickback, and may result in higher kickback forces. Do not mount a bow guide on any STIHL chainsaw. Any chainsaw equipped with a bow guide is potentially very dangerous. The risk of kickback is increased with a bow guide because of the increased kickback contact area. Low kickback chain will not - Stihl 009 | Instruction Manual - Page 19
Felling is cutting down a tree. 001BA037 LÄ 001BA038 LÄ Before felling a tree, consider carefully all conditions which may affect the direction of fall, including: The intended direction of the fall. Pull-in occurs when the chain on the bottom of the bar is suddenly stopped when it is pinched, - Stihl 009 | Instruction Manual - Page 20
001BA088 LÄ 001BA040 LÄ 001BA041 LÄ 1 1/2 1 21/2 When felling, maintain a distance of at least 21/2 tree lengths from the nearest person. When felling in the vicinity of roads, railways and power lines, etc., take extra precautions. Inform the police, utility company or railway authority before - Stihl 009 | Instruction Manual - Page 21
001BA019 KN 001BA042 LÄ When making the felling notch, use the gunning sight on the shroud and housing to check the required direction of fall: • Position the saw so that the gunning sight points exactly in the direction you want the tree to fall. felling notch - determines the direction of the - Stihl 009 | Instruction Manual - Page 22
larger trees make cuts at both sides of the trunk, • at same height as subsequent felling cut. • Cut to no more than width of guide bar. This is especially important in soft wood in summer - it helps prevent sapwood splintering when the tree falls. 001BA043 LÄ 001BA044 LÄ 001BA045 LÄ •Conventional - Stihl 009 | Instruction Manual - Page 23
careful with partially fallen trees which are poorly supported. When the tree hangs or for some other cut. Avoid repositioning the saw more than necessary. When repositioning for the next cut, keep the guide bar fully engaged in the kerf to keep the felling cut straight. If the saw begins to - Stihl 009 | Instruction Manual - Page 24
cautious and avoid contacting the log or other limbs with the nose of the guide bar. Do not stand on a log while limbing it - you may slip or the log may roll. Start limbing by leaving the lower limbs to support the log off the ground. When underbucking freely hanging limbs, a pinch may result - Stihl 009 | Instruction Manual - Page 25
small logs, place log through "V" - shaped supports on top of a sawhorse. Never permit another person instructions in the appropriate section of your Owner's Manual , especially those in the chapters "Mounting the Bar and Chain", "Maintaining and Sharpening" and "Chain Brake". Use only STIHL - Stihl 009 | Instruction Manual - Page 26
repair work not described in your Owner's Manual. Have such work performed at your STIHL service shop only. Never test the ignition system , bolts and screws except the carburetor adjustment screws after each use. In order for the chain brake on your STIHL chainsaw to properly perform its function - Stihl 009 | Instruction Manual - Page 27
tensioning nut by turning the tensioning screw counterclockwise until the end of its thread is level with the tensioning nut. Locate the slot of the guide bar over the stud bolt and push it at an angle between the clutch drum of the sprocket and the peg of the tensioning nut - Stihl 009 | Instruction Manual - Page 28
8 Starting at the chain sprocket , place the Oilomatic chain on the guide bar so that the cutting edges on the top of the bar point toward the bar nose . Now pull the guide bar forwards until the peg of the tensioning nut engages the lower fixing hole - Stihl 009 | Instruction Manual - Page 29
chain brake - the pan head screw . Chain tension and lubrication are extremely important in respect of the cutting results obtained and the service life of the whole cutting attachment. Chain lubrication must always be checked before you start cutting. Chain tension should be checked frequently - Stihl 009 | Instruction Manual - Page 30
affect elastomers (carburetor diaphragms, oil seals, fuel lines etc.), but magnesium castings as well. This could cause running problems or even the canister before fueling your machine. Gasoline US gal. 1 2 1/2 5 Oil (STIHL 50:1 or equivalent branded TC oils) US fl.oz 2.6 6.4 12.8 In order - Stihl 009 | Instruction Manual - Page 31
lubrication of the chain and guide bar: MIX Change the fuel pick up body every year. Before storing your machine for a long period, drain and clean the fuel tank and run engine until carburetor is dry. Biological chain oil must be resistant to aging (e.g. STIHL Bioplus) since it will otherwise - Stihl 009 | Instruction Manual - Page 32
and move freely. The chain brake is subject to normal wear and tear. It must therefore be checked and serviced regularly by trained personnel (e.g. STIHL dealer) at the following intervals: Full-time professional users: every 3 months Semi-professional users: every 6 months Occasional users - Stihl 009 | Instruction Manual - Page 33
run for a short while at idling speed so that engine heat can be dissipated by flow of cooling air. This protects engine-mounted components (ignition, carburetor) from thermal overload. - Stihl 009 | Instruction Manual - Page 34
Chain brake engaged Top: Center: Bottom: Stop switch away from Choke slide on - cold start Starting throttle position 1 2 125BA013 LA 125BA012 LA 125BA014 LA Before starting your saw, make sure you have a firm foothold and check that the saw chain is not touching the ground or any other - Stihl 009 | Instruction Manual - Page 35
. Do not pull out starter rope more than 70 cm (27.5 in) as it might otherwise break. Do not allow starter grip to snap back. Guide it back slowly so that starter rope can rewind correctly. 6 125BA019 LA 7. Pull starter rope three or four times, then move choke slide away from - Stihl 009 | Instruction Manual - Page 36
the handlebar . 9. The engine is shut down by sliding the stop switch to . 125BA021 LA 125BA020 LA The choke lever is mechanically connected to the carburetor's choke valve. The choke valve is closed when the choke lever is on and open when the choke lever is moved away from . When starting - Stihl 009 | Instruction Manual - Page 37
bar over every time you resharpen or preplace the chain. Regular cleaning of the oil inlet holes and guide bar groove is also important. The bar can be examined for signs of wear at the same time. correctly. If this is not the case, refer to "Troubleshooting on Chain Oiling System". 125BA022 LA - Stihl 009 | Instruction Manual - Page 38
high. If the wear marks on the teeth are very pronounced (about 0.5 mm/0.02 in deep), the sprocket should be replaced. A worn sprocket reduces the service life of the saw chain. The chain sprocket should be replaced as a matter of routine with every second Oilomatic chain. It is best to use - Stihl 009 | Instruction Manual - Page 39
2 125BA024 LA 125BA025 LA If you have checked chain lubrication (see chapter "Guide Bar, Saw Chain and Chain Sprocket") and found that no oil is being delivered the cutting attachment. To do this, remove the chain sprocket cover, guide bar and chain. Thoroughly clean the oil inlet holes as well - Stihl 009 | Instruction Manual - Page 40
, clean loose dirt off the filter cover and the area around it to be sure that no dirt can get into the engine through the carburetor when the cover is removed. 2 Take out the M 4 flat head screw to remove the filter cover and air filter element . 125BA027 LA The intake air - Stihl 009 | Instruction Manual - Page 41
Exhaust emissions are controlled by the design of the fundamental engine parameters and components (e.g. carburetion, ignition, timing and valve or port timing) without the addition of any major hardware. It is usually necessary to change the setting of the idle speed adjusting screw after every - Stihl 009 | Instruction Manual - Page 42
range. Rectify problems which have caused fouling of spark plug: Incorrect carburetor setting, too on the insulator nose which may result in trouble in operation. If engine is down on power and burn injury, use only spark plugs authorized by STIHL (see "Specifications"). Always press spark plug boot - Stihl 009 | Instruction Manual - Page 43
back toward front handle) and then remove the chain sprocket cover, guide bar and chain. Top: Center: Bottom: Locking screw in position cracks. If any damage is found, replace the parts concerned. Only original STIHL chain sprockets may be installed. Reverse the above sequence to refit the parts. - Stihl 009 | Instruction Manual - Page 44
689BA020 KN 689BA021 KN Maintaining and Sharpening Saw Chain Correctly sharpened chain A properly sharpened chain slices through wood effortlessly and requires very little feed pressure. Do not work with a dull or damaged chain as it will increase the physical effort required, produce - Stihl 009 | Instruction Manual - Page 45
: Use a file holder* A file holder must be used for manual resharpening of Super chain. The correct filing angle is marked on the the filing and side plate angles, depth gauge setting and cutter length. Also cleans the guide bar groove and oil inlet hole. File correctly : If you use a file holder, - Stihl 009 | Instruction Manual - Page 46
: Hold the file horizontally for all chain types (at right angle to side of guide bar) and file according to the angles marked on the filing tool. : Avoid the chain by immersing it in an oil bath. Before long out-of-service period Clean the chain with a brush and immerse it in an oil bath. 44 - Stihl 009 | Instruction Manual - Page 47
Sharpening Tools (special accessories) Chain pitch Round file Ø Round file Inch 1/4 3/8 PMN 3/8 P 0.325 3/8 0.404 (mm) mm (inch) (6,35) 4,0 (9,32) 4,0 (9,32) 4,0 (8,25) 4,8 (9,32) 5,2 (10,26) 5,5 (5/32) (5/32) (5/32) (3/16) (13/64) (7/32) Part No. 5605 772 4006 5605 772 4006 5605 772 4006 - Stihl 009 | Instruction Manual - Page 48
Chain lubrication Saw chain Guide bar Chain sprocket Air filter Cooling inlets Cylinder Carburetor Spark plug All accessible screws chain must not turn Readjust idle Replace Retighten Inspect Have replaced by STIHL dealer Inspect Inspect spark arrestor screen Clean or replace spark arrestor screen - Stihl 009 | Instruction Manual - Page 49
Carburetor: Compliance Label indicates the number All position diaphragm carburetor Chain lubrication: STIHL single cylinder, two-stroke engine Fully automatic oil pump 009 Displacement: 36.6 cm3 009 L Oil publication of this Manual, ask your STIHL dealer for the latest STIHL recommendations. In - Stihl 009 | Instruction Manual - Page 50
of the parts. Model Machine number Guide bar part number Chain part number Sprocket part number Warranty claims following repairs can be accepted only if the repair has been performed by an authorized STIHL Service Shop using original STIHL spare parts. Original STIHL parts can be identified by the - Stihl 009 | Instruction Manual - Page 51
control system includes parts such as the carburetor and the ignition system. Also included may maintenance listed in your owner's manual. STIHL Incorporated recommends that you retain all off-road equipment engine to a STIHL service center as soon as a problem exists. The warranty repairs will be - Stihl 009 | Instruction Manual - Page 52
system (ignition module) Catalytic converter (if applicable) Fasteners Bring the product to any authorized STIHL servicing dealer and present the signed warranty card. The maintenance instructions in this manual are based on the application of the recommended 2-stroke fuel-oil mixture (see also - Stihl 009 | Instruction Manual - Page 53
! WARNING! The engine exhaust from this product contains chemicals known to the State of California to cause cancer, birth defects or other reproductive harm. 0458 125 3021 englisch / English USA / CARB / EPA
-
 1
1 -
 2
2 -
 3
3 -
 4
4 -
 5
5 -
 6
6 -
 7
7 -
8
-
9
-
10
-
11
-
12
-
13
-
14
-
15
-
16
-
17
-
18
-
19
-
20
-
21
-
22
-
23
-
24
-
25
-
26
-
27
-
28
-
29
-
30
-
31
-
32
-
33
-
34
-
35
-
36
-
37
-
38
-
39
-
40
-
41
-
42
-
43
-
44
-
45
-
46
-
47
-
48
-
49
-
50
-
51
-
52
-
53
 |
 |
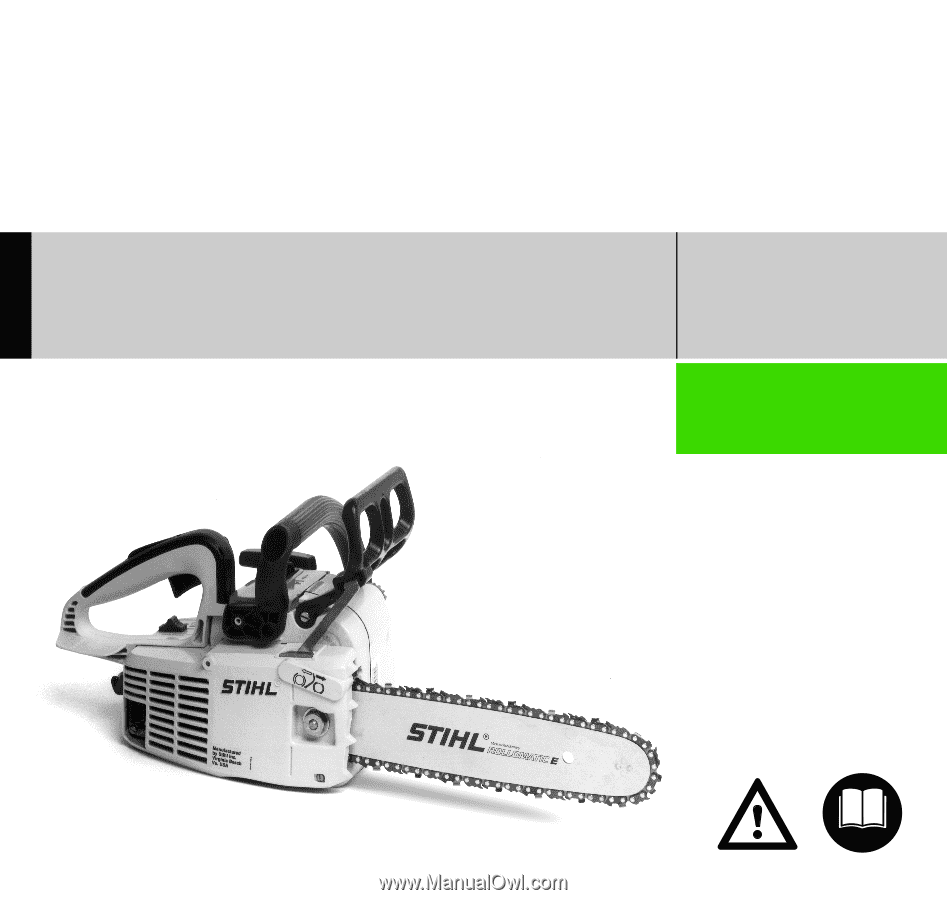
Instruction Manual
Warning!
To reduce the risk of kickback injury use
STIHL reduced kickback bar and STIHL PM 1
(3/8" Picco), RM 2 (0.325") or PM 2 (3/8")
chain depending on sprocket pitch or other
available low kickback components.
Read and follow all safety precautions in
Instruction Manual – improper use can cause
serious or fatal injury.
STIH)
STIHL 009
Occasional User Saw