Sub-Zero IC-30FI Integrated Installation Guide - Page 6
Preparation, Anti-Tip Bracket
 |
View all Sub-Zero IC-30FI manuals
Add to My Manuals
Save this manual to your list of manuals |
Page 6 highlights
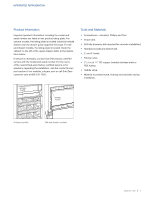
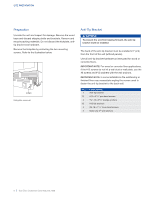
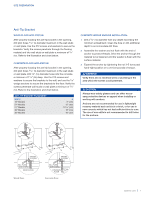
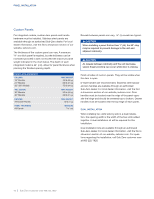
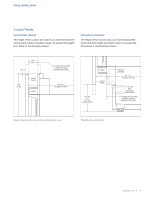
SITE PREPARATION Preparation Uncrate the unit and inspect for damage. Remove the wood base and discard shipping bolts and brackets. Remove and recycle packing materials. Do not discard the kickplate, antitip bracket and hardware. Remove the kickplate by extracting the two mounting screws. Refer to the illustration below. SCREW Kickplate removal. Anti-Tip Bracket WARNING To prevent the unit from tipping forward, the anti-tip bracket must be installed. The back of the anti-tip bracket must be installed 24" (610) from the front of the unit (without panels). Use all anti-tip bracket hardware as instructed for wood or concrete floors. IMPORTANT NOTE: For wood or concrete floor applications, if the #12 screws do not hit a wall stud or wall plate, use the #8 screws and #12 washers with the wall anchors. IMPORTANT NOTE: In some installations the subflooring or finished floor may necessitate angling the screws used to fasten the anti-tip bracket to the back wall. ANTI-TIP HARDWARE 1 Anti-tip bracket 12 #12 x 21/2" pan head screws 4 3/8"-16 x 33/4" wedge anchors 12 #12 flat washers 4 #8-18 x 11/4" truss head screws 4 Nylon Zip-it® wall anchors 6 | Sub-Zero Customer Care 800.222.7820
-
 1
1 -
 2
2 -
 3
3 -
 4
4 -
 5
5 -
 6
6 -
 7
7 -
 8
8 -
 9
9 -
 10
10 -
 11
11 -
 12
12 -
13
-
14
-
15
-
16
-
17
-
18
-
19
-
20
-
21
-
22
-
23
-
24
-
25
-
26
-
27
-
28
-
29
-
30
-
31
-
32
-
33
-
34
-
35
-
36
-
37
-
38
-
39
-
40
-
41
-
42
-
43
-
44
 |
 |
