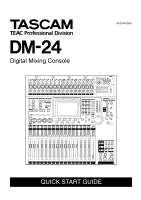
TASCAM DM-24 Installation and Use Quick Start Guide - Page 5
Mic/line inputs
 |
View all TASCAM DM-24 manuals
Add to My Manuals
Save this manual to your list of manuals |
Page 5 highlights
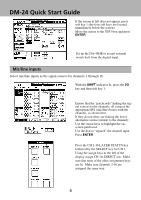
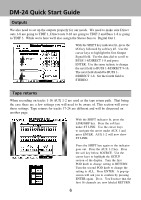
DM-24 Quick Start Guide 3 If the screen at left does not appear, press soft key 1 (the four soft keys are located immediately below the screen). Move the cursor to the TDIF1 box and press ENTER. 4 Set up the DA-45HR to accept external word clock from the digital input. Mic/line inputs Select mic/line inputs as the signal sources for channels 1 through 16. 1 With the SHIFT indicator lit, press the I/O key and then soft key 1. 2 Ensure that the "patchcords" linking the sig- nal sources to the channels, all connect the appropriate M/L (mic/line) boxes with the channels, as shown here. If they do not (they are linking the lower alternative source (return) to the channel): Use the cursor keys to highlight the onscreen patchcord. Use the dial to "repatch" the channel input. Press ENTER. 3 Press the CH 1-16 LAYER STATUS key followed by the SELECT key for CH 1. Using the assign keys to the left of the display assign CH 1to DIRECT out. Make sure that none of the other assignment keys are lit. Make sure channels 2-16 are assigned the same way. 5
-
 1
1 -
 2
2 -
 3
3 -
 4
4 -
 5
5 -
 6
6 -
 7
7 -
 8
8 -
 9
9 -
 10
10 -
 11
11 -
12
-
13
-
14
-
15
-
16
 |
 |
