TEAC LPR500 Owners Manual - Page 30
REC OFF Timer
 |
View all TEAC LPR500 manuals
Add to My Manuals
Save this manual to your list of manuals |
Page 30 highlights
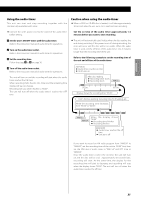
REC OFF Timer 4 Press the RECORD button again. "OFF" and the recording time (minutes/seconds) will be displayed. recording time 5 Press the .m or ,/ button to set the end recording time. This unit can record from the radio or other equipment connected to the unit by setting the end recording time with the REC OFF timer. The REC OFF timer function does not work when the unit records from PHONO or TAPE. 1 Press the PHONO/TAPE/AUX button or the FM/AM button to select the source to be recorded. To record an external source connected to the AUX IN jacks, select AUX. 2 Load a recordable CD-R or CD-RW disc into the unit. Each time the button is pressed, the display will move up (down) by 5 minutes. < The time set will be memorized and will be displayed the next time you will use this function. To change the recording time, follow the steps 1 to 5 . < The recording time can be set up to the maximum recordable time of the disc. When the disc has less than 5 minutes of recordable time, the recording time will be regulated by the remaining time. Example: CD-RW with a recordable time of "74 minutes" Press the skip buttons (.m/,/) to set the time at 5-minute intervals up to 74 minutes. 10:00 70:00 5:00 74:00 6 Press the PLAY/PAUSE button (y/J) to start recording. Make sure "NO TOC" and "CD-R" (or "CD-RW)" indicators light on the display, or the RECORD button will not work. < Before recording, tune in the radio station, set the track number assignment, set the recording level and prepare the external source connected to the AUX IN jacks. 3 Press the RECORD button to set the unit to record pause mode. The red indicator on the RECORD button blinks and J appears on the display. When recording starts, recording time starts decreasing. Recording will stop when the time reaches to "00:00". < When recording is finished, the recording timer will be cancelled. < You can use the PLAY/PAUSE button (y/J) and the TRACK INCREMENT button during the timer recording. < Press the STOP button (H) to stop recording. 30
-
 1
1 -
2
-
3
-
4
-
5
-
6
-
7
-
8
-
9
-
10
-
11
-
12
-
13
-
14
-
15
-
16
-
17
-
18
-
19
-
20
-
21
-
22
-
23
-
24
-
 25
25 -
 26
26 -
 27
27 -
 28
28 -
 29
29 -
 30
30 -
 31
31 -
 32
32 -
 33
33 -
 34
34 -
 35
35 -
36
-
37
-
38
-
39
-
40
-
41
-
42
-
43
-
44
-
45
-
46
-
47
-
48
-
49
-
50
-
51
-
52
-
53
-
54
-
55
-
56
-
57
-
58
-
59
-
60
-
61
-
62
-
63
-
64
 |
 |
