TEAC LPR500 Owners Manual - Page 9
Connection - black
 |
View all TEAC LPR500 manuals
Add to My Manuals
Save this manual to your list of manuals |
Page 9 highlights
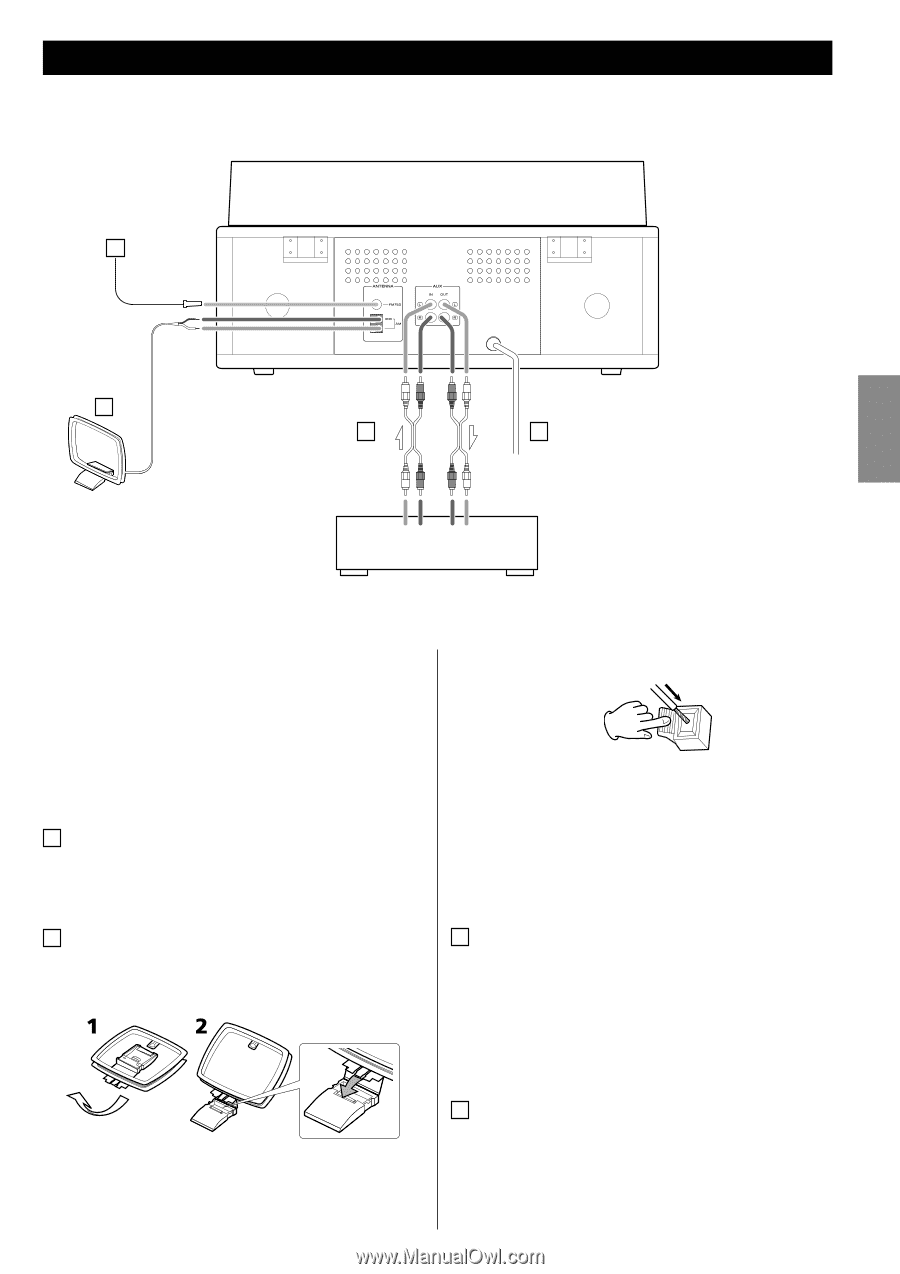
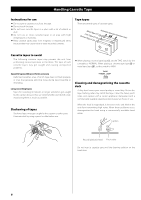
Connection ENGLISH A B White Red White C D White Red White LR RL LINE OUT LINE IN Cassette Tape Deck, etc. CAUTION: < Switch off the power to all equipment before making connections. < Read the instructions of each component you intend to use with this unit. < Be sure to insert each plug securely. To prevent hum and noise, avoid bundling the signal interconnection cables together with the AC power cord. A FM antenna While in FM mode, tune in an FM station and extend the lead to find the best position for the reception. This antenna may need to be repositioned if you move your unit to a new location. B AM loop antenna To stand the loop antenna on a surface, fix the claw to the slot in the antenna base. Connect the loop antenna's wires to the AM antenna terminals. < Make sure to connect the black wire to the GND terminal. Place the antenna on a shelf or hang it on a window frame, etc., in the direction which gives the best reception. Keep all other wires such as power cords, speaker wires or interconnect wires as far away as possible from the antenna. C AUX IN/OUT jacks Analog 2-channel audio signal is input or output from these jacks. Connect these jacks to a CD player, cassette tape deck, etc. using attached RCA cables. Make sure to connect: white plug q white jack (L: left channel) red plug q red jack (R: right channel) D AC Power Cord Plug this AC power cord into an AC wall socket. 9
-
 1
1 -
2
-
3
-
 4
4 -
 5
5 -
 6
6 -
 7
7 -
 8
8 -
 9
9 -
 10
10 -
 11
11 -
 12
12 -
 13
13 -
 14
14 -
15
-
16
-
17
-
18
-
19
-
20
-
21
-
22
-
23
-
24
-
25
-
26
-
27
-
28
-
29
-
30
-
31
-
32
-
33
-
34
-
35
-
36
-
37
-
38
-
39
-
40
-
41
-
42
-
43
-
44
-
45
-
46
-
47
-
48
-
49
-
50
-
51
-
52
-
53
-
54
-
55
-
56
-
57
-
58
-
59
-
60
-
61
-
62
-
63
-
64
 |
 |