TEAC TA-1VP TA-1VP owners manual - Page 26
Microphone Modeler Module
 |
View all TEAC TA-1VP manuals
Add to My Manuals
Save this manual to your list of manuals |
Page 26 highlights
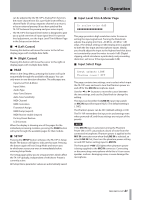
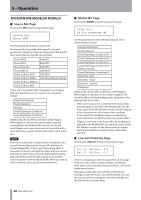
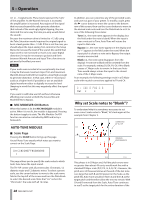
5 - Operation MICROPHONE MODELER MODULE ªª Source Mic Page Pressing the SRC button brings up this page: Source Mic: Shure SM57 Use the Data Knob to select a source mic. The Source Mic list includes both specific mics and generic mic categories. If you are using one of the specific mics, select that mic. Specific mics include: Shure SM58 Rode NT1 Shure SM57 Rode NT2 Shure Beta 58a Rode NT3 Shure KSM 32 CAD M177 Audio Technica 3035 CAD E200 Audio Technica ATM31 CAD E350 (default setting) Audio Technica ATM41a Audio Technica 4050 If your mic is not listed, select the generic mic category that best describes your mic. Generic mic categories include: Hand-held Dynamic Studio Dynamic Wireless Small Diaphragm Condenser Large Diaphragm Condenser Additionally, the list offers a selection called "Bypass." When Bypass is selected, the source signal is passed unmodified to the Modeled Mic section. You should select Bypass when your source was not recorded with a microphone (e.g., guitar via direct box, direct synth input, etc.). NOTE Even if your audio was recorded with a microphone, you can still choose Bypass as the Source Mic and any mic as the Modeled Mic. In that case, the resulting effect is equivalent to having recorded the audio with your actual physical mic (which you, of course, did) and then having played back that track through a good set of speakers and rerecorded it with the Modeled Mic. What you end up with is a hybrid of your actual and modeled mic. ªª Model Mic Page Pressing the MODEL button brings up this page: Model Mic: Lg Dia condenser #1 Use the Data Knob to select the desired type of mic model. Models include: Hand-held Dynamic Studio Dynamic Small Diaphragm Condenser #1 Small Diaphragm Condenser #2 Large Diaphragm Condenser #1 Large Diaphragm Condenser #2 (default setting) Large Diaphragm Condenser #3 Drum Mic - Kick Drum Mic - Snare Drum Mic - Cymbal Telephone Additionally, the list offers a selection called "Bypass." When Bypass is selected, no mic model is applied. The net sonic effect of selecting Bypass here depends on the setting of the Source Mic: •• If the correct source mic is selected in the Source Mic list and Bypass is selected in the Modeled Mic list, the final output of the Mic Modeler module will be stripped of the characteristics of the source mic, resulting in the signal that would have been recorded by an instrumentation microphone with no proximity effect. •• If Bypass is selected in the Source Mic list and Bypass is selected in the Modeled Mic list, the final output of the Mic Modeler module will be identical to the original input signal (with the exception of any added tube warmth). ªª Low Cut/Proximity Page Pressing the LOW CUT button brings up this page: Src LC ON Prox 4.5 Mdl LC ON Prox 6.3 (There's a lot going on with the parameters on this page and some of it is rather counter-intuitive, so if things don't seem to be acting the way you'd expect, refer to the explanations below.) This page contains the Low Cut Filter and Proximity settings for both the Source mic and the Model mic. Use the cursor buttons to navigate to the desired fields and the Data Knob to set the values. 26 TASCAM TA-1VP
-
 1
1 -
2
-
3
-
4
-
5
-
6
-
7
-
8
-
9
-
10
-
11
-
12
-
13
-
14
-
15
-
16
-
17
-
18
-
19
-
20
-
 21
21 -
 22
22 -
 23
23 -
 24
24 -
 25
25 -
 26
26 -
 27
27 -
 28
28 -
 29
29 -
 30
30 -
 31
31 -
32
-
33
-
34
-
35
-
36
-
37
-
38
-
39
-
40
-
41
-
42
-
43
-
44
 |
 |
