TP-Link RE580D RE580D V1 User Guide
TP-Link RE580D Manual
 |
View all TP-Link RE580D manuals
Add to My Manuals
Save this manual to your list of manuals |
TP-Link RE580D manual content summary:
- TP-Link RE580D | RE580D V1 User Guide - Page 1
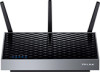
19100112 RE Easy Wi-Fi Extension Flexible Placement AC 1900 Wi-Fi Range Extender RE580D 1910011262 REV 1.0.0 - TP-Link RE580D | RE580D V1 User Guide - Page 2
COPYRIGHT & TRADEMARKS Specifications are subject to change without notice. is a registered trademark of TP-LINK TECHNOLOGIES CO., LTD. Other brands and product names are trademarks or registered trademarks of their respective holders. No part of the specifications may be reproduced - TP-Link RE580D | RE580D V1 User Guide - Page 3
FCC STATEMENT This equipment has been tested and found to comply with the limits for a Class B digital device radiate radio frequency energy and, if not installed and used in accordance with the instructions, may cause harmful interference to radio communications. However, there is no guarantee that - TP-Link RE580D | RE580D V1 User Guide - Page 4
2012 Italy None If used outside of own premises, general authorization is required Luxembourg None General authorization required for network and service supply(not for spectrum) Norway Implemented This subsection does not apply for the geographical area within a radius of 20 km from - TP-Link RE580D | RE580D V1 User Guide - Page 5
CAN ICES-3 (B)/NMB-3(B) Radiation Exposure Statement: This equipment complies with IC radiation exposure limits set forth for an uncontrolled environment. This equipment should be installed and operated with minimum distance 20cm between the radiator & your body. Déclaration d'exposition aux - TP-Link RE580D | RE580D V1 User Guide - Page 6
source. ● Don't disassemble the product, or make repairs yourself. You run the risk of electric shock and voiding the limited warranty. If you need service, please contact us. ● Avoid water and wet locations. This product can be used in the following countries: AT BG BY CA CZ DE DK EE - TP-Link RE580D | RE580D V1 User Guide - Page 7
following equipment: Product Description: AC1900 Wi-Fi Range Extender Model No.: RE580D Trademark: TP-LINK We declare under our own with the following standards or other normative documents EN 300 328 V1.8.1 EN 301 893 V1.7.1 EN 301 489-1 V1.9.2:2011 & EN 301 489-17 V2.2.1:2012 EN 55022:2010+ - TP-Link RE580D | RE580D V1 User Guide - Page 8
View the DHCP Client List 21 More Functions 23 Entertainment Adapter 23 Manage the Extender 24 LED Control 24 Firmware Upgrade 25 Backup & Restore 25 Factory Defaults 26 System Log 26 Reboot 27 Logout 27 Appendix 28 Factory Defaults 28 Troubleshooting 29 Specifications 30 Glossary 30 - TP-Link RE580D | RE580D V1 User Guide - Page 9
extender, you can easily configure it with the help of this guide. Before installing the extender, please look through this guide to get the full information of the RE580D AC1900 Wi-Fi Range Extender. Support protected Access (WPA2-PSK, WPA-PSK), the RE580D AC1900 Wi-Fi Range Extender delivers - TP-Link RE580D | RE580D V1 User Guide - Page 10
Main Features Complies with IEEE 802.11ac Provides multiple encryption security Types including: 64/128-bit WEP and WPA-PSK/WPA2-PSK Supports Built-in DHCP server Supports Firmware Upgrade Supports Web-based Management Appearance LEDs Ports Buttons Introduction 2 - TP-Link RE580D | RE580D V1 User Guide - Page 11
Ethernet port is not connected. (Range Extender/WPS) Button: If your Wireless router supports WPS or QSS function, you can press the WPS or QSS button and then press the RE button to establish a secure connection between the Wireless router and the extender. Reset Button: This button is used - TP-Link RE580D | RE580D V1 User Guide - Page 12
2 Connect the Extender to the Internet This chapter covers the following topics: Before You Begin Basic Requirements Quick Setup Before You Begin Please read this guide carefully before installing and using the device. The operating distance range of your wireless connection can vary - TP-Link RE580D | RE580D V1 User Guide - Page 13
Netscape Navigator 6.0 or above. Operating temperature of the extender should be 0℃~40℃ (32℉ ~104℉). Operating humidity of the extender should be 10%~90%RH (Noncondensing). Quick Setup Using WPS (Wi-Fi Protected Setup) Your router should support WPS. Otherwise, please use Using your web browser - TP-Link RE580D | RE580D V1 User Guide - Page 14
refer to the router manufacturer's user guide. 2) Immediately press the RE button on your extender. The LED should change from flashing disable the WPS function by default, if the WPS method fails, please refer to Using your Web Browser. 3) If you are connecting the extender to a dual-band router - TP-Link RE580D | RE580D V1 User Guide - Page 15
Connecting via Ethernet Cable 1) Disable the Wi-Fi on your computer. 2) Connect the extender to your computer via an Ethernet cable. 3 Login Launch a web browser and type http://tplinkrepeater.net into the URL field and use admin (all lowercase) for both Username and Password to log in. Connect the - TP-Link RE580D | RE580D V1 User Guide - Page 16
4 Configure 1) Create a new username and password to log in the web management page, then click Confirm. 2) Select your region,then click Next. Per FCC regulations, all Wi-Fi products marketed in the U.S. are fixed to the U.S. region. Connect the Extender to the Internet 8 - TP-Link RE580D | RE580D V1 User Guide - Page 17
3) Select your router's 2.4GHz host network and enter the password, then click Next. 4) Select your router's 5GHz host network and enter the password, then click Next. If your router does not support 5GHz wireless network, please click Skip to continue. Connect the Extender to the Internet 9 - TP-Link RE580D | RE580D V1 User Guide - Page 18
5) Either keep the same SSIDs as your host network or create new names for the extended networks, then click Next. 6) Verify your wireless settings and click Finish. The corresponding LEDs (2.4GHz and 5GHz) should turn on and stay solid. Connect the Extender to the Internet 10 - TP-Link RE580D | RE580D V1 User Guide - Page 19
zone. Wait until the LED is lit with a solid blue. If not, relocate the extender closer to the router to achieve a good (or better) signal quality. Enjoy! Both extended networks share the same Wi-Fi password as your main network, but may have different wireless network names if you customize the - TP-Link RE580D | RE580D V1 User Guide - Page 20
connection in the Status webpage. ● The normal status. This chapter covers the following topics: View the Extender's Current Status View the Information about the Host Network, the Extender and the Clients ● The extender is failed to connect to the wireless network of your router. ● The - TP-Link RE580D | RE580D V1 User Guide - Page 21
for the icons of 2.4GHz/5GHz wireless status: Name Instructions The wireless is on and encrypted. The wireless is on and unencrypted. Router:The wireless is off, or the connection is failed. / Extender:The wireless is off. / The icons are selected. View the Information about the Host - TP-Link RE580D | RE580D V1 User Guide - Page 22
and Security Settings This chapter covers the following topics: Extend another Network Extender Settings Manage the Extender's Wi-Fi Security Settings Change the Extender's IP Address DHCP Server Extend another Network If you want to extend another network, you can refer to the following - TP-Link RE580D | RE580D V1 User Guide - Page 23
host network is encrypted, enter the password in the box of the host wireless security. If the network you want to extend is on but not shown in again. You can also enter the information of the network manually you want to extend on the Connect to Network page. Then click Save to connect to - TP-Link RE580D | RE580D V1 User Guide - Page 24
the LED turns solid blue. If not, relocate it closer to the router to achieve a good (or better) signal quality. Enjoy! The extender shares the same wireless network name (SSID) and wireless password as your host network. If you want to change the wireless network name (SSID), please refer to - TP-Link RE580D | RE580D V1 User Guide - Page 25
Account webpage. 2) Create a new username and password as shown in the figure below. 3) Click Save to save the settings. Control the Wireless Devices Access to the Extender The Access Control function controls the devices connected to the extender by the wireless connection. For increased security - TP-Link RE580D | RE580D V1 User Guide - Page 26
at the same time. ● Add the device to the blacklist manually, if the device is not in the Online Devices list. Click Mode Only the devices in the Whitelist are allowed to connect to the extender. 1) Launch a web browser and type in http://tplinkrepeater.net, then go to Settings->Wireless-> Access - TP-Link RE580D | RE580D V1 User Guide - Page 27
/Whitelist 1) Launch a web browser and type in http://tplinkrepeater.net, then go to Settings->Wireless-> Access Control webpage. 2) You can modify or remove the devices in the Blacklist or Whitelist. ● Modify to remove them at the same time. Manage the Extended Network and Security Settings 19 - TP-Link RE580D | RE580D V1 User Guide - Page 28
IP address and gateway manually. IP Address: Enter the IP address in dotted-decimal notation (192.168.0.254 by default). Subnet: Enter IP Address automatically" mode. Settings ● Set the DHCP Server status to Auto (by default) When the DHCP Server is Auto, the extender automatically detects to - TP-Link RE580D | RE580D V1 User Guide - Page 29
Pool, Default Gateway for the DHCP server and LAN IP address are in the same segmengt as the router. Otherwises, the extender cannot access the Internet on. Otherwise, you have to configure the IP address for each client manually. 1) Launch a web browser and type in http://tplinkrepeater.net, then - TP-Link RE580D | RE580D V1 User Guide - Page 30
. Lease Time: The time duration that the IP address is leased to the DHCP client. Click Refresh to refresh the DHCP Client List. Manage the Extended Network and Security Settings 22 - TP-Link RE580D | RE580D V1 User Guide - Page 31
the following topics: Entertainment Adapter Entertainment Adapter The extender RE580D can be used as a wireless adapter to connect any . After the extender connected to the Internet, you can connect an Ethernetenabled device to the extender using an Ethernet cable. By default, the Ethernet - TP-Link RE580D | RE580D V1 User Guide - Page 32
Firmware Upgrade Backup & Restore Factory Defaults System Log Reboot Logout LED Control LED Control can turn off the LEDs at the specific time. The extender can to turn off the LEDs. ● Night Mode:If the Night Mode box is checked, all the LEDs are off in the setting time. Manage the - TP-Link RE580D | RE580D V1 User Guide - Page 33
.net,then go to Settings->System Tools->Firmware Upgrade webpage. 2) You can view the firmware version and the software version. Search the latest firmware of your extender from the Support page at www.tplink.com. Then download the latest firmware upgrade file to your computer. 3) Click Browse to - TP-Link RE580D | RE580D V1 User Guide - Page 34
Factory Restore to reset your extender to its factory default settings in the figure below. Factory Restore will erase all settings that you have configured for the extender. To re-login to the extender's management page, use the default admin for both username and password. System Log 1) Launch - TP-Link RE580D | RE580D V1 User Guide - Page 35
on your computer. Reboot 1) Launch a web browser and type in http://tplinkrepeater.net. 2) Click Reboot on the top right corner to reboot the extender. Logout 1) Launch a web browser and type in http://tplinkrepeater.net. 2) Click Logout on the top right corner to log out the management webpage - TP-Link RE580D | RE580D V1 User Guide - Page 36
Troubleshooting Specifications Glossary Factory Defaults Name Status Common Default Settings Username Password IP Address Subnet Mask Domain Wireless admin admin 192.168.0.254 255.255.255.0 http://tplinkrepeater.net SSID Wireless Security 2.4GHz: TP-LINK_Extender_2.4GHz 5GHz: TP - TP-Link RE580D | RE580D V1 User Guide - Page 37
how to do that, please refer to previous T1; ● Use the default username and password: admin, admin; ● Try to reconfigure your extender by following the instructions of this guide. T3. What can I do if I cannot access the web-based configuration page? ● Check to verify all the connections (either - TP-Link RE580D | RE580D V1 User Guide - Page 38
to allow for increased data throughput via spatial multiplexing and increased range by exploiting the spatial diversity, perhaps through coding schemes like Alamouti wireless local area networking (WLAN) products. ● Access Point (Range Extender) - A wireless LAN transceiver or "base Appendix 30 - TP-Link RE580D | RE580D V1 User Guide - Page 39
one or many wireless devices. Access points can also bridge to each other. ● DNS (Domain Name System) - An Internet Service that translates the names of websites benefit of easier administration and use. This is similar to 802.1x support and requires a RADIUS server in order to implement. The Wi-Fi
-
 1
1 -
 2
2 -
 3
3 -
 4
4 -
 5
5 -
 6
6 -
 7
7 -
8
-
9
-
10
-
11
-
12
-
13
-
14
-
15
-
16
-
17
-
18
-
19
-
20
-
21
-
22
-
23
-
24
-
25
-
26
-
27
-
28
-
29
-
30
-
31
-
32
-
33
-
34
-
35
-
36
-
37
-
38
-
39
 |
 |

1910011262
REV 1.0.0
Easy Wi-Fi Extension
Flexible Placement
AC
1900
Wi-Fi Range Extender
RE580D