TP-Link RE580D RE580D V1 User Guide - Page 11
LED Explanation, Button Explanation - range extender
 |
View all TP-Link RE580D manuals
Add to My Manuals
Save this manual to your list of manuals |
Page 11 highlights
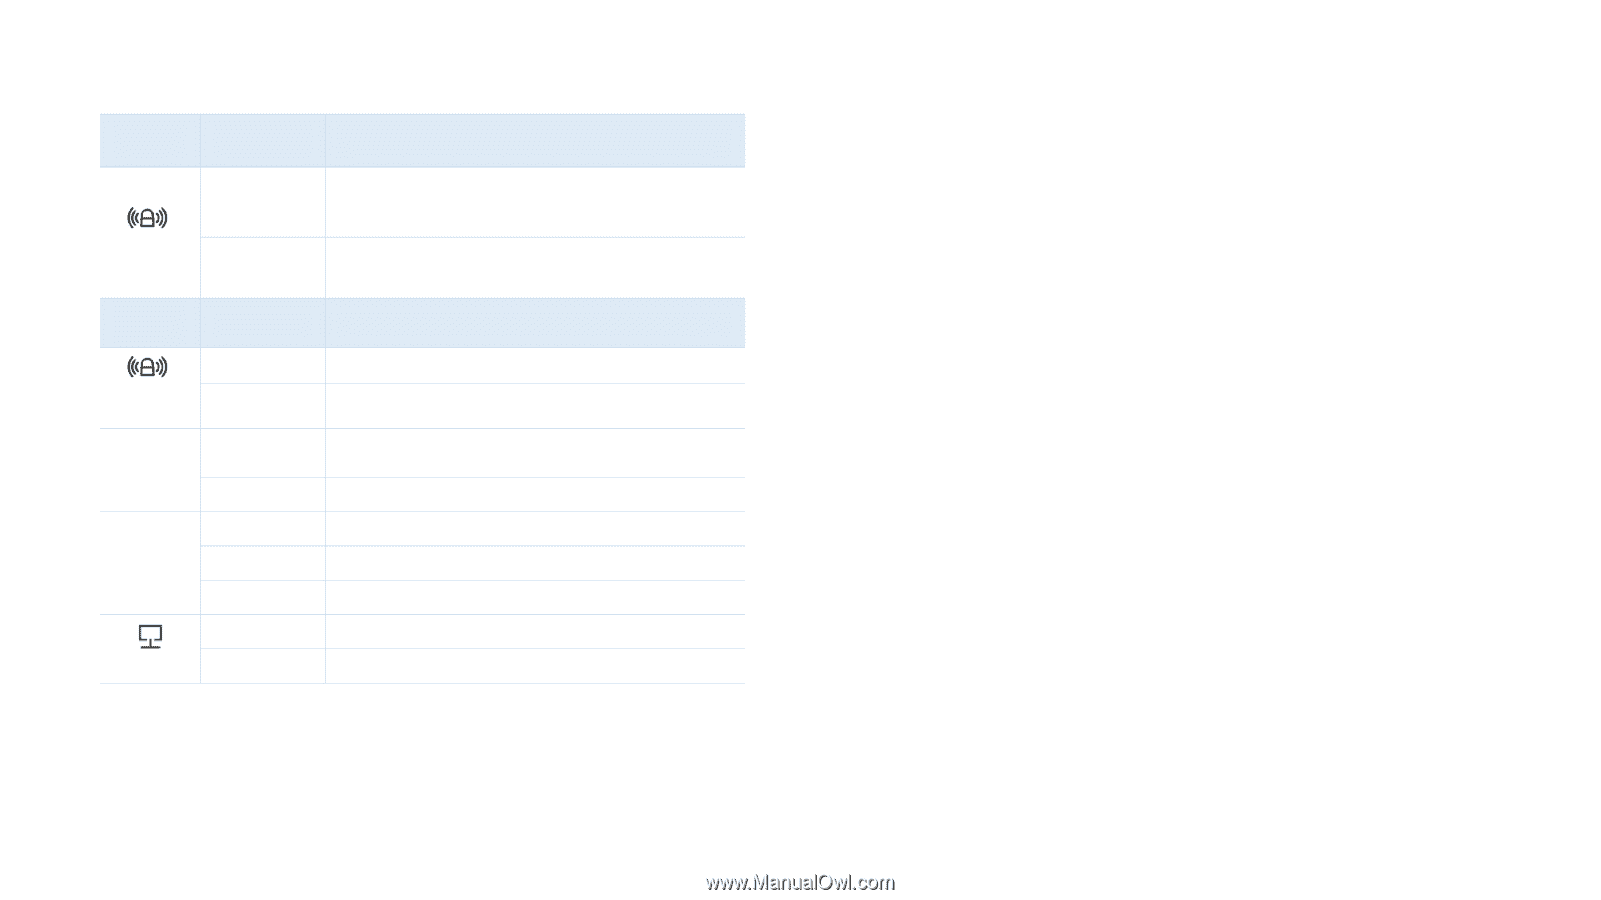
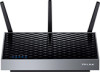
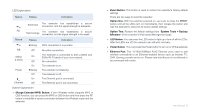
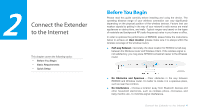
LED Explanation Name Status Indication Solid blue The extender has established a secure connection, and the signal strength is adequate. RE Solid orange The extender has established a secure connection, but the signal strength is too weak. Name Status Indication Blinking RE Off 5GHz/ 2.4GHz Power Ethernet On Off On Blinking Off On Off Button Explanation WPS connection is in process. No active connection. The extender is connected to both 2.4GHz and 5GHz Wi-Fi bands of your host network. No connection. The extender is on. The extender is initializing. The extender is off. The Ethernet port is connected. The Ethernet port is not connected. (Range Extender/WPS) Button: If your Wireless router supports WPS or QSS function, you can press the WPS or QSS button and then press the RE button to establish a secure connection between the Wireless router and the extender. Reset Button: This button is used to restore the extender's factory default settings. There are two ways to reset the extender: Option One: With the extender powered on, use a pin to press the RESET button until all the LEDs turn on momentarily, then release the button and wait the extender to reboot to its factory default settings. Option Two: Restore the default settings from "System Tools > Backup &Restore" of the extender's Web-based Management page. LED Button: You can press the LED button to light up or turn off all the LEDs. After the LEDs are off, the extender can still work normally. Power Button:You can press the Power button to turn on or off the extender. Ethernet Port: Five 10/100/1000Mbps RJ45 Ethernet ports used to add wireless connectivity to an Ethernet-enabled device such as Internet TV, DVR, Gaming console and so on. Please note that this port is not allowed to be connected with router. Introduction 3
-
 1
1 -
2
-
3
-
4
-
5
-
 6
6 -
 7
7 -
 8
8 -
 9
9 -
 10
10 -
 11
11 -
 12
12 -
 13
13 -
 14
14 -
 15
15 -
 16
16 -
17
-
18
-
19
-
20
-
21
-
22
-
23
-
24
-
25
-
26
-
27
-
28
-
29
-
30
-
31
-
32
-
33
-
34
-
35
-
36
-
37
-
38
-
39
 |
 |