TP-Link TL-WN353G User Guide - Page 23
TL-WN353G, Step 1, Step 2, Step 3, Step 4, WAP2-PSK authentication, WPA2-PSK, WPA 802.1x
 |
View all TP-Link TL-WN353G manuals
Add to My Manuals
Save this manual to your list of manuals |
Page 23 highlights
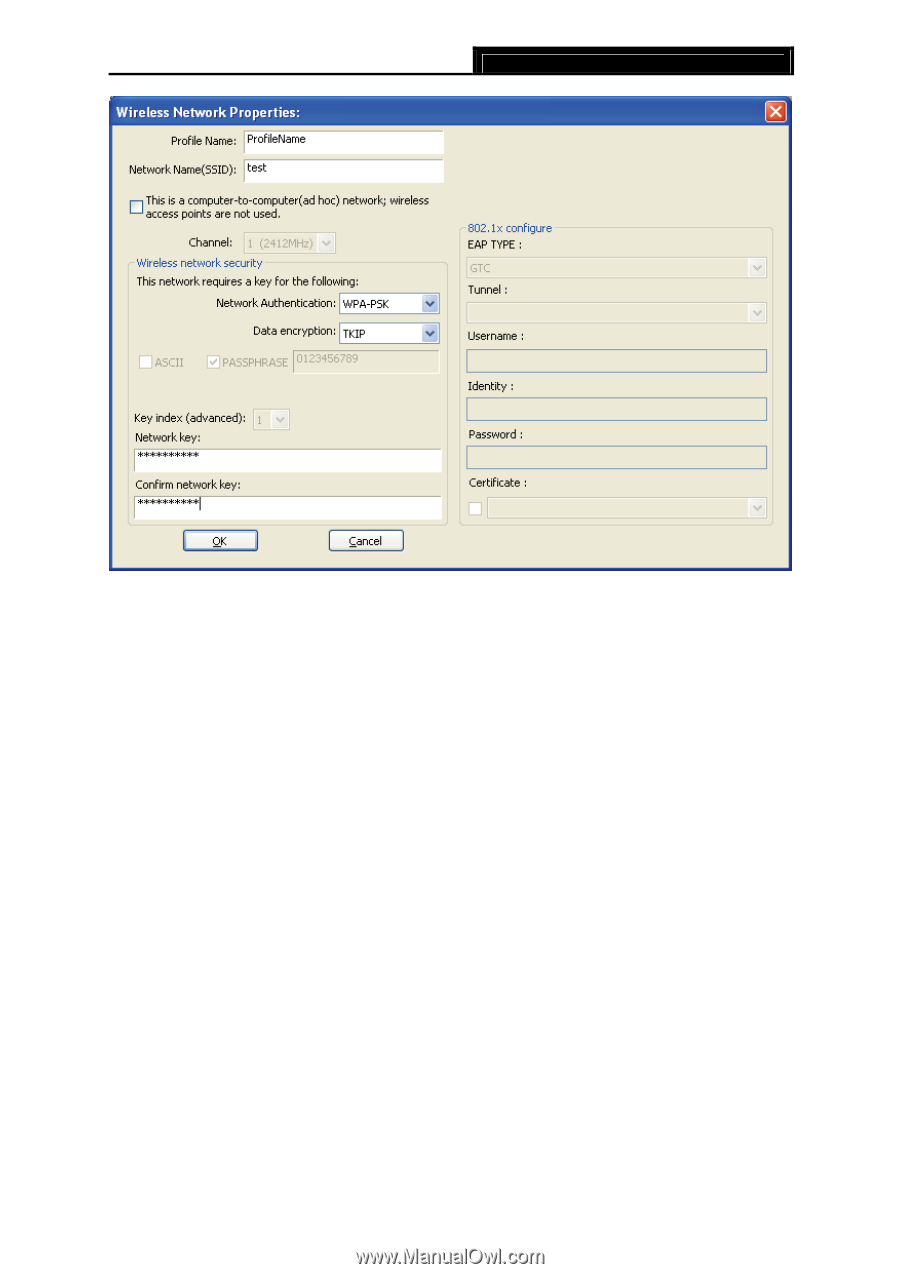
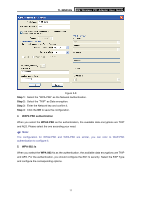
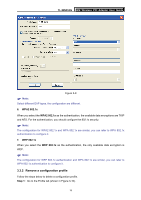
TL-WN353G 54M Wireless PCI Adapter User Guide Figure 3-8 Step 1: Select the "WPA-PSK" as the Network Authentication. Step 2: Select the "TKIP" as Data encryption. Step 3: Enter the Network key and confirm it. Step 4: Click the OK to save the configuration. 4. WAP2-PSK authentication When you select the WPA2-PSK as the authentication, the available data encryptions are TKIP and AES. Please select the one according your need. ) Note: The configuration for WPA2-PSK and WPA-PSK are similar, you can refer to WAP-PSK authentication to configure it. 5. WPA 802.1x When you select the WPA 802.1x as the authentication, the available data encryptions are TKIP and AES. For the authentication, you should configure the 802.1x security. Select the EAP Type and configure the corresponding options. 17
-
 1
1 -
2
-
3
-
4
-
5
-
6
-
7
-
8
-
9
-
10
-
11
-
12
-
13
-
14
-
15
-
16
-
17
-
 18
18 -
 19
19 -
 20
20 -
 21
21 -
 22
22 -
 23
23 -
 24
24 -
 25
25 -
 26
26 -
 27
27 -
 28
28 -
29
-
30
-
31
-
32
-
33
-
34
-
35
-
36
 |
 |