TP-Link TL-WPA8730 KIT TL-WPA8730 KITEU V1 User Guide - Page 32
To automatically synchronize the time, To manually set the date and time
 |
View all TP-Link TL-WPA8730 KIT manuals
Add to My Manuals
Save this manual to your list of manuals |
Page 32 highlights
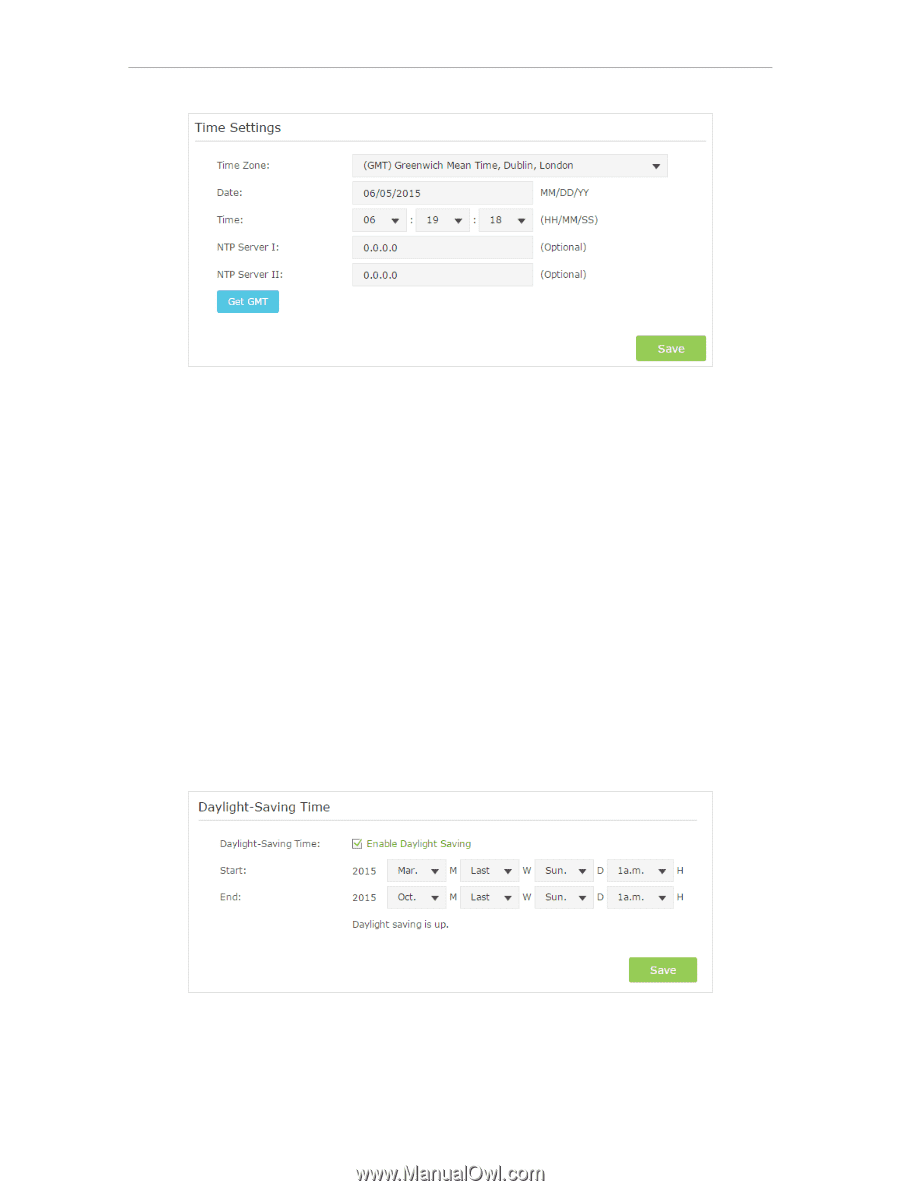
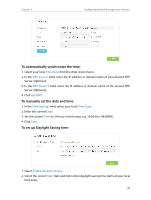
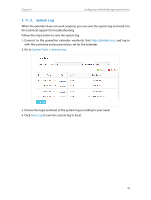
Chapter 3 Configuring via Web Management Interface To automatically synchronize the time: 1. Select your local Time Zone from the drop-down menu. 2. In the NTP Server I field, enter the IP address or domain name of your desired NTP Server. (Optional) 3. In the NTP Server II field, enter the IP address or domain name of the second NTP Server. (Optional) 4. Click Get GMT. To manually set the date and time: 1. In the Time Settings field, select your local Time Zone. 2. Enter the current Date. 3. Set the current Time (In 24-hour clock format, e.g. 16:00:00 is 04:00PM). 4. Click Save. To set up Daylight Saving time: 1. Select Enable Daylight Saving. 2. Select the correct Start date and time when daylight saving time starts at your local time zone. 29
-
 1
1 -
2
-
3
-
4
-
5
-
6
-
7
-
8
-
9
-
10
-
11
-
12
-
13
-
14
-
15
-
16
-
17
-
18
-
19
-
20
-
21
-
22
-
23
-
24
-
25
-
26
-
 27
27 -
 28
28 -
 29
29 -
 30
30 -
 31
31 -
 32
32 -
 33
33 -
 34
34 -
 35
35 -
 36
36 -
 37
37 -
38
-
39
-
40
-
41
-
42
 |
 |