TRENDnet AC3200 User's Guide - Page 5
TRENDnet User, TEW-828DRU, Product Hardware Features - tew 828dru
 |
View all TRENDnet AC3200 manuals
Add to My Manuals
Save this manual to your list of manuals |
Page 5 highlights
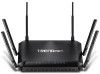
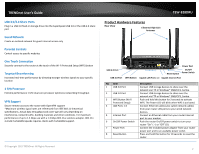
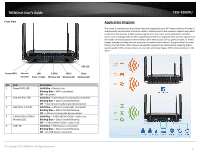
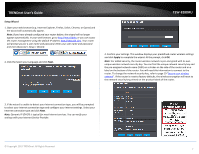
TRENDnet User's Guide USB 3.0/2.0 Share Ports Plug in a USB 3.0 flash or storage drive into the SuperSpeed USB 3.0 or the USB 2.0 share port Guest Network Create an isolated network for guest internet access only Parental Controls Control access to specific websites One Touch Connection Securely connect to the router at the touch of the Wi-Fi Protected Setup (WPS) button Targeted Beamforming Increased real-time performance by directing stronger wireless signals to your specific location 1 GHz Processor Extreme performance 1 GHz dual core processor optimizes networking throughput VPN Support Secure remote access to the router with OpenVPN support *Maximum wireless signal rates are referenced from IEEE 802.11 theoretical specifications. Actual data throughput and cover-age will vary depending on interference, network traffic, building materials and other conditions. For maximum performance of up to 1.3 Gbps use with a 1.3 Gbps 802.11ac wireless adapter. 802.11n 2.4 GHz TurboQAM speeds requires clients with TurboQAM support. © Copyright 2015 TRENDnet. All Rights Reserved. Product Hardware Features Rear View 6 External High Gain Antennas TEW-828DRU USB 3.0 Port USB 2.0 Port WPS Button Reset Button Power Port On/Off Power Switch Gigabit LAN Ports 1-4 Gigabit Internet Port No Item 1 USB 3.0 Port 2 USB 2.0 Port 3 WPS Button (Wi-Fi Protected Setup) 4 LAN Ports 1-4 5 Internet Port 6 On/Off Power Switch 7 Power Port 8 Reset Button Description Connect USB storage devices to share over the network via FTP or Windows® SMB/CIFS, Samba. Connect USB storage devices to share over the network via FTP or Windows® SMB/CIFS, Samba. Push and hold this button for 3 seconds to activate WPS. The Power LED will blink when WPS is activated. Connect Ethernet cables (also called network cables) from your router LAN ports to your wired network devices. Connect an Ethernet cable from your router Internet port to your modem. Push the router On/Off power switch to turn your router "On" ( - ) or "Off" (O). Connect the included power adapter from your router power port and to an available power outlet. Press and hold this button for 10 seconds to reset the router. 2
-
 1
1 -
 2
2 -
 3
3 -
 4
4 -
 5
5 -
 6
6 -
 7
7 -
 8
8 -
 9
9 -
 10
10 -
 11
11 -
12
-
13
-
14
-
15
-
16
-
17
-
18
-
19
-
20
-
21
-
22
-
23
-
24
-
25
-
26
-
27
-
28
-
29
-
30
-
31
-
32
-
33
-
34
-
35
-
36
-
37
-
38
-
39
-
40
-
41
-
42
-
43
-
44
-
45
-
46
-
47
-
48
-
49
-
50
-
51
-
52
-
53
-
54
-
55
-
56
-
57
-
58
-
59
-
60
-
61
-
62
-
63
-
64
-
65
-
66
-
67
-
68
-
69
-
70
-
71
-
72
 |
 |
