Thermador PODM301J Installation Instructions - Page 11
Removing Packaging - model
 |
View all Thermador PODM301J manuals
Add to My Manuals
Save this manual to your list of manuals |
Page 11 highlights
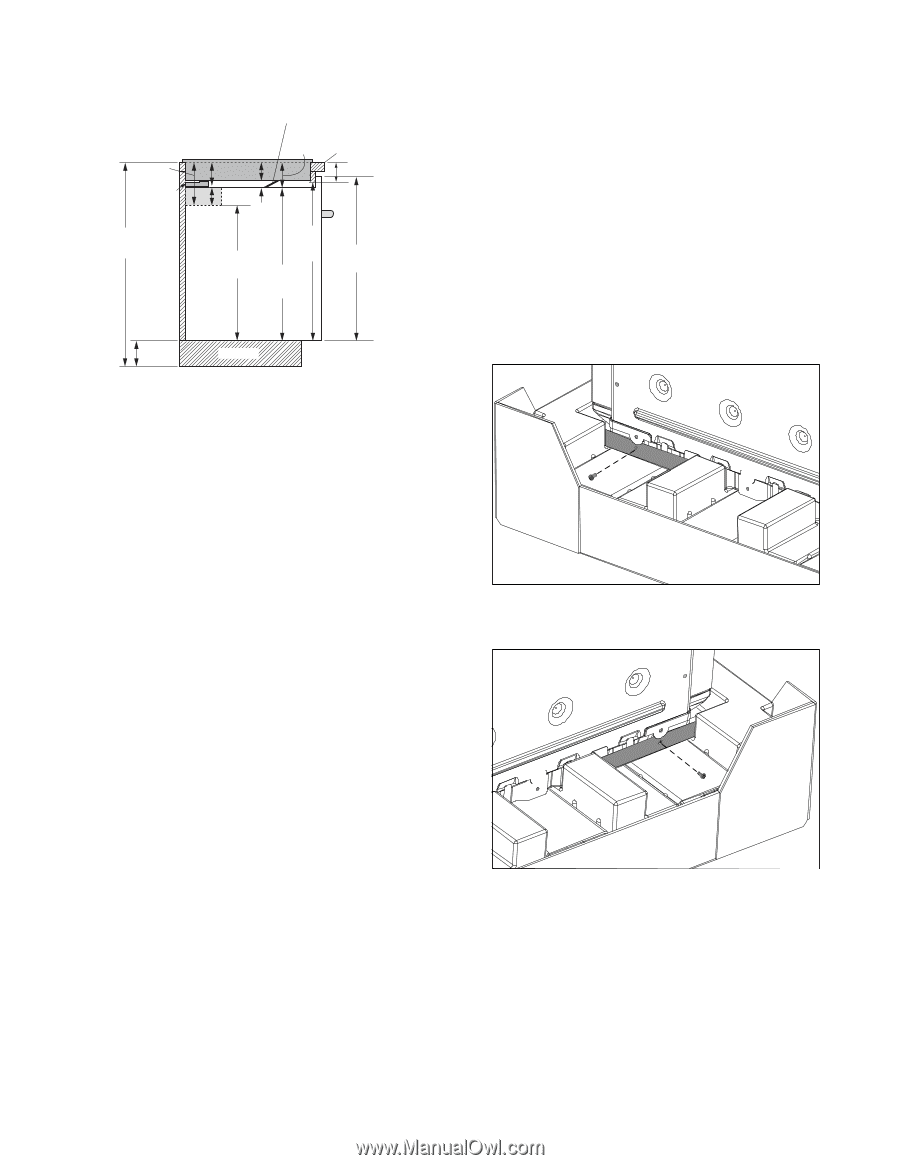
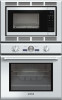
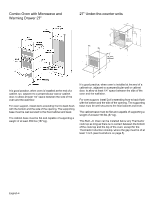
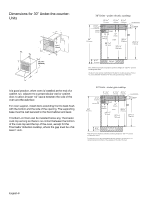
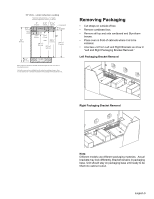
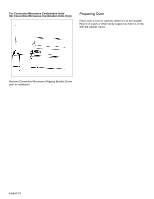
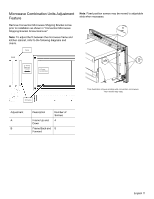
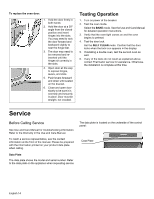
30" Units - under induction cooktop Heat shield: Self positioning - 2 3/8" length, Minimum required air clearance: 1" (26mm) 6 3/4" (172 mm) Fitting / Conduit 36" (914 mm) 4" (102 mm) 3 1/8" 4 3/16" (79mm) (106mm) COOKTOP COUNTERTOP 3 "(76mm) SUMP 2 3/4" (70 mm) 11/16" (27 mm) OVEN 281/4" (718mm) 24 7/16" (621mm) 271/16" (687 mm) 29 1/16" (738 mm) 43/4" (121mm) TOE KICK Note: Dimensions based on standard countertop height (36" with 43/4" toe kick including base plate). The built-in oven can be installed below the induction cooktop as long as there is an air clearance of 1" between the bottom of the cooktop and the top of the oven. Removing Packaging • Cut straps on outside of box. • Remove cardboard box. • Remove all top and side cardboard and Styrofoam braces. • Place oven in front of cabinets where it is to be installed. • Unscrew unit from Left and Right Brackets as show in "Left and Right Packaging Bracket Removal." Left Packaging Bracket Removal Right Packaging Bracket Removal Note: Different models use different packaging materials. Actual brackets may look differently. Bracket remains in packaging base. Unit should stay on packaging base until ready to be lifted into cabinet cutout. English 9
-
 1
1 -
2
-
3
-
4
-
5
-
 6
6 -
 7
7 -
 8
8 -
 9
9 -
 10
10 -
 11
11 -
 12
12 -
 13
13 -
 14
14 -
 15
15 -
 16
16 -
17
-
18
-
19
-
20
-
21
-
22
-
23
-
24
-
25
-
26
-
27
-
28
-
29
-
30
-
31
-
32
-
33
-
34
-
35
-
36
-
37
-
38
-
39
-
40
-
41
-
42
-
43
-
44
-
45
-
46
-
47
-
48
-
49
-
50
-
51
-
52
 |
 |