Thermador PODM301J Installation Instructions - Page 14
Installation - podm301
 |
View all Thermador PODM301J manuals
Add to My Manuals
Save this manual to your list of manuals |
Page 14 highlights
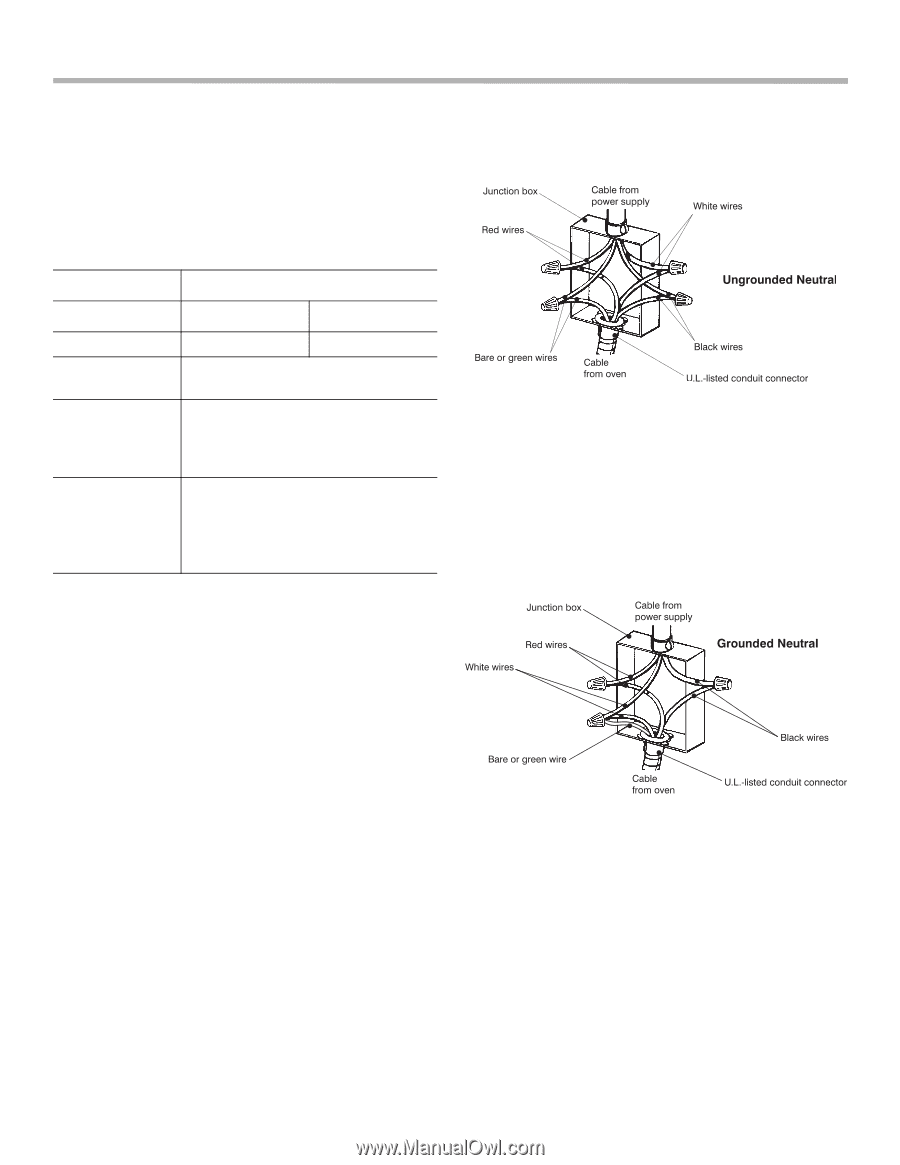
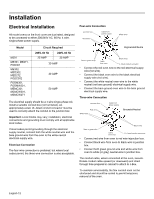
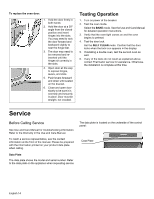
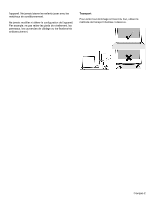
Installation Electrical Installation Four-wire Connection All model ovens on the front cover are dual rated, designed to be connected to either 208/240V AC, 60 Hz, 4 wire, single-phase power supply. Model M301 ME301, ME271, POD301 ME302, MED302, MED272, PODC302 PODM301, PODMW301, MEMC301, MEMCW301, MEMCW271 Circuit Required 208V, 60 Hz 25 AMP 240V, 60 Hz 30 AMP 30 AMP 40 AMP 50 AMP The electrical supply should be a 4-wire single-phase AC. Install a suitable conduit box (not furnished). An appropriately-sized, UL-listed conduit connector must be used to correctly attach the conduit to the junction box. Important: Local Codes may vary; installation, electrical connections and grounding must comply with all applicable local codes. If local codes permit grounding through the electrical supply neutral, connect both the white neutral wire and the bare ground wire from the oven to the white neutral electrical supply wire. Electrical Connection The four-wire connection is preferred, but where local codes permit, the three wire connection is also acceptable. • Connect the red oven wire to the red electrical supply wire (hot wire). • Connect the black oven wire to the black electrical supply wire (hot wire). • Connect the white neutral oven wire to the white neutral (not bare ground) electrical supply wire. • Connect the bare ground oven wire to the bare ground electrical supply wire. Three-wire Connection • Connect red wire from oven to red wire injunction box. • Connect black wire from oven to black wire in junction box. • Connect both green ground wire and white wire from oven to white (or gray) neutral wire in junction box. The conduit cable, where connected at the oven, swivels. Rotate conduit cable upward (or downward) and direct through hole prepared in cabinet to attach to J-Box. To maintain serviceability, the flex conduit must not be shortened and should be routed to permit temporary removal of the oven. English 12
-
 1
1 -
2
-
3
-
4
-
5
-
6
-
7
-
8
-
 9
9 -
 10
10 -
 11
11 -
 12
12 -
 13
13 -
 14
14 -
 15
15 -
 16
16 -
 17
17 -
 18
18 -
 19
19 -
20
-
21
-
22
-
23
-
24
-
25
-
26
-
27
-
28
-
29
-
30
-
31
-
32
-
33
-
34
-
35
-
36
-
37
-
38
-
39
-
40
-
41
-
42
-
43
-
44
-
45
-
46
-
47
-
48
-
49
-
50
-
51
-
52
 |
 |