Thermador PODM301J Installation Instructions - Page 13
Microwave Combination Units Adjustment, Feature
 |
View all Thermador PODM301J manuals
Add to My Manuals
Save this manual to your list of manuals |
Page 13 highlights
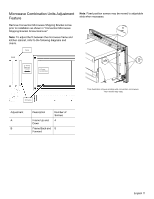
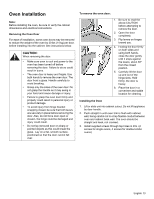
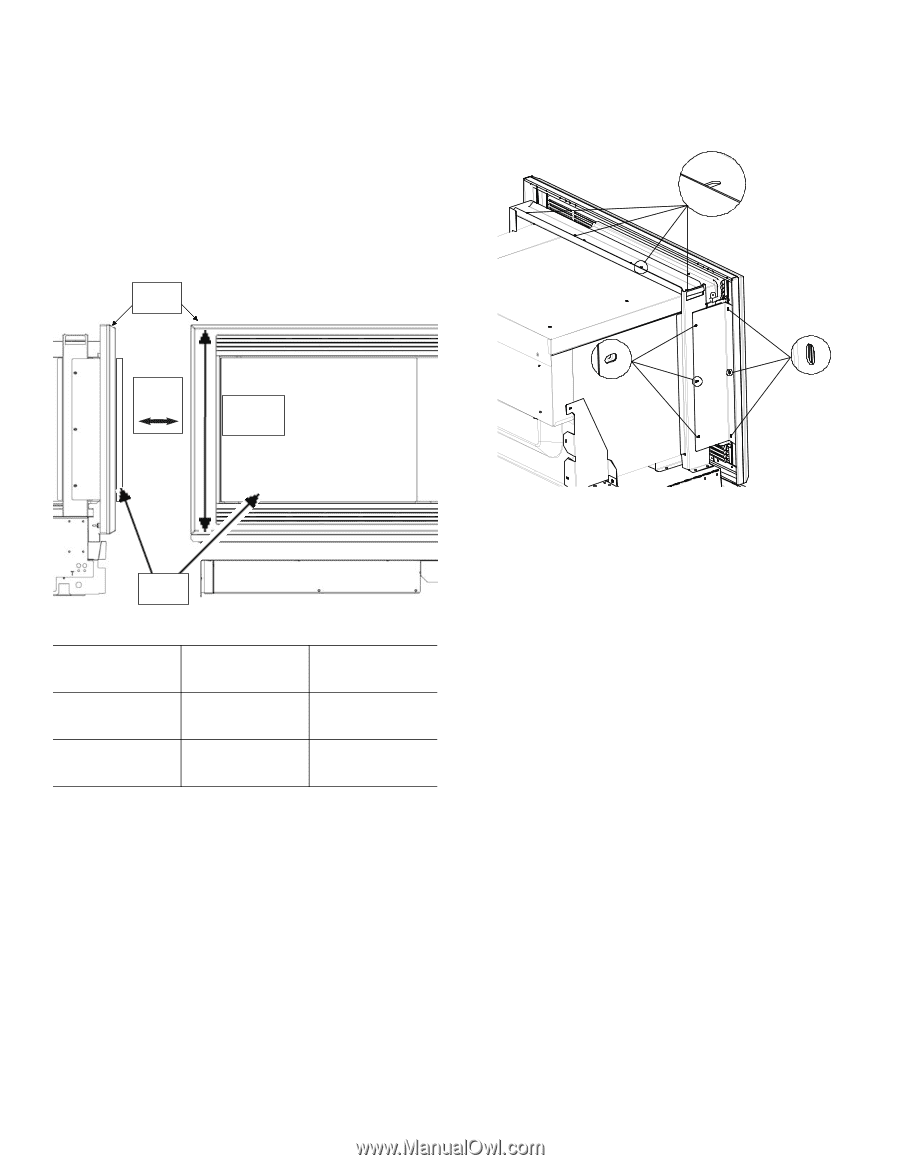
Microwave Combination Units Adjustment Feature Note: Fixed position screws may be moved to adjustable slots when necessary. Remove Convection Microwave Shipping Bracket screw prior to installation as shown in "Convection Microwave B Shipping Bracket Screw Removal." Note: To adjust the fit between the microwave frame and kitchen cabinet, refer to the following diagrams and charts. Frame B: Frame Back and Forward A: Frame Up and Down B A Microwave Adjustment A B Description Frame Up and Down Frame Back and Forward Number of Screws 4 8 This illustration shows models with convection microwave. Your model may vary. English 11
-
 1
1 -
2
-
3
-
4
-
5
-
6
-
7
-
 8
8 -
 9
9 -
 10
10 -
 11
11 -
 12
12 -
 13
13 -
 14
14 -
 15
15 -
 16
16 -
 17
17 -
 18
18 -
19
-
20
-
21
-
22
-
23
-
24
-
25
-
26
-
27
-
28
-
29
-
30
-
31
-
32
-
33
-
34
-
35
-
36
-
37
-
38
-
39
-
40
-
41
-
42
-
43
-
44
-
45
-
46
-
47
-
48
-
49
-
50
-
51
-
52
 |
 |
English 11
Microwave Combination Units Adjustment
Feature
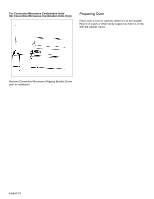
Remove Convection Microwave Shipping Bracket screw
prior to installation as shown in “Convection Microwave
Shipping Bracket Screw Removal.”
Note
: To adjust the fit between the microwave frame and
kitchen cabinet, refer to the following diagrams and
charts.
Note
: Fixed position screws may be moved to adjustable
slots when necessary.
Adjustment
Description
Number of
Screws
A
Frame Up and
Down
4
B
Frame Back and
Forward
8
A: Frame
Up and Down
Microwave
B: Frame
Back and
Forward
Frame
A
B
B
This illustration shows models with convection microwave.
Your model may vary.