Toshiba A350 PSALWC-01300Q Users Manual Canada; English - Page 73
Battery, DC IN, indicators on the front of the computer should glow.
 |
View all Toshiba A350 PSALWC-01300Q manuals
Add to My Manuals
Save this manual to your list of manuals |
Page 73 highlights
1. Connect the power cord to the AC adaptor. Getting Started Figure 3-1 Connecting the power cord to the AC adaptor (2-pin plug) Figure 3-2 Connecting the power cord to the AC adaptor (3-pin plug) Either a 2-pin or 3-pin adaptor/cord will be included with the computer depending on the model. 2. Connect the AC adaptor's DC output plug to the DC IN 19V jack on the right side of the computer. DC IN 19V Jack Figure 3-3 Connecting the adaptor to the computer 3. Plug the power cord into a live wall outlet - the Battery and DC IN indicators on the front of the computer should glow. User's Manual 3-4
-
 1
1 -
2
-
3
-
4
-
5
-
6
-
7
-
8
-
9
-
10
-
11
-
12
-
13
-
14
-
15
-
16
-
17
-
18
-
19
-
20
-
21
-
22
-
23
-
24
-
25
-
26
-
27
-
28
-
29
-
30
-
31
-
32
-
33
-
34
-
35
-
36
-
37
-
38
-
39
-
40
-
41
-
42
-
43
-
44
-
45
-
46
-
47
-
48
-
49
-
50
-
51
-
52
-
53
-
54
-
55
-
56
-
57
-
58
-
59
-
60
-
61
-
62
-
63
-
64
-
65
-
66
-
67
-
 68
68 -
 69
69 -
 70
70 -
 71
71 -
 72
72 -
 73
73 -
 74
74 -
 75
75 -
 76
76 -
 77
77 -
 78
78 -
79
-
80
-
81
-
82
-
83
-
84
-
85
-
86
-
87
-
88
-
89
-
90
-
91
-
92
-
93
-
94
-
95
-
96
-
97
-
98
-
99
-
100
-
101
-
102
-
103
-
104
-
105
-
106
-
107
-
108
-
109
-
110
-
111
-
112
-
113
-
114
-
115
-
116
-
117
-
118
-
119
-
120
-
121
-
122
-
123
-
124
-
125
-
126
-
127
-
128
-
129
-
130
-
131
-
132
-
133
-
134
-
135
-
136
-
137
-
138
-
139
-
140
-
141
-
142
-
143
-
144
-
145
-
146
-
147
-
148
-
149
-
150
-
151
-
152
-
153
-
154
-
155
-
156
-
157
-
158
-
159
-
160
-
161
-
162
-
163
-
164
-
165
-
166
-
167
-
168
-
169
-
170
-
171
-
172
-
173
-
174
-
175
-
176
-
177
-
178
-
179
-
180
-
181
-
182
-
183
-
184
-
185
-
186
-
187
-
188
-
189
-
190
-
191
-
192
-
193
-
194
-
195
-
196
-
197
-
198
-
199
-
200
-
201
-
202
-
203
-
204
-
205
-
206
-
207
-
208
-
209
-
210
-
211
-
212
-
213
-
214
-
215
-
216
-
217
-
218
-
219
-
220
-
221
-
222
-
223
-
224
-
225
-
226
-
227
-
228
-
229
-
230
-
231
-
232
-
233
-
234
-
235
-
236
-
237
-
238
-
239
 |
 |
User’s Manual
3-4
Getting Started
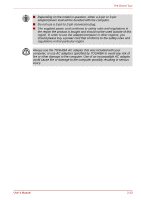
1.
Connect the power cord to the AC adaptor.
Figure 3-1 Connecting the power cord to the AC adaptor (2-pin plug)
Figure 3-2 Connecting the power cord to the AC adaptor (3-pin plug)
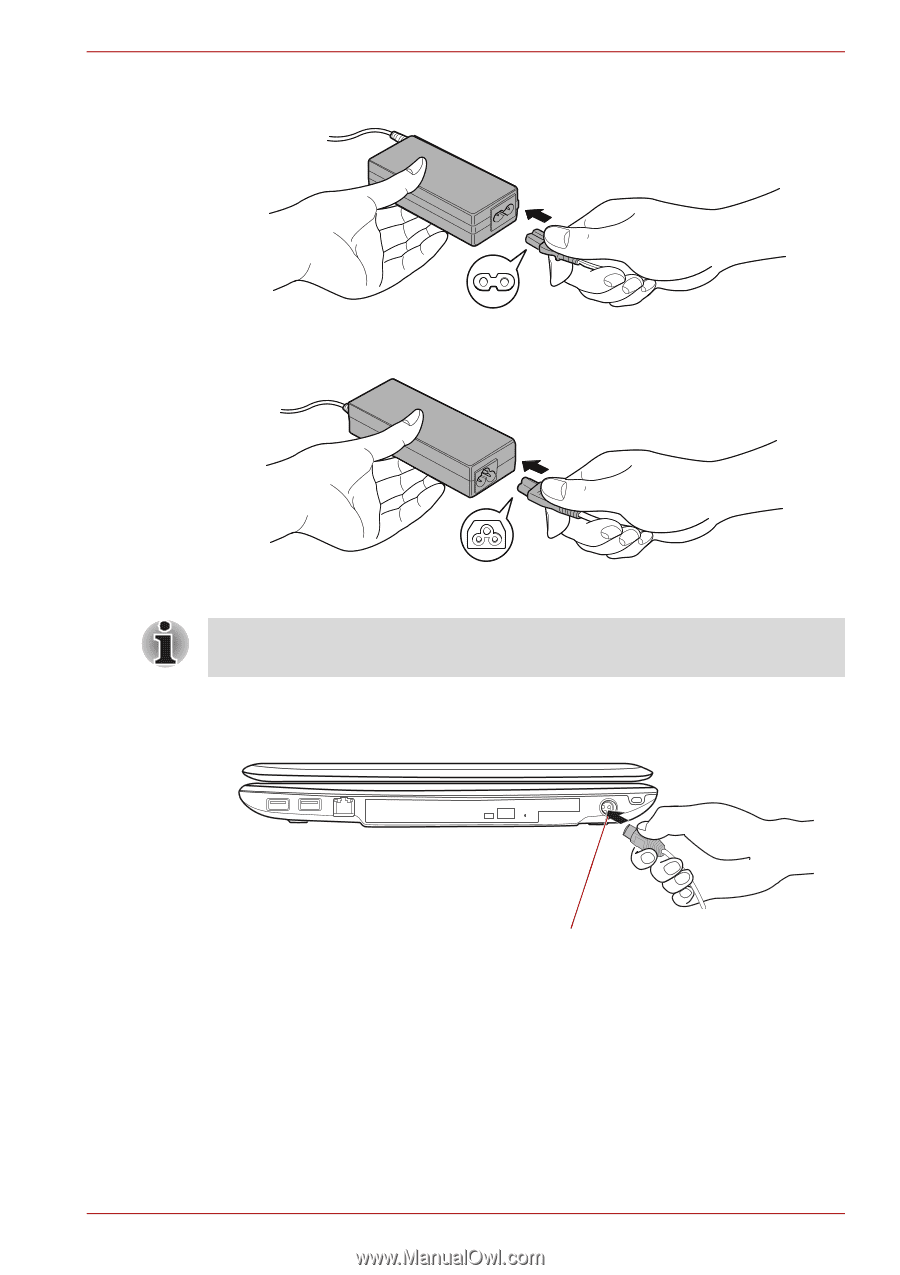
2.
Connect the AC adaptor's DC output plug to the DC IN 19V jack on the
right side of the computer.
Figure 3-3 Connecting the adaptor to the computer
3.
Plug the power cord into a live wall outlet - the
Battery
and
DC IN
indicators on the front of the computer should glow.
Either a 2-pin or 3-pin adaptor/cord will be included with the computer
depending on the model.
DC IN 19V Jack