Toshiba Portege R30-C PT365C-00G00G Users Manual Canada; English - Page 71
Delete the Fingerprint Data, TOSHIBA Fingerprint Utility, Fingerprint, Enroll, Fingerprint Enroll
 |
View all Toshiba Portege R30-C PT365C-00G00G manuals
Add to My Manuals
Save this manual to your list of manuals |
Page 71 highlights
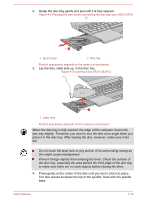
5. The scanning practice screen is displayed. You are able to practice swiping (three times) your finger to ensure you use the correct method. When you have finished practicing swiping your finger, click Next. 6. Swipe four times with the same finger. If scanning of fingerprint succeeds, "Enrollment succeeded! Do you want to save this fingerprint?" message box appears. Click OK. 7. The following message appears: "It's strongly recommended you enroll one more fingerprint.". Click OK and repeat Step 3, 4, 5 and 6 with another finger. It is strongly recommended that you register 2 or more fingerprints. You cannot enroll the same fingerprint more than once, even on a different user account. Delete the Fingerprint Data Saved fingerprint data is stored in special non-volatile memory inside the fingerprint sensor. Therefore, if you give the computer to someone else, or dispose of it in any way, please uninstall the application or delete all the logs created by the application. Delete the fingerprint data for the currently logged in user 1. In the TOSHIBA Fingerprint Utility main menu, select Fingerprint Enroll. 2. In the Fingerprint Enroll window, it enables you to delete the fingerprint data for the currently logged in user. Click an enrolled finger you want to delete. "Do you want to delete?" message box appears on the screen and then click OK. If you want to delete other fingerprints, repeat this step. If only one fingerprint is registered, the message "At least one fingerprint is required." appears after clicking OK. You are not allowed to delete a unique fingerprint. 3. Click Close. 4. "Do you want to quit?" is displayed. Click OK. It will be returned to the TOSHIBA Fingerprint Utility main menu. Delete all users fingerprints 1. In the TOSHIBA Fingerprint Utility main menu, click Run as administrator. 2. User Account Control window is displayed. Click Yes. 3. Swipe your enrolled finger. 4. Select Fingerprint Management option. 5. A list of fingerprint information for all users is shown in the screen. Click the enrolled fingerprint data you want to delete, and then click Delete Selected Items. User's Manual 4-10
-
 1
1 -
2
-
3
-
4
-
5
-
6
-
7
-
8
-
9
-
10
-
11
-
12
-
13
-
14
-
15
-
16
-
17
-
18
-
19
-
20
-
21
-
22
-
23
-
24
-
25
-
26
-
27
-
28
-
29
-
30
-
31
-
32
-
33
-
34
-
35
-
36
-
37
-
38
-
39
-
40
-
41
-
42
-
43
-
44
-
45
-
46
-
47
-
48
-
49
-
50
-
51
-
52
-
53
-
54
-
55
-
56
-
57
-
58
-
59
-
60
-
61
-
62
-
63
-
64
-
65
-
 66
66 -
 67
67 -
 68
68 -
 69
69 -
 70
70 -
 71
71 -
 72
72 -
 73
73 -
 74
74 -
 75
75 -
 76
76 -
77
-
78
-
79
-
80
-
81
-
82
-
83
-
84
-
85
-
86
-
87
-
88
-
89
-
90
-
91
-
92
-
93
-
94
-
95
-
96
-
97
-
98
-
99
-
100
-
101
-
102
-
103
-
104
-
105
-
106
-
107
-
108
-
109
-
110
-
111
-
112
-
113
-
114
-
115
-
116
-
117
-
118
-
119
-
120
-
121
-
122
-
123
-
124
-
125
-
126
-
127
-
128
-
129
-
130
-
131
-
132
-
133
-
134
-
135
-
136
-
137
-
138
-
139
-
140
-
141
-
142
-
143
-
144
-
145
-
146
-
147
-
148
-
149
-
150
-
151
-
152
-
153
-
154
-
155
-
156
-
157
-
158
-
159
-
160
-
161
-
162
-
163
-
164
-
165
-
166
-
167
-
168
-
169
-
170
-
171
-
172
-
173
 |
 |