Toshiba Satellite E105-S1402 User Guide - Page 51
Adding memory (optional - keyboard lights
 |
View all Toshiba Satellite E105-S1402 manuals
Add to My Manuals
Save this manual to your list of manuals |
Page 51 highlights
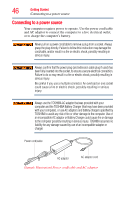
Getting Started 51 Adding memory (optional) 3 Press and release the power button. The on/off light glows white. (Sample Illustration) Turning on the power The preinstalled operating system will load automatically. When you turn on the computer for the first time, do not turn off the power again until the operating system has loaded completely. Adding memory (optional) HINT: To purchase additional memory modules, see the accessories information packaged with your system or visit accessories.toshiba.com. Your computer comes with enough memory to run most of today's popular applications. You may want to increase the computer's memory if you use complex software or process large amounts of data. If you are a technically advanced user, visit pcsupport.toshiba.com for information. Toshiba will not be responsible for any product damage, data loss, service or part replacement made necessary by improper installation of a memory module. Your computer has two memory module slots. Both slots are located under the keyboard and should only be accessed by a Toshiba-authorized service provider. NOTE Before adding external devices or memory, Toshiba recommends setting up your software. See "Setting up your software" on page 44
-
 1
1 -
2
-
3
-
4
-
5
-
6
-
7
-
8
-
9
-
10
-
11
-
12
-
13
-
14
-
15
-
16
-
17
-
18
-
19
-
20
-
21
-
22
-
23
-
24
-
25
-
26
-
27
-
28
-
29
-
30
-
31
-
32
-
33
-
34
-
35
-
36
-
37
-
38
-
39
-
40
-
41
-
42
-
43
-
44
-
45
-
 46
46 -
 47
47 -
 48
48 -
 49
49 -
 50
50 -
 51
51 -
 52
52 -
 53
53 -
 54
54 -
 55
55 -
 56
56 -
57
-
58
-
59
-
60
-
61
-
62
-
63
-
64
-
65
-
66
-
67
-
68
-
69
-
70
-
71
-
72
-
73
-
74
-
75
-
76
-
77
-
78
-
79
-
80
-
81
-
82
-
83
-
84
-
85
-
86
-
87
-
88
-
89
-
90
-
91
-
92
-
93
-
94
-
95
-
96
-
97
-
98
-
99
-
100
-
101
-
102
-
103
-
104
-
105
-
106
-
107
-
108
-
109
-
110
-
111
-
112
-
113
-
114
-
115
-
116
-
117
-
118
-
119
-
120
-
121
-
122
-
123
-
124
-
125
-
126
-
127
-
128
-
129
-
130
-
131
-
132
-
133
-
134
-
135
-
136
-
137
-
138
-
139
-
140
-
141
-
142
-
143
-
144
-
145
-
146
-
147
-
148
-
149
-
150
-
151
-
152
-
153
-
154
-
155
-
156
-
157
-
158
-
159
-
160
-
161
-
162
-
163
-
164
-
165
-
166
-
167
-
168
-
169
-
170
-
171
-
172
-
173
-
174
-
175
-
176
-
177
-
178
-
179
-
180
-
181
-
182
-
183
-
184
-
185
-
186
-
187
-
188
-
189
-
190
-
191
-
192
-
193
-
194
-
195
-
196
-
197
-
198
-
199
-
200
-
201
-
202
-
203
-
204
-
205
-
206
-
207
-
208
-
209
-
210
-
211
-
212
-
213
 |
 |
