Toshiba Satellite E200 Users Manual Canada; English - Page 66
USB FDD Kit, eSATA, External monitor, HDMI, Auto-Selected, System, LCD Only, System LCD Only, Display
 |
View all Toshiba Satellite E200 manuals
Add to My Manuals
Save this manual to your list of manuals |
Page 66 highlights
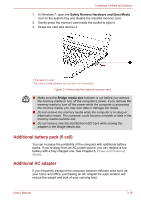
Hardware, Utilities and Options USB FDD Kit The 3 1/2" external FDD drive module can be connected to the USB port. eSATA An eSATA-equipped device can be connected to the eSATA/USB combo port. External monitor An external analog monitor can be connected to the external monitor port on the computer. The computer supports VGA and Super VGA video modes. To connect a monitor, follow the steps below. The hibernation and sleep feature can be used with an external monitor. Simply enable hibernation and sleep and the computer will maintain the data as it is displayed on the external monitor. 1. Connect the monitor to the external monitor port. 2. Turn the monitor's power on. When you turn on the power, the computer automatically recognizes the monitor and determines whether it is color or monochrome. You can use the HW Setup to select between Auto-Selected and System LCD Only displays. Refer to Chapter 7, HW Setup. If you have selected System LCD Only under the Display options of the HW Setup, the internal LCD will be active when you turn on the computer, even if the external monitor is connected. If Auto-Selected is selected, only the external monitor will be active. To change the display settings, press FN + F5. If you disconnect the monitor before you turn the computer off, be sure to press FN + F5 to switch to the internal display. Refer to Chapter 5, The Keyboard, for details on using hot keys to change the display setting. HDMI Some models are equipped with HDMI port that can send video by connecting with external devices. 1080p, 720p, 576p and 480p signal formats are supported, but actually available signal format depends on each HDMI devices. To connect external devices, follow the steps as detailed below: As the port operation of all HDMI (High-Definition Multimedia Interface) monitors has not been confirmed, some HDMI monitors may not function properly. 1. Plug one end of the HDMI cable into the HDMI port of the HDMI device. User's Manual 3-19
-
 1
1 -
2
-
3
-
4
-
5
-
6
-
7
-
8
-
9
-
10
-
11
-
12
-
13
-
14
-
15
-
16
-
17
-
18
-
19
-
20
-
21
-
22
-
23
-
24
-
25
-
26
-
27
-
28
-
29
-
30
-
31
-
32
-
33
-
34
-
35
-
36
-
37
-
38
-
39
-
40
-
41
-
42
-
43
-
44
-
45
-
46
-
47
-
48
-
49
-
50
-
51
-
52
-
53
-
54
-
55
-
56
-
57
-
58
-
59
-
60
-
 61
61 -
 62
62 -
 63
63 -
 64
64 -
 65
65 -
 66
66 -
 67
67 -
 68
68 -
 69
69 -
 70
70 -
 71
71 -
72
-
73
-
74
-
75
-
76
-
77
-
78
-
79
-
80
-
81
-
82
-
83
-
84
-
85
-
86
-
87
-
88
-
89
-
90
-
91
-
92
-
93
-
94
-
95
-
96
-
97
-
98
-
99
-
100
-
101
-
102
-
103
-
104
-
105
-
106
-
107
-
108
-
109
-
110
-
111
-
112
-
113
-
114
-
115
-
116
-
117
-
118
-
119
-
120
-
121
-
122
-
123
-
124
-
125
-
126
-
127
-
128
-
129
-
130
-
131
-
132
-
133
-
134
-
135
-
136
-
137
-
138
-
139
-
140
-
141
-
142
-
143
-
144
-
145
-
146
-
147
-
148
-
149
-
150
-
151
-
152
-
153
-
154
-
155
-
156
-
157
-
158
-
159
-
160
-
161
-
162
-
163
-
164
-
165
-
166
-
167
-
168
-
169
-
170
-
171
-
172
-
173
-
174
-
175
-
176
-
177
-
178
-
179
-
180
-
181
-
182
-
183
-
184
-
185
-
186
-
187
-
188
 |
 |
