Toshiba Tecra A7-S712 User Guide - Page 74
Deleting the Hard Disk Recovery Utility, Computer Management, Disk Management, Start, Programs
 |
View all Toshiba Tecra A7-S712 manuals
Add to My Manuals
Save this manual to your list of manuals |
Page 74 highlights
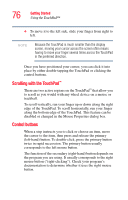
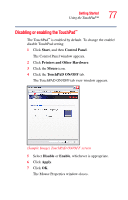
74 Getting Started Hard Drive Recovery Utilities 3 Double-click the Computer Management icon. 4 Click Disk Management. 5 Highlight the hard disk drive in the Volume list to display its status in the lower portion of the screen. Deleting the Hard Disk Recovery Utility You can delete the HDD recovery partition without losing your data. 1 Click Start, All Programs, Hard Disk Recovery Utilities, then Delete Hard Disk Recovery Partition. The Delete Hard Disk Recovery Utility warning screen displays. Sample Delete Hard Disk Recovery Utility screen 2 Click OK to continue. 3 When the following warning screen displays, click Yes to confirm. Sample Delete Hard Disk Recovery Utility confirmation screen
-
 1
1 -
2
-
3
-
4
-
5
-
6
-
7
-
8
-
9
-
10
-
11
-
12
-
13
-
14
-
15
-
16
-
17
-
18
-
19
-
20
-
21
-
22
-
23
-
24
-
25
-
26
-
27
-
28
-
29
-
30
-
31
-
32
-
33
-
34
-
35
-
36
-
37
-
38
-
39
-
40
-
41
-
42
-
43
-
44
-
45
-
46
-
47
-
48
-
49
-
50
-
51
-
52
-
53
-
54
-
55
-
56
-
57
-
58
-
59
-
60
-
61
-
62
-
63
-
64
-
65
-
66
-
67
-
68
-
 69
69 -
 70
70 -
 71
71 -
 72
72 -
 73
73 -
 74
74 -
 75
75 -
 76
76 -
 77
77 -
 78
78 -
 79
79 -
80
-
81
-
82
-
83
-
84
-
85
-
86
-
87
-
88
-
89
-
90
-
91
-
92
-
93
-
94
-
95
-
96
-
97
-
98
-
99
-
100
-
101
-
102
-
103
-
104
-
105
-
106
-
107
-
108
-
109
-
110
-
111
-
112
-
113
-
114
-
115
-
116
-
117
-
118
-
119
-
120
-
121
-
122
-
123
-
124
-
125
-
126
-
127
-
128
-
129
-
130
-
131
-
132
-
133
-
134
-
135
-
136
-
137
-
138
-
139
-
140
-
141
-
142
-
143
-
144
-
145
-
146
-
147
-
148
-
149
-
150
-
151
-
152
-
153
-
154
-
155
-
156
-
157
-
158
-
159
-
160
-
161
-
162
-
163
-
164
-
165
-
166
-
167
-
168
-
169
-
170
-
171
-
172
-
173
-
174
-
175
-
176
-
177
-
178
-
179
-
180
-
181
-
182
-
183
-
184
-
185
-
186
-
187
-
188
-
189
-
190
-
191
-
192
-
193
-
194
-
195
-
196
-
197
-
198
-
199
-
200
-
201
-
202
-
203
-
204
-
205
-
206
-
207
-
208
-
209
-
210
-
211
-
212
-
213
-
214
-
215
-
216
-
217
-
218
-
219
-
220
-
221
-
222
-
223
-
224
-
225
-
226
-
227
-
228
-
229
-
230
-
231
-
232
-
233
-
234
-
235
-
236
-
237
-
238
-
239
-
240
-
241
-
242
-
243
-
244
-
245
-
246
-
247
-
248
-
249
-
250
-
251
-
252
-
253
-
254
-
255
-
256
-
257
-
258
-
259
-
260
-
261
-
262
-
263
-
264
-
265
-
266
-
267
-
268
-
269
-
270
-
271
-
272
-
273
-
274
-
275
-
276
-
277
-
278
-
279
-
280
-
281
-
282
-
283
-
284
-
285
-
286
-
287
-
288
-
289
-
290
-
291
-
292
-
293
-
294
-
295
-
296
-
297
-
298
-
299
-
300
-
301
-
302
-
303
-
304
-
305
-
306
-
307
 |
 |

74
Getting Started
Hard Drive Recovery Utilities
3
Double-click the
Computer Management
icon.
4
Click
Disk Management
.
5
Highlight the hard disk drive in the Volume list to display
its status in the lower portion of the screen.
Deleting the Hard Disk Recovery Utility
You can delete the HDD recovery partition without losing
your data.
1
Click
Start
,
All
Programs
,
Hard Disk Recovery Utilities
,
then
Delete Hard Disk Recovery Partition
. The Delete Hard
Disk Recovery Utility warning screen displays.
Sample Delete Hard Disk Recovery Utility screen
2
Click
OK
to continue.
3
When the following warning screen displays, click
Yes
to
confirm.
Sample Delete Hard Disk Recovery Utility confirmation
screen