Toshiba Tecra M5-S5231 Resource Guide for Tecra M5 - Page 31
Removing a PC Card, Learning the basics, Computing tips
 |
View all Toshiba Tecra M5-S5231 manuals
Add to My Manuals
Save this manual to your list of manuals |
Page 31 highlights
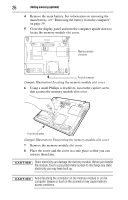
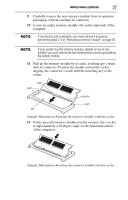
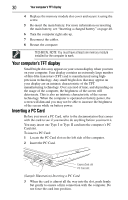
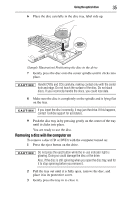
Removing a PC Card 31 Removing a PC Card Be sure to disable the PC Card prior to removing it. Otherwise, the system may be damaged. Before removing a PC Card, make sure that no applications or system services are using the card. 1 Prepare the card for removal by clicking the Safely Remove Hardware icon in the Notification Area and then selecting the PC Card device. If the system is unable to prepare the card for safe removal, a message will tell you to try again later. If the card can be removed now, the system displays Safe To Remove Hardware. 2 Locate the PC Card eject button next to the PC Card slot. 3 Press the PC Card eject button once to pop it out slightly, then push it in to remove the PC Card. The PC Card ejects slightly from the slot. 4 Grasp the edges of the PC Card and slide it out of the slot. Learning the basics Computing tips ❖ Save your work frequently. Your work stays in the computer's temporary memory until you save it to the disk. If the network you are using goes down and you must restart your computer to reconnect, or your battery runs out of charge while you are working, you will lose all work since you last saved. HINT: Some programs have an automatic save feature that can be activated. This feature saves your file to the hard disk at preset intervals. See your software documentation for details. ❖ Back up your files to disks (or other removable media) on a regular basis. Label the backup copies clearly and store them in a safe place. ❖ Scan all new files for viruses. ❖ Do not turn off the computer if a drive indicator light indicates a drive is active. The Windows® operating system records information, such as your desktop setup, during its shutdown procedure. If you do not let the Windows® operating system shut down normally, details such as new icon positions may be lost.
-
 1
1 -
2
-
3
-
4
-
5
-
6
-
7
-
8
-
9
-
10
-
11
-
12
-
13
-
14
-
15
-
16
-
17
-
18
-
19
-
20
-
21
-
22
-
23
-
24
-
25
-
 26
26 -
 27
27 -
 28
28 -
 29
29 -
 30
30 -
 31
31 -
 32
32 -
 33
33 -
 34
34 -
 35
35 -
 36
36 -
37
-
38
-
39
-
40
-
41
-
42
-
43
-
44
-
45
-
46
-
47
-
48
-
49
-
50
-
51
-
52
 |
 |