Tripp Lite B0930082E4UV Owners Manual for B093- B097- and B098-Series Console - Page 12
System Configuration
 |
View all Tripp Lite B0930082E4UV manuals
Add to My Manuals
Save this manual to your list of manuals |
Page 12 highlights
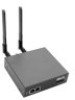
3. System Configuration This chapter provides step-by-step instructions for the initial configuration of your console server and how to connect it to the Management or Operational LAN. Notes: • System configuration must be done by a person with Administrator access. • For guidance on configuring large numbers of Tripp Lite console servers and/or automating provisioning, sections 15.15 Bulk Provisioning and 15.16 Zero Touch Provisioning. 3.1 Management Console Connection Your console server ships configured with a default IP Address 192.168.0.1 Subnet Mask 255.255.255.0 Directly connect a computer to the console server. Note: For initial configuration, it is recommended that the console server be directly connected to a single computer. However, if you choose to connect your LAN before completing the initial setup steps, it is important that you ensure there are no other devices on the LAN with an address of 192.168.0.1, and the console server and the computer are on the same LAN segment, with no interposed router devices. 3.1.1 Connected Computer Setup To configure the console server with a browser, the connected PC/workstation should have an IP address in the same range as the console server (for example, 192.168.0.100): • To configure the IP Address of your Linux or UNIX computer, run ifconfig. • For Windows PCs: Click Start -> (Settings ->) Control Panel and double-click Network Connections (for 95/98/Me, double-click Network). Right click on Local Area Connection and select Properties. Select Internet Protocol (TCP/IP) and click Properties. Select Use the following IP address and enter the following details: IP address: 192.168.0.100 Subnet mask: 255.255.255.0 If you want to retain your existing IP settings for this network connection, click Advanced and Add the above as a secondary IP connection. • If it is not convenient to change your computer network address, you can use the ARP-Ping command to reset the console server IP address. To do this from a Windows PC: Click Start -> Run (or select All Programs -> Accessories -> Run). Type cmd and click OK to bring up the command line. Type arp -d to flush the ARP cache. Type arp -a to view the current ARP cache (this should be empty). 12
-
 1
1 -
2
-
3
-
4
-
5
-
6
-
 7
7 -
 8
8 -
 9
9 -
 10
10 -
 11
11 -
 12
12 -
 13
13 -
 14
14 -
 15
15 -
 16
16 -
 17
17 -
18
-
19
-
20
-
21
-
22
-
23
-
24
-
25
-
26
-
27
-
28
-
29
-
30
-
31
-
32
-
33
-
34
-
35
-
36
-
37
-
38
-
39
-
40
-
41
-
42
-
43
-
44
-
45
-
46
-
47
-
48
-
49
-
50
-
51
-
52
-
53
-
54
-
55
-
56
-
57
-
58
-
59
-
60
-
61
-
62
-
63
-
64
-
65
-
66
-
67
-
68
-
69
-
70
-
71
-
72
-
73
-
74
-
75
-
76
-
77
-
78
-
79
-
80
-
81
-
82
-
83
-
84
-
85
-
86
-
87
-
88
-
89
-
90
-
91
-
92
-
93
-
94
-
95
-
96
-
97
-
98
-
99
-
100
-
101
-
102
-
103
-
104
-
105
-
106
-
107
-
108
-
109
-
110
-
111
-
112
-
113
-
114
-
115
-
116
-
117
-
118
-
119
-
120
-
121
-
122
-
123
-
124
-
125
-
126
-
127
-
128
-
129
-
130
-
131
-
132
-
133
-
134
-
135
-
136
-
137
-
138
-
139
-
140
-
141
-
142
-
143
-
144
-
145
-
146
-
147
-
148
-
149
-
150
-
151
-
152
-
153
-
154
-
155
-
156
-
157
-
158
-
159
-
160
-
161
-
162
-
163
-
164
-
165
-
166
-
167
-
168
-
169
-
170
-
171
-
172
-
173
-
174
-
175
-
176
-
177
-
178
-
179
-
180
-
181
-
182
-
183
-
184
-
185
-
186
-
187
-
188
-
189
-
190
-
191
-
192
-
193
-
194
-
195
-
196
-
197
-
198
-
199
-
200
-
201
-
202
-
203
-
204
-
205
-
206
-
207
-
208
-
209
-
210
-
211
-
212
-
213
-
214
-
215
-
216
-
217
-
218
-
219
-
220
-
221
-
222
-
223
-
224
-
225
-
226
-
227
-
228
-
229
-
230
-
231
-
232
-
233
-
234
-
235
-
236
-
237
-
238
-
239
-
240
-
241
-
242
-
243
-
244
-
245
-
246
-
247
-
248
-
249
-
250
-
251
-
252
-
253
-
254
-
255
-
256
-
257
-
258
-
259
-
260
-
261
-
262
-
263
-
264
-
265
-
266
-
267
-
268
-
269
-
270
-
271
-
272
-
273
-
274
-
275
-
276
-
277
-
278
-
279
-
280
-
281
-
282
-
283
-
284
-
285
-
286
-
287
-
288
 |
 |
