Troy-Bilt CSV 070 Service Manual - Page 11
Actuating arm, See
 |
View all Troy-Bilt CSV 070 manuals
Add to My Manuals
Save this manual to your list of manuals |
Page 11 highlights
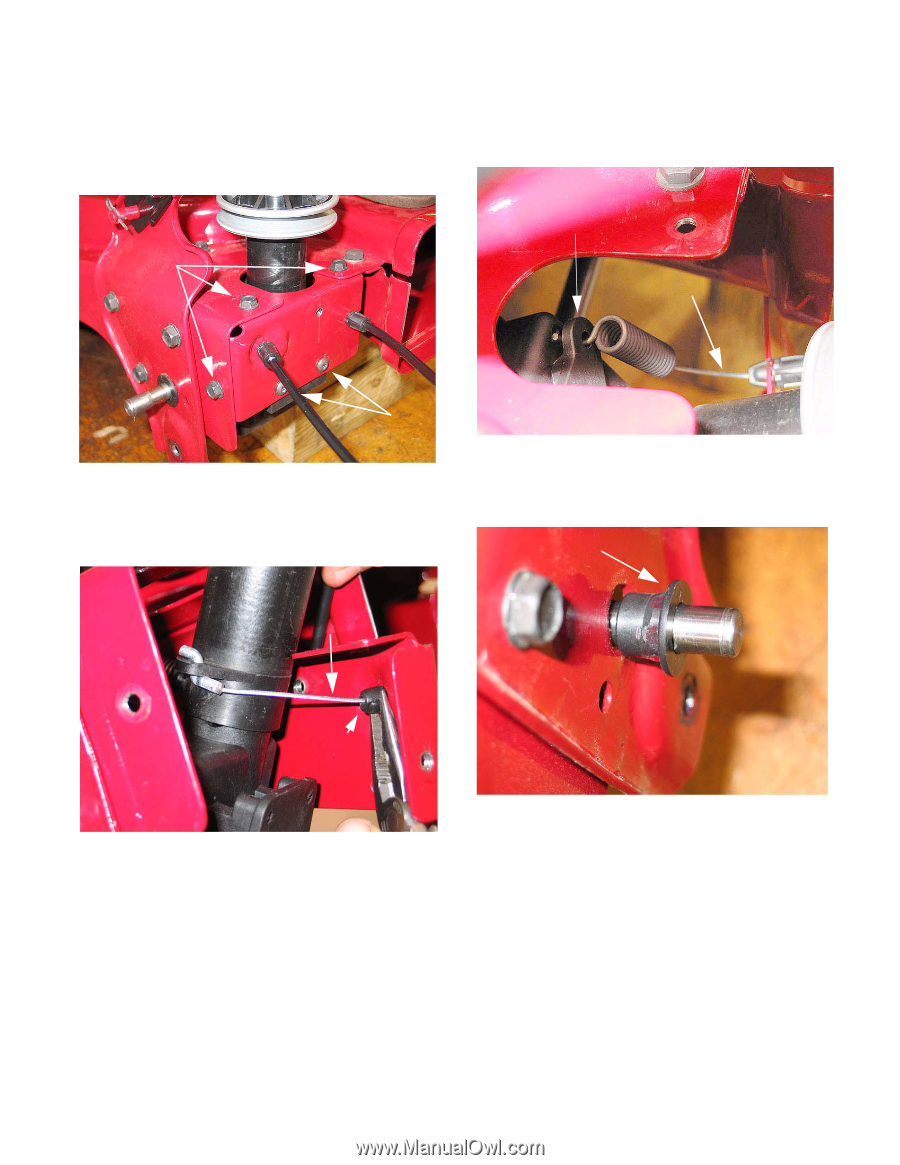
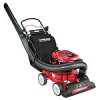
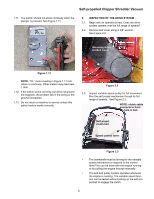
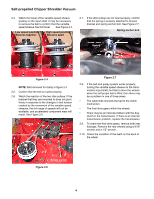
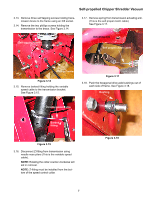
Self-propelled Chipper Shredder Vacuum 3.13. Remove three self tapping screws holding transmission brace to the frame using an 3/8 socket. 3.14. Remove the two phillips screws holding the transmission to the brace. See Figure 3.14. Self tapping screws 3.17. Remove spring from transmission actuating arm. (This is the self propel clutch cable) See Figure 3.17. Actuating arm Self propel clutch cable Phillips screw Figure 3.14 3.15. Remove barbed fitting holding the variable speed cable to the transmission bracket. See Figure 3.15. Figure 3.17 3.18. Push the hexagonal drive axle bushings out of each side of frame. See Figure 3.18. Bushing Variable speed cable Barbed fitting Figure 3.15 3.16. Disconnect Z-fitting from transmission using needle nose pliers (This is the variable speed cable). NOTE: Rotating the collar counter-clockwise will aid in removal. NOTE: Z-fitting must be installed from the bottom of the speed control collar. Figure 3.18 7
-
 1
1 -
2
-
3
-
4
-
5
-
 6
6 -
 7
7 -
 8
8 -
 9
9 -
 10
10 -
 11
11 -
 12
12 -
 13
13 -
 14
14 -
 15
15
 |
 |