Troy-Bilt Pro-Line CRT Service Manual - Page 11
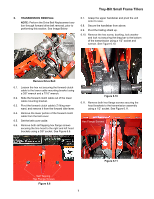
TRANSMISSION REMOVAL, Remove Drive Belt, - tiller tines
 |
View all Troy-Bilt Pro-Line CRT manuals
Add to My Manuals
Save this manual to your list of manuals |
Page 11 highlights
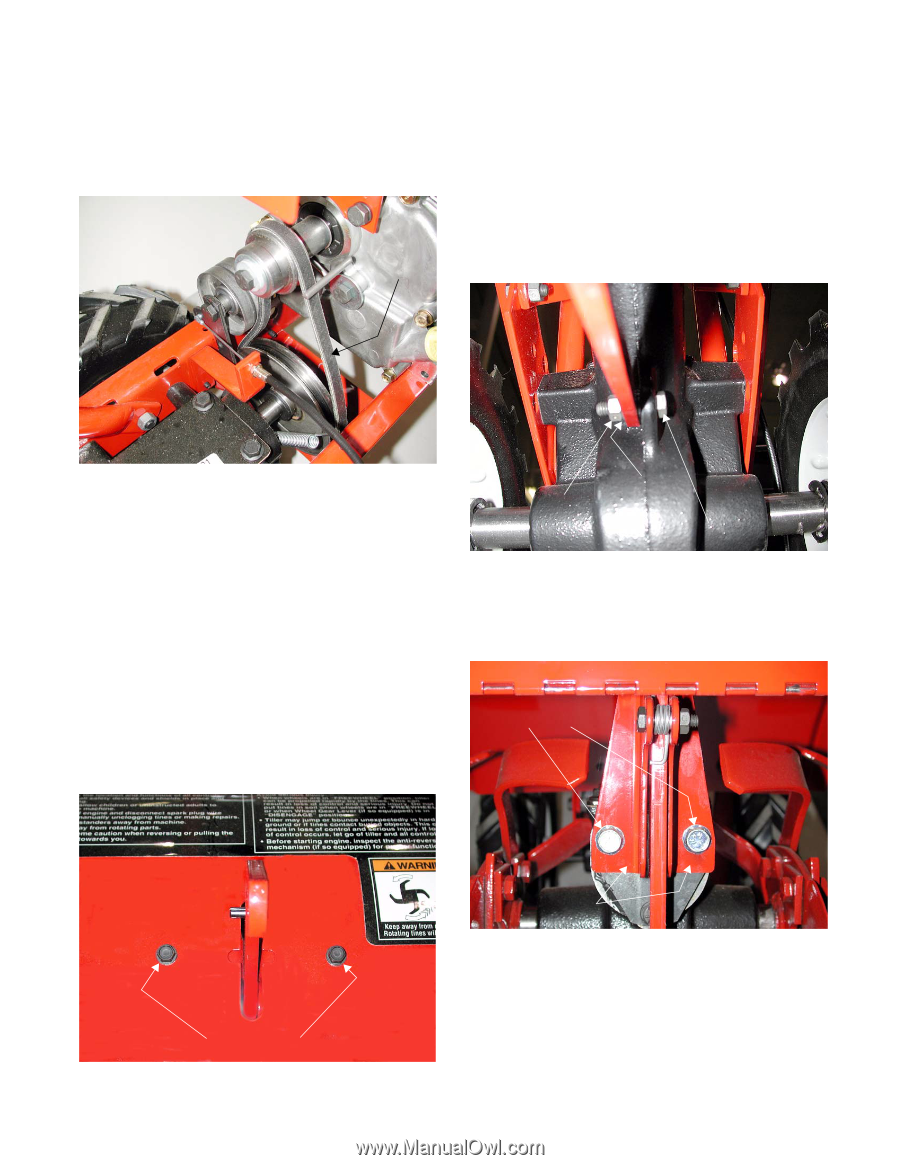
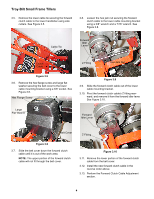
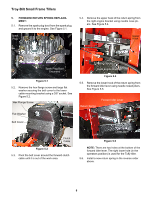
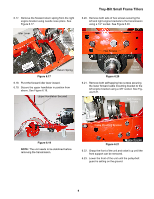
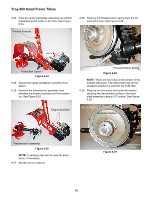
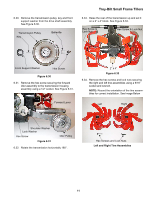
Troy-Bilt Small Frame Tillers 6. TRANSMISSION REMOVAL: 6.7. Grasp the upper handlebar and pivot the unit NOTE: Perform the Drive Belt Replacement sec- onto it's nose. tion through forward drive belt removal, prior to 6.8. Secure the handlebar from above. performing this section. See Image Below 6.9. Pivot the trailing shield up. Remove Drive Belt 6.10. Remove the hex screw, bushing, lock washer and lock nut securing the drag bar to the bottom of the transmission using a 1/2" socket and wrench. See Figure 6.10. Remove Drive Belt 6.1. Loosen the hex nut securing the forward clutch cable to the lower cable mounting bracket using a 3/8" wrench and a 7/16" wrench. 6.2. Slide the forward clutch cable out of the lower cable mounting bracket. 6.3. Pivot the forward clutch cable's Z fitting rearward, and remove it from the forward idler lever. 6.4. Remove the lower portion of the forward clutch cable from the belt cover. 6.5. Set the belt cover aside. 6.6. Remove both self tapping hex flange screws securing the tine hood to the right and left hood brackets using a 3/8" socket. See Figure 6.6. Lock Washer Lock Nut Hex Screw Figure 6.10 6.11. Remove both hex flange screws securing the hood brackets to the transmission assembly using a 1/2" socket. See Figure 6.11. Hex Flange Screws Self Tapping Hex Flange Screws Figure 6.6 Hood Brackets Figure 6.11 7
-
 1
1 -
2
-
3
-
4
-
5
-
 6
6 -
 7
7 -
 8
8 -
 9
9 -
 10
10 -
 11
11 -
 12
12 -
 13
13 -
 14
14 -
 15
15 -
 16
16 -
17
-
18
-
19
-
20
-
21
-
22
-
23
-
24
-
25
-
26
-
27
-
28
-
29
-
30
-
31
-
32
-
33
-
34
-
35
-
36
-
37
-
38
-
39
-
40
-
41
-
42
 |
 |