Troy-Bilt Pro-Line CRT Service Manual - Page 38
Troy-Bilt Pro-Line CRT Manual
 |
View all Troy-Bilt Pro-Line CRT manuals
Add to My Manuals
Save this manual to your list of manuals |
Page 38 highlights
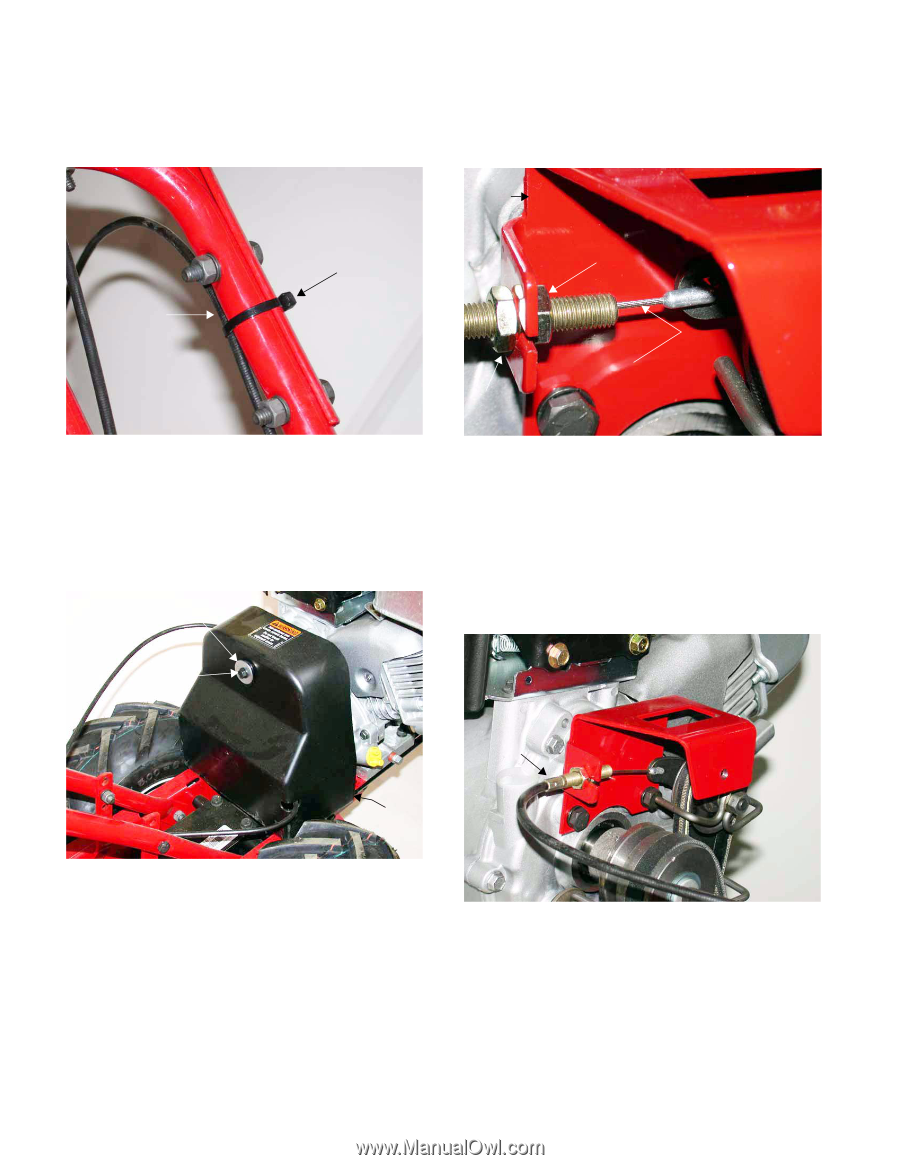
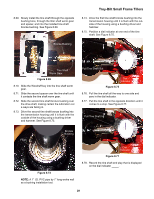
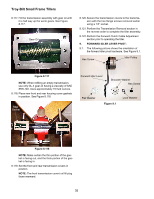
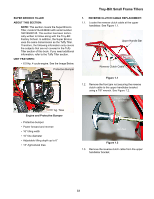
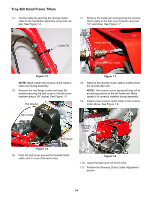
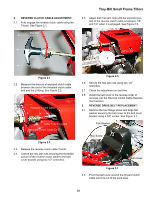
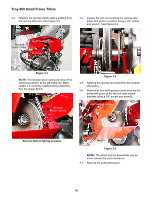
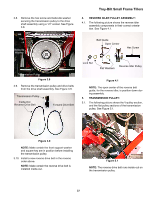
Troy-Bilt Small Frame Tillers 1.4. Cut the cable tie securing the reverse clutch cable to the handlebar assembly using side cutters. See Figure 1.4. Reverse Clutch Cable Cable Tie Figure 1.4 NOTE: Make certain the reverse clutch cable is cable tied during assembly. 1.5. Remove the hex flange screw and large flat washer securing the belt cover to the belt cover bracket using a 3/8" socket. See Figure 1.5. Flat Washer 1.7. Remove the inside jam nut securing the reverse clutch cable to the belt cover bracket using two 1/2" wrenches. See Figure 1.7. Belt Cover Bracket Inside Jam Nut Reverse Clutch Cable Jam Nut Figure 1.7 1.8. Remove the reverse clutch cable's Z-fitting from the reverse idler arm. NOTE: The reverse return spring will drop off its anchoring position at the left frame rail. Make certain it is correctly installed during assembly. 1.9. Install a new reverse clutch cable in the reverse order above. See Figure 1.9. Hex Screw Belt Cover Reverse Clutch Cable Figure 1.5 1.6. Pivot the belt cover around the forward clutch cable until it is out of the work area. Figure 1.9 1.10. Leave the belt cover off at this time. 1.11. Perform the Reverse Clutch Cable Adjustment section. 34
-
 1
1 -
2
-
3
-
4
-
5
-
6
-
7
-
8
-
9
-
10
-
11
-
12
-
13
-
14
-
15
-
16
-
17
-
18
-
19
-
20
-
21
-
22
-
23
-
24
-
25
-
26
-
27
-
28
-
29
-
30
-
31
-
32
-
 33
33 -
 34
34 -
 35
35 -
 36
36 -
 37
37 -
 38
38 -
 39
39 -
 40
40 -
 41
41 -
 42
42
 |
 |