Uniden WHAMx4 English Owners Manual - Page 8
Understanding Your Microphone - charging cradle
 |
UPC - 050633500781
View all Uniden WHAMx4 manuals
Add to My Manuals
Save this manual to your list of manuals |
Page 8 highlights
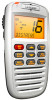
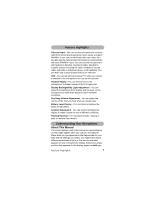
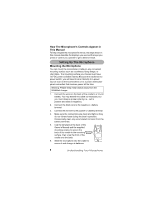
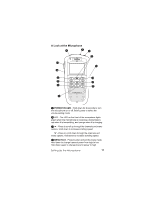
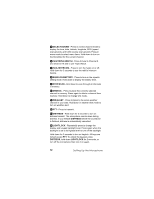
UHonwdTehrsetaMnicdrionpghoYnoe'usrCMonitcrorolspAhpopneear in This Manual To help navigate the microphone's menus, the steps shown in this manual describe the displays you see and the keys you press or control you operate to get a desired result. Setting Up The Microphone Mounting the Microphone You can mount the microphone's cradle on any convenient mounting surface such as a bulkhead, flying bridge, or chart table. The mounting surface you choose must have 12V DC power available nearby. Because the cradle has no power switch, you will need to wire it directly to a power source such as the boat's battery or to a power distribution panel connection that receives power all the time. Warning: Please keep metal objects away from the WHAMx4 charger. 1. Connect the wires on the back of the cradle to a 12-volt battery. You may extend this cable as necessary, but you must observe proper polarity (i.e., red is positive and black is negative). 2. Connect the black wire to the negative (-) battery terminal. 3. Connect the red wire to the positive (+) battery terminal. 4. Make sure the connections are clean and tight so they do not vibrate loose during the boat's operation. Occasionally clean any accumulated corrosion from the battery terminals. 5. Use the template at the back of this Owner's Manual and the supplied mounting screws to secure the back of the cradle to the mounting Mounting Screws surface, then snap the front of the cradle onto the back. 6. Slide the microphone into the cradle to secure it and charge its batteries. 8 Understanding Your Microphone
-
 1
1 -
2
-
 3
3 -
 4
4 -
 5
5 -
 6
6 -
 7
7 -
 8
8 -
 9
9 -
 10
10 -
 11
11 -
 12
12 -
 13
13 -
14
-
15
-
16
-
17
-
18
-
19
-
20
-
21
-
22
-
23
-
24
-
25
-
26
-
27
-
28
-
29
-
30
-
31
-
32
-
33
-
34
-
35
-
36
-
37
-
38
-
39
-
40
-
41
-
42
-
43
-
44
-
45
-
46
-
47
-
48
-
49
-
50
-
51
-
52
-
53
-
54
-
55
-
56
-
57
-
58
-
59
-
60
-
61
-
62
-
63
-
64
-
65
-
66
-
67
-
68
-
69
-
70
-
71
-
72
-
73
-
74
-
75
-
76
-
77
-
78
-
79
-
80
-
81
-
82
-
83
-
84
-
85
 |
 |