Vantec NST-225MX-S3 User Guide - Page 6
Insert the HDD/SSD into the top bay and push horizontally for both the SATA
 |
View all Vantec NST-225MX-S3 manuals
Add to My Manuals
Save this manual to your list of manuals |
Page 6 highlights
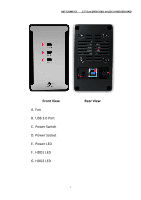
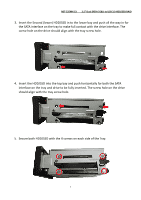
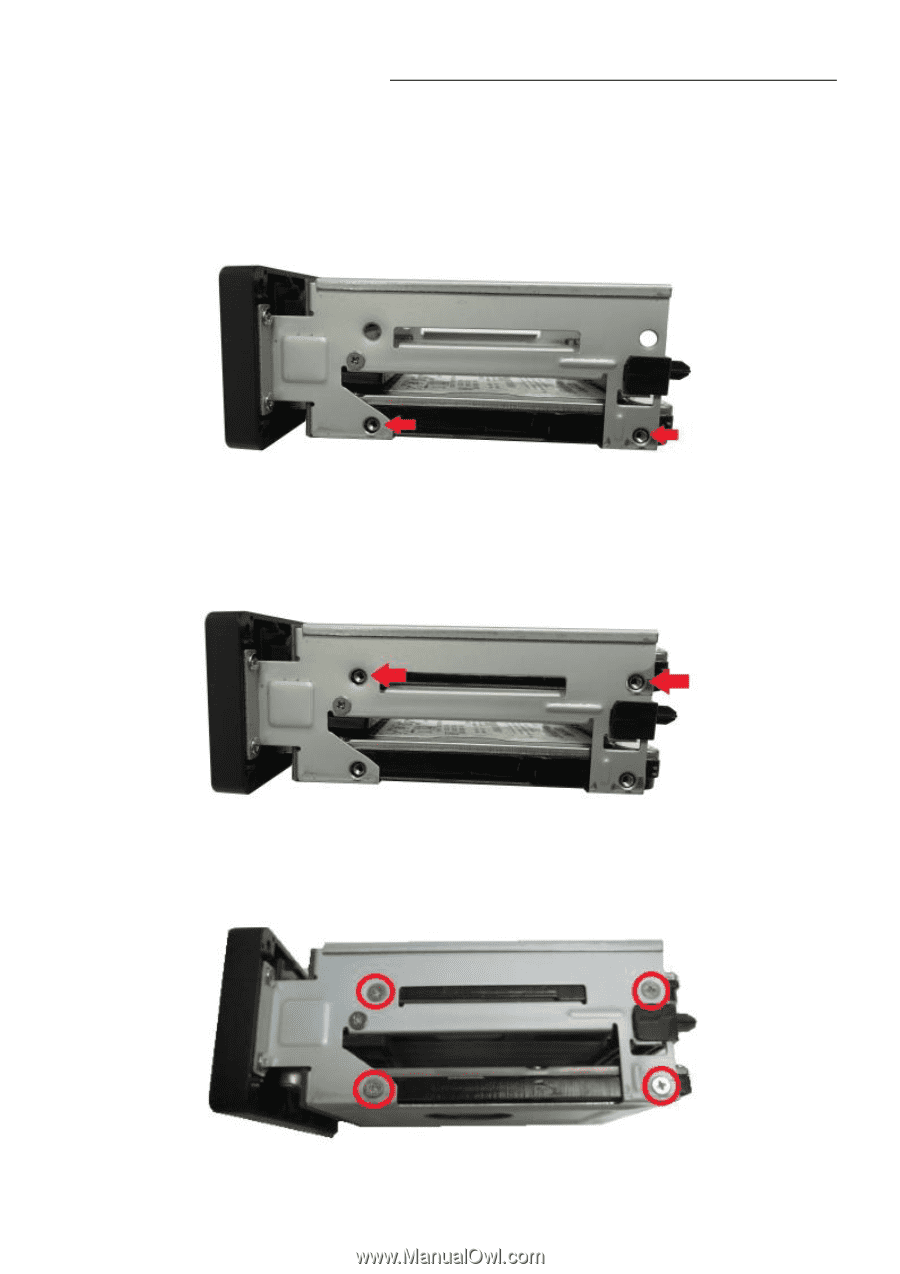
NST-225MX-S3 2.5" Dual SATA 6 Gb/s to USB 3.0 HDD/SSD RAID 3. Insert the Second (lower) HDD/SSD in to the lower bay and push all the way in for the SATA interface on the tray to make full contact with the drive interface. The screw hole on the drive should align with the tray screw hole. 4. Insert the HDD/SSD into the top bay and push horizontally for both the SATA interface on the tray and drive to be fully inserted. The screw hole on the drive should align with the tray screw hole. 5. Secure both HDD/SSD with the 4 screws on each side of the Tray. 6
-
 1
1 -
 2
2 -
 3
3 -
 4
4 -
 5
5 -
 6
6 -
 7
7 -
 8
8 -
 9
9 -
 10
10 -
 11
11 -
 12
12 -
13
-
14
-
15
-
16
-
17
-
18
-
19
-
20
-
21
-
22
-
23
-
24
-
25
-
26
 |
 |
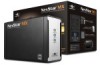
NST-225MX-S3
2
.5” Dual SATA
6 Gb/s to USB 3.0 HDD/SSD RAID
6
3.
Insert the Second (lower) HDD/SSD in to the lower bay and push all the way in for
the SATA interface on the tray to make full contact with the drive interface. The
screw hole on the drive should align with the tray screw hole.
4.
Insert the HDD/SSD into the top bay and push horizontally for both the SATA
interface on the tray and drive to be fully inserted. The screw hole on the drive
should align with the tray screw hole.
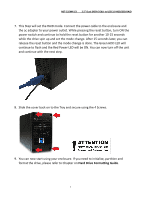
5.
Secure both HDD/SSD with the 4 screws on each side of the Tray.