ViewSonic PJD5553LWS PJD5553Lws User Guide English - Page 37
Adjusting Brilliant Color, Reducing image noise, Selecting a gamma setting
 |
View all ViewSonic PJD5553LWS manuals
Add to My Manuals
Save this manual to your list of manuals |
Page 37 highlights
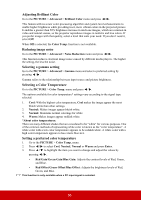
Adjusting Brilliant Color Go to the PICTURE > Advanced > Brilliant Color menu and press / . This feature utilizes a new color-processing algorithm and system level enhancements to enable higher brightness while providing truer, more vibrant colors in the projected picture. It enables a greater than 50% brightness increase in mid-tone images, which are common in video and natural scenes, so the projector reproduces images in realistic and true colors. If you prefer images with that quality, select a level that suits your need. If you don't need it, select Off. When Off is selected, the Color Temp. function is not available. Reducing image noise Go to the PICTURE > Advanced > Noise Reduction menu and press / . This function reduces electrical image noise caused by different media players. The higher the setting, the less the noise. Selecting a gamma setting Go to the PICTURE > Advanced > Gamma menu and select a preferred setting by pressing / . Gamma refers to the relationship between input source and picture brightness. Selecting a Color Temperature Go to the PICTURE > Color Temp. menu and press / . The options available for color temperature* settings vary according to the signal type selected. 1. Cool: With the highest color temperature, Cool makes the image appear the most bluish white than other settings. 2. Neutral: Makes images appear bluish white. 3. Normal: Maintains normal colorings for white. 4. Warm: Makes images appear reddish white. *About color temperatures: There are many different shades that are considered to be "white" for various purposes. One of the common methods of representing white color is known as the "color temperature". A white color with a low color temperature appears to be reddish white. A white color with a high color temperature appears to have more blue in it. Setting a preferred color temperature 1. Go to the PICTURE > Color Temp. menu. 2. Press / to select Cool, Neutral, Normal or Warm and press Enter. 3. Press / to highlight the item you want to change and adjust the values by pressing / . • Red Gain/Green Gain/Blue Gain: Adjusts the contrast levels of Red, Green, and Blue. • Red Offset/Green Offset/Blue Offset: Adjusts the brightness levels of Red, Green, and Blue. This function is only available when a PC input signal is selected. 30
-
 1
1 -
2
-
3
-
4
-
5
-
6
-
7
-
8
-
9
-
10
-
11
-
12
-
13
-
14
-
15
-
16
-
17
-
18
-
19
-
20
-
21
-
22
-
23
-
24
-
25
-
26
-
27
-
28
-
29
-
30
-
31
-
 32
32 -
 33
33 -
 34
34 -
 35
35 -
 36
36 -
 37
37 -
 38
38 -
 39
39 -
 40
40 -
 41
41 -
 42
42 -
43
-
44
-
45
-
46
-
47
-
48
-
49
-
50
-
51
-
52
-
53
-
54
-
55
-
56
-
57
-
58
-
59
-
60
-
61
-
62
-
63
-
64
-
65
-
66
-
67
-
68
-
69
-
70
-
71
-
72
-
73
-
74
-
75
-
76
-
77
-
78
-
79
-
80
-
81
-
82
-
83
-
84
 |
 |