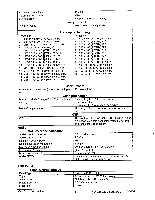
ViewSonic VX500 Service Manual - Page 14
Controls, Control, Explanation
 |
View all ViewSonic VX500 manuals
Add to My Manuals
Save this manual to your list of manuals |
Page 14 highlights
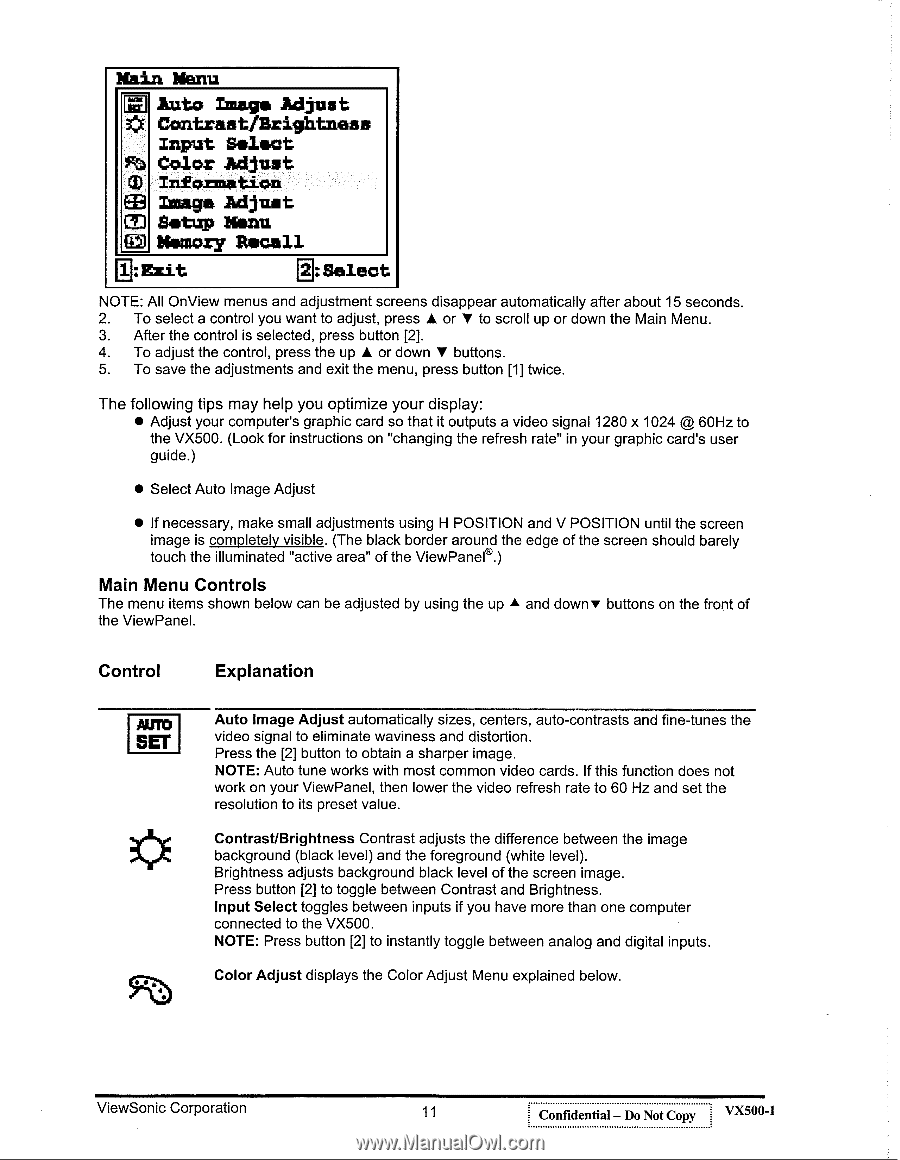
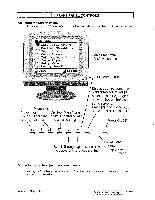
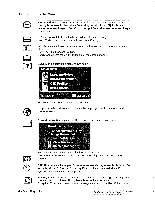
Main Menu Fi Auto Liege Adjust tE Contrast/Brightness Input Select fti Color Adjust T Infozmation ED Image Adjust CD Setup Menu LEO Memory Recall 1:Ezit 6:Select NOTE: All OnView menus and adjustment screens disappear automatically after about 15 seconds. 2. To select a control you want to adjust, press ♦ or ♦ to scroll up or down the Main Menu. 3. After the control is selected, press button [2]. 4. To adjust the control, press the up ♦ or down ♦ buttons. 5. To save the adjustments and exit the menu, press button [1] twice. The following tips may help you optimize your display: • Adjust your computer's graphic card so that it outputs a video signal 1280 x 1024 @ 60Hz to the VX500. (Look for instructions on "changing the refresh rate" in your graphic card's user guide.) • Select Auto Image Adjust • If necessary, make small adjustments using H POSITION and V POSITION until the screen image is completely visible. (The black border around the edge of the screen should barely touch the illuminated "active area" of the ViewPanel®.) Main Menu Controls The menu items shown below can be adjusted by using the up A and downy buttons on the front of the ViewPanel. Control Explanation AUTO SET Auto Image Adjust automatically sizes, centers, auto-contrasts and fine-tunes the video signal to eliminate waviness and distortion. Press the [2] button to obtain a sharper image. NOTE: Auto tune works with most common video cards. If this function does not work on your ViewPanel, then lower the video refresh rate to 60 Hz and set the resolution to its preset value. Contrast/Brightness Contrast adjusts the difference between the image background (black level) and the foreground (white level). Brightness adjusts background black level of the screen image. Press button [2] to toggle between Contrast and Brightness. Input Select toggles between inputs if you have more than one computer connected to the VX500. NOTE: Press button [2] to instantly toggle between analog and digital inputs. Color Adjust displays the Color Adjust Menu explained below. ViewSonic Corporation 11 Confidential - Do Not Copy VX500-1
-
 1
1 -
2
-
3
-
4
-
5
-
6
-
7
-
8
-
 9
9 -
 10
10 -
 11
11 -
 12
12 -
 13
13 -
 14
14 -
 15
15 -
 16
16 -
 17
17 -
 18
18 -
 19
19 -
20
-
21
-
22
-
23
-
24
-
25
-
26
-
27
-
28
-
29
-
30
-
31
-
32
-
33
-
34
-
35
-
36
-
37
-
38
-
39
-
40
-
41
-
42
-
43
-
44
-
45
-
46
-
47
-
48
-
49
 |
 |